
Introduction
This step-by-step guide takes you through how to set up your new tenant on our system. The entire process from end to end will include 6 stages:
1. Send tenant invitation
2. Approve the tenant’s application Questionnaire response
3. Initiate background check
4. Approve background check
5. Initiate tenancy agreement
6. Submit tenancy agreement
Let’s get started!
1. Send Tenant Invitation
The process of onboarding new tenants starts with sending them an invitation to join the HomeTrumpeter system via email. There are two ways to send an invitation: you could go through the properties tab, which is the easier and more direct option, or go through the tenants tab on your dashboard.
On the properties page, you can click on the add tenants icon as shown in the image below.
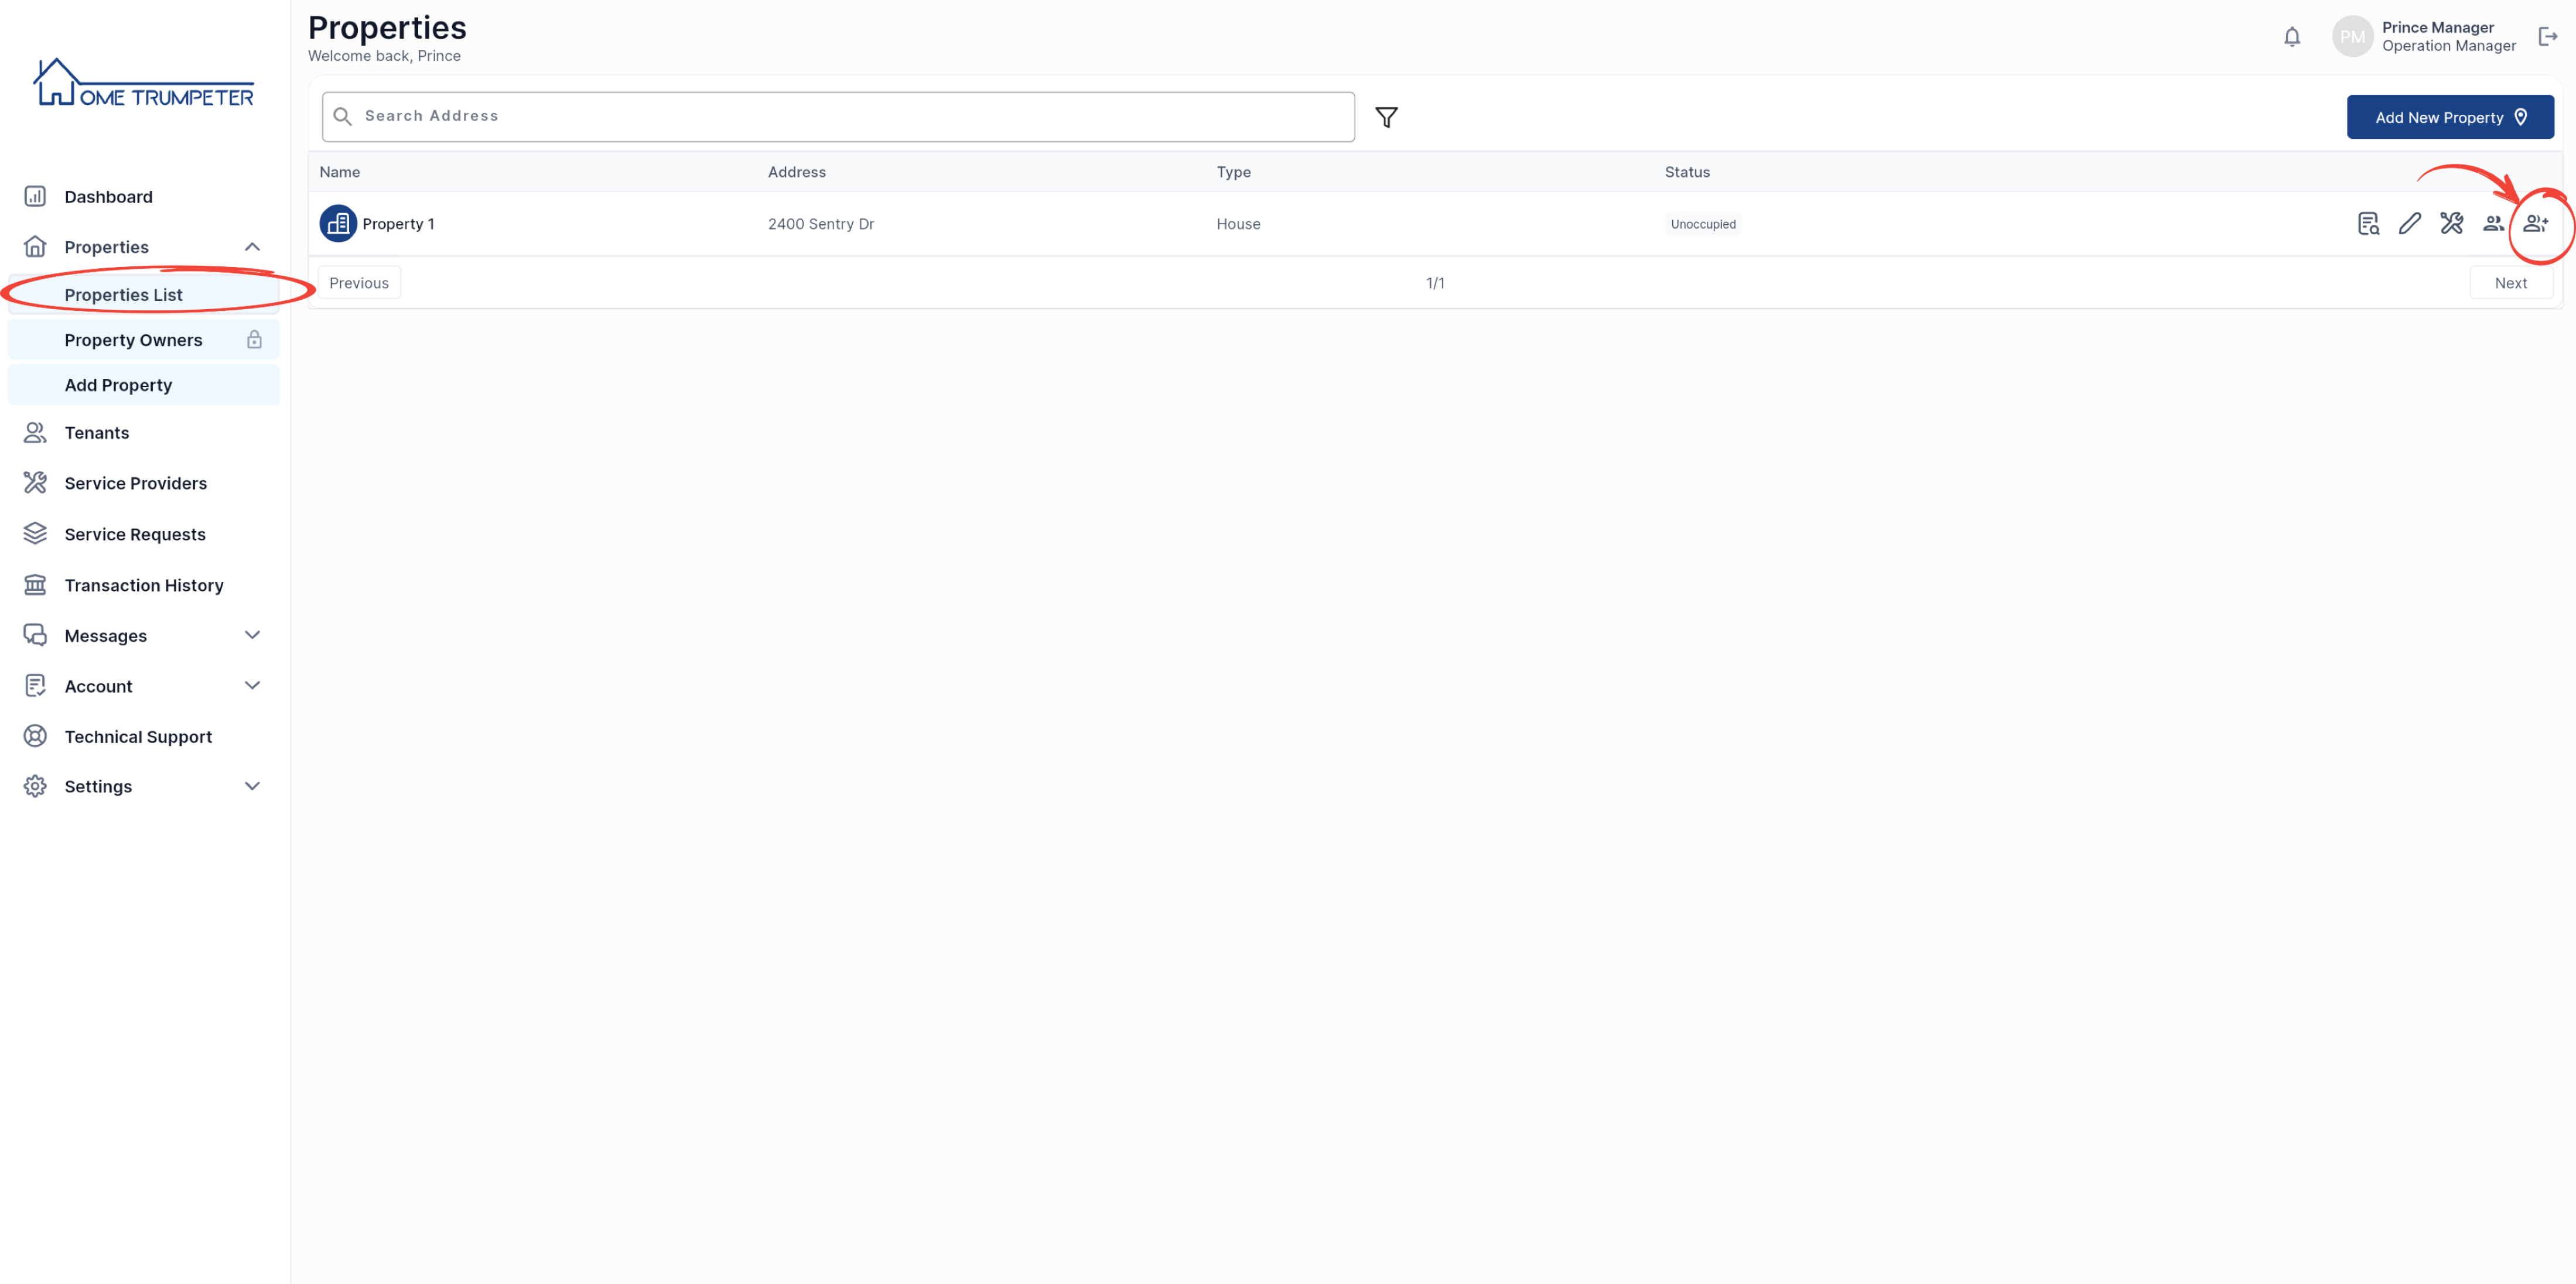
Fill out the tenant’s details and click on the ‘Add’ button.

You should get a pop-up confirmation message indicating that the invitation has been sent successfully.

You should see a confirmation of a successfully sent invitation on the properties page.

Alternatively, you could navigate to your tenants’ tab and click on the ‘Invite Tenant’ button on the top right corner of your screen.

Next, you will be asked to choose how to enter your tenant’s information. You can choose the manual option (entering one tenant at a time) or upload a spreadsheet with all your tenants’ information.

You will then be asked to select the property to which your new tenant will be added. Click here to see how to add a new property.
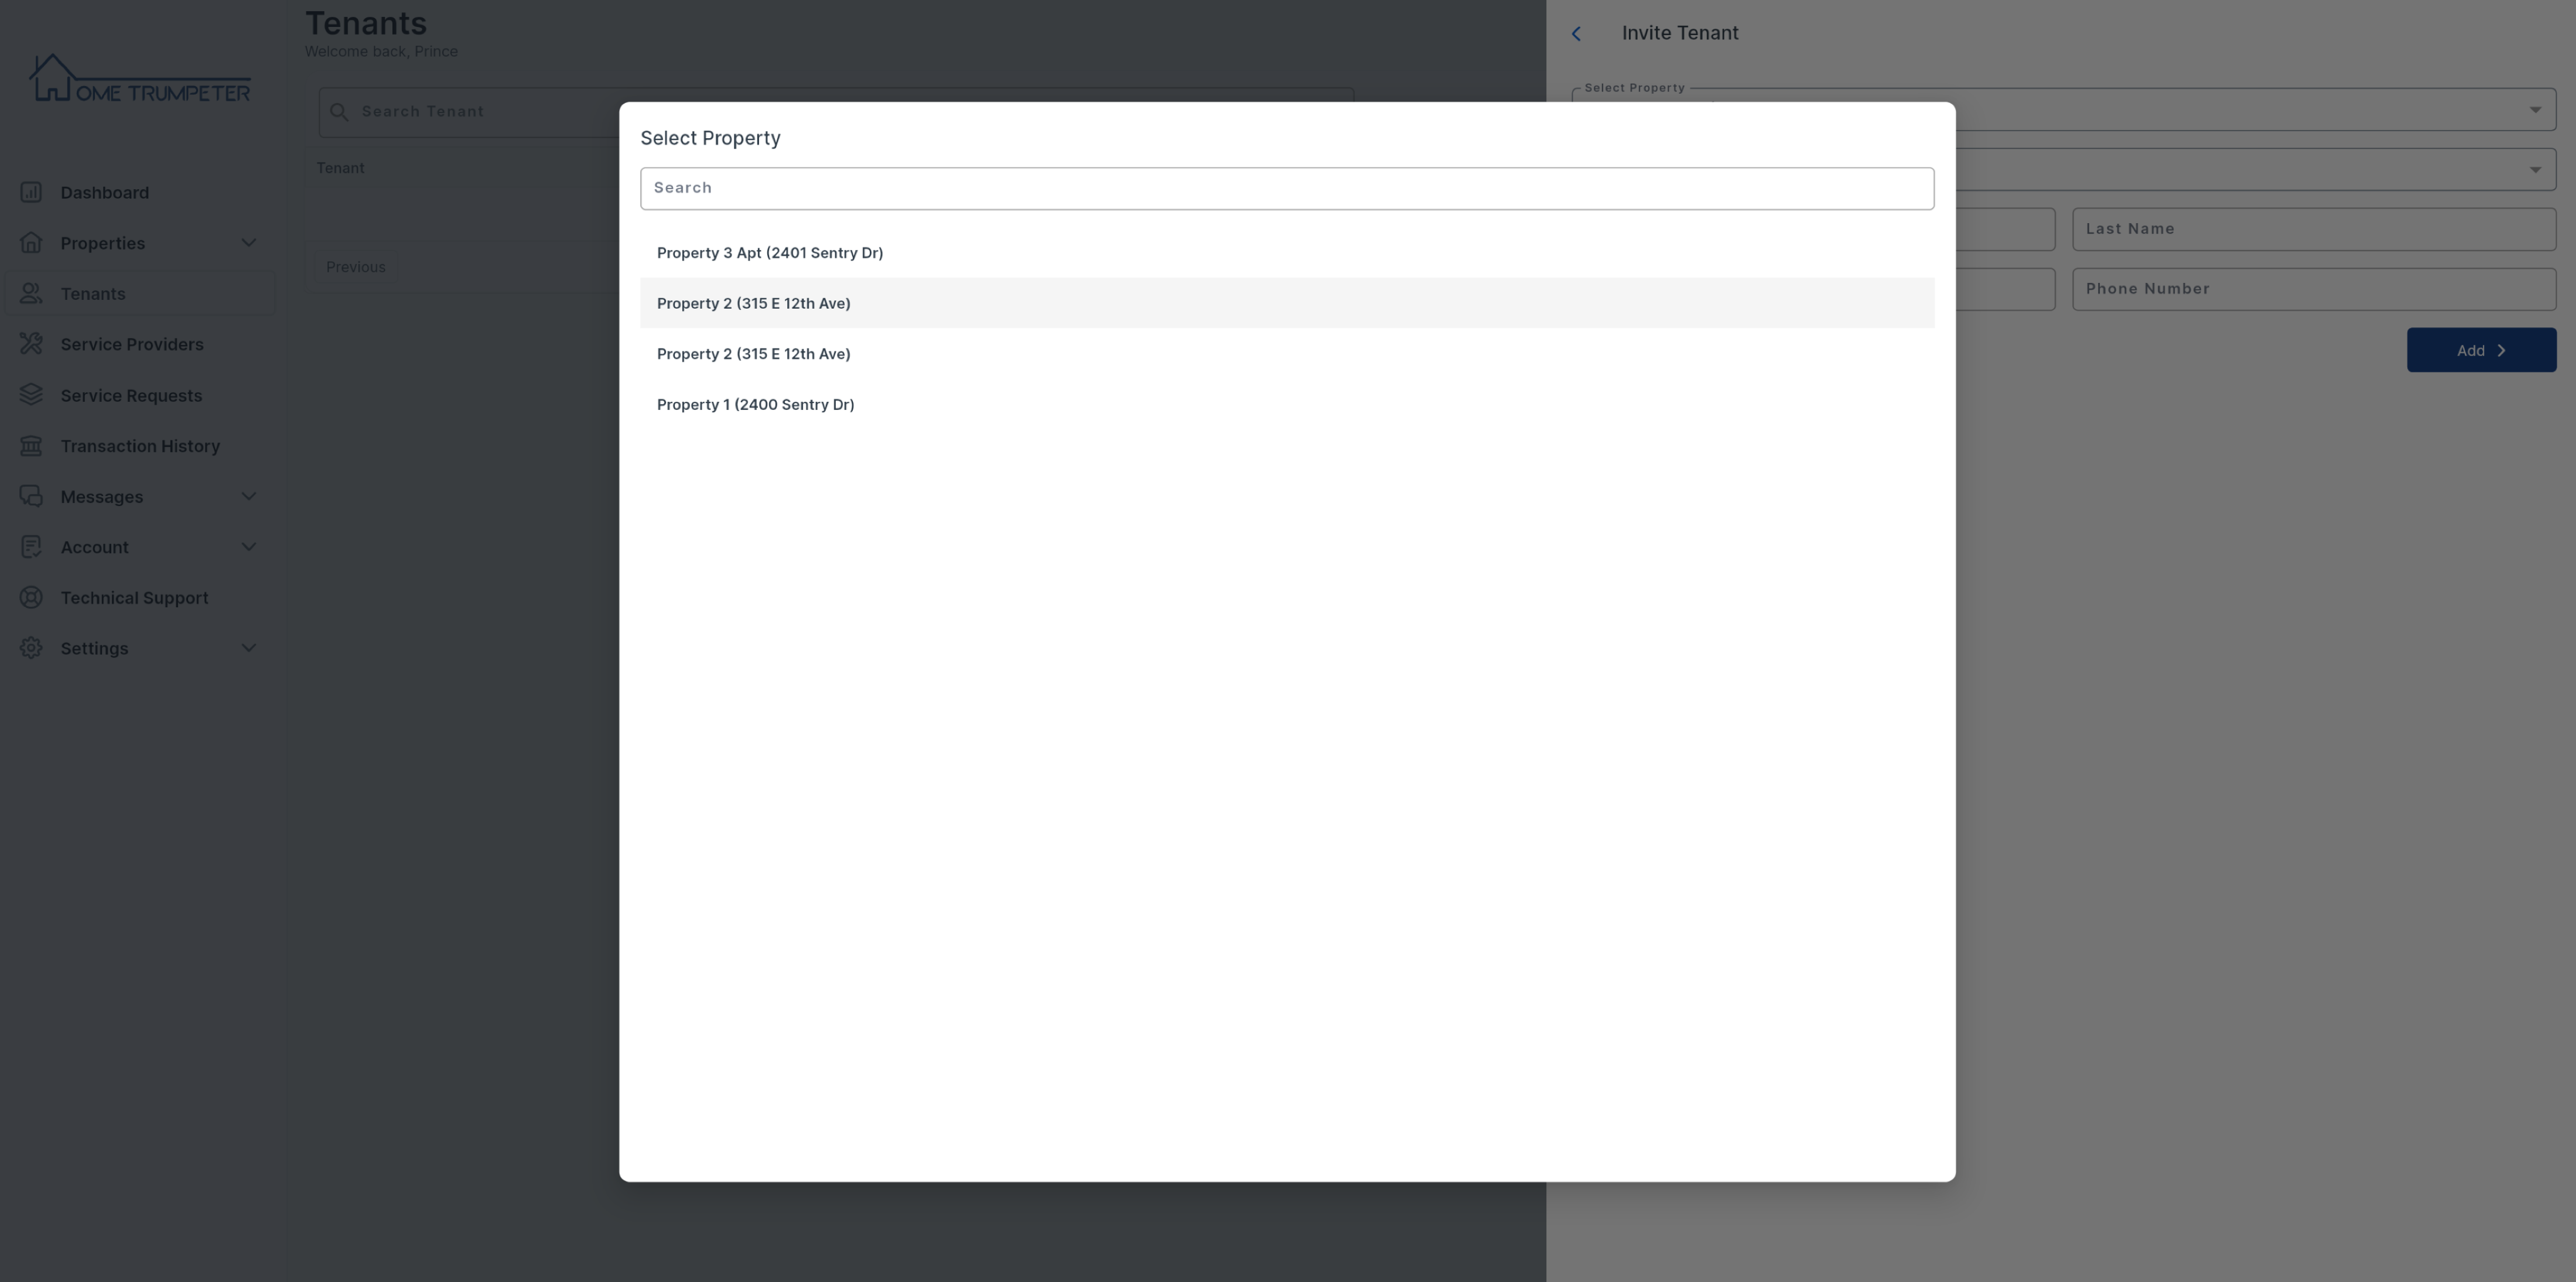
You can then enter the other tenant’s details, followed by clicking on the ‘Add’ button to send an invitation.
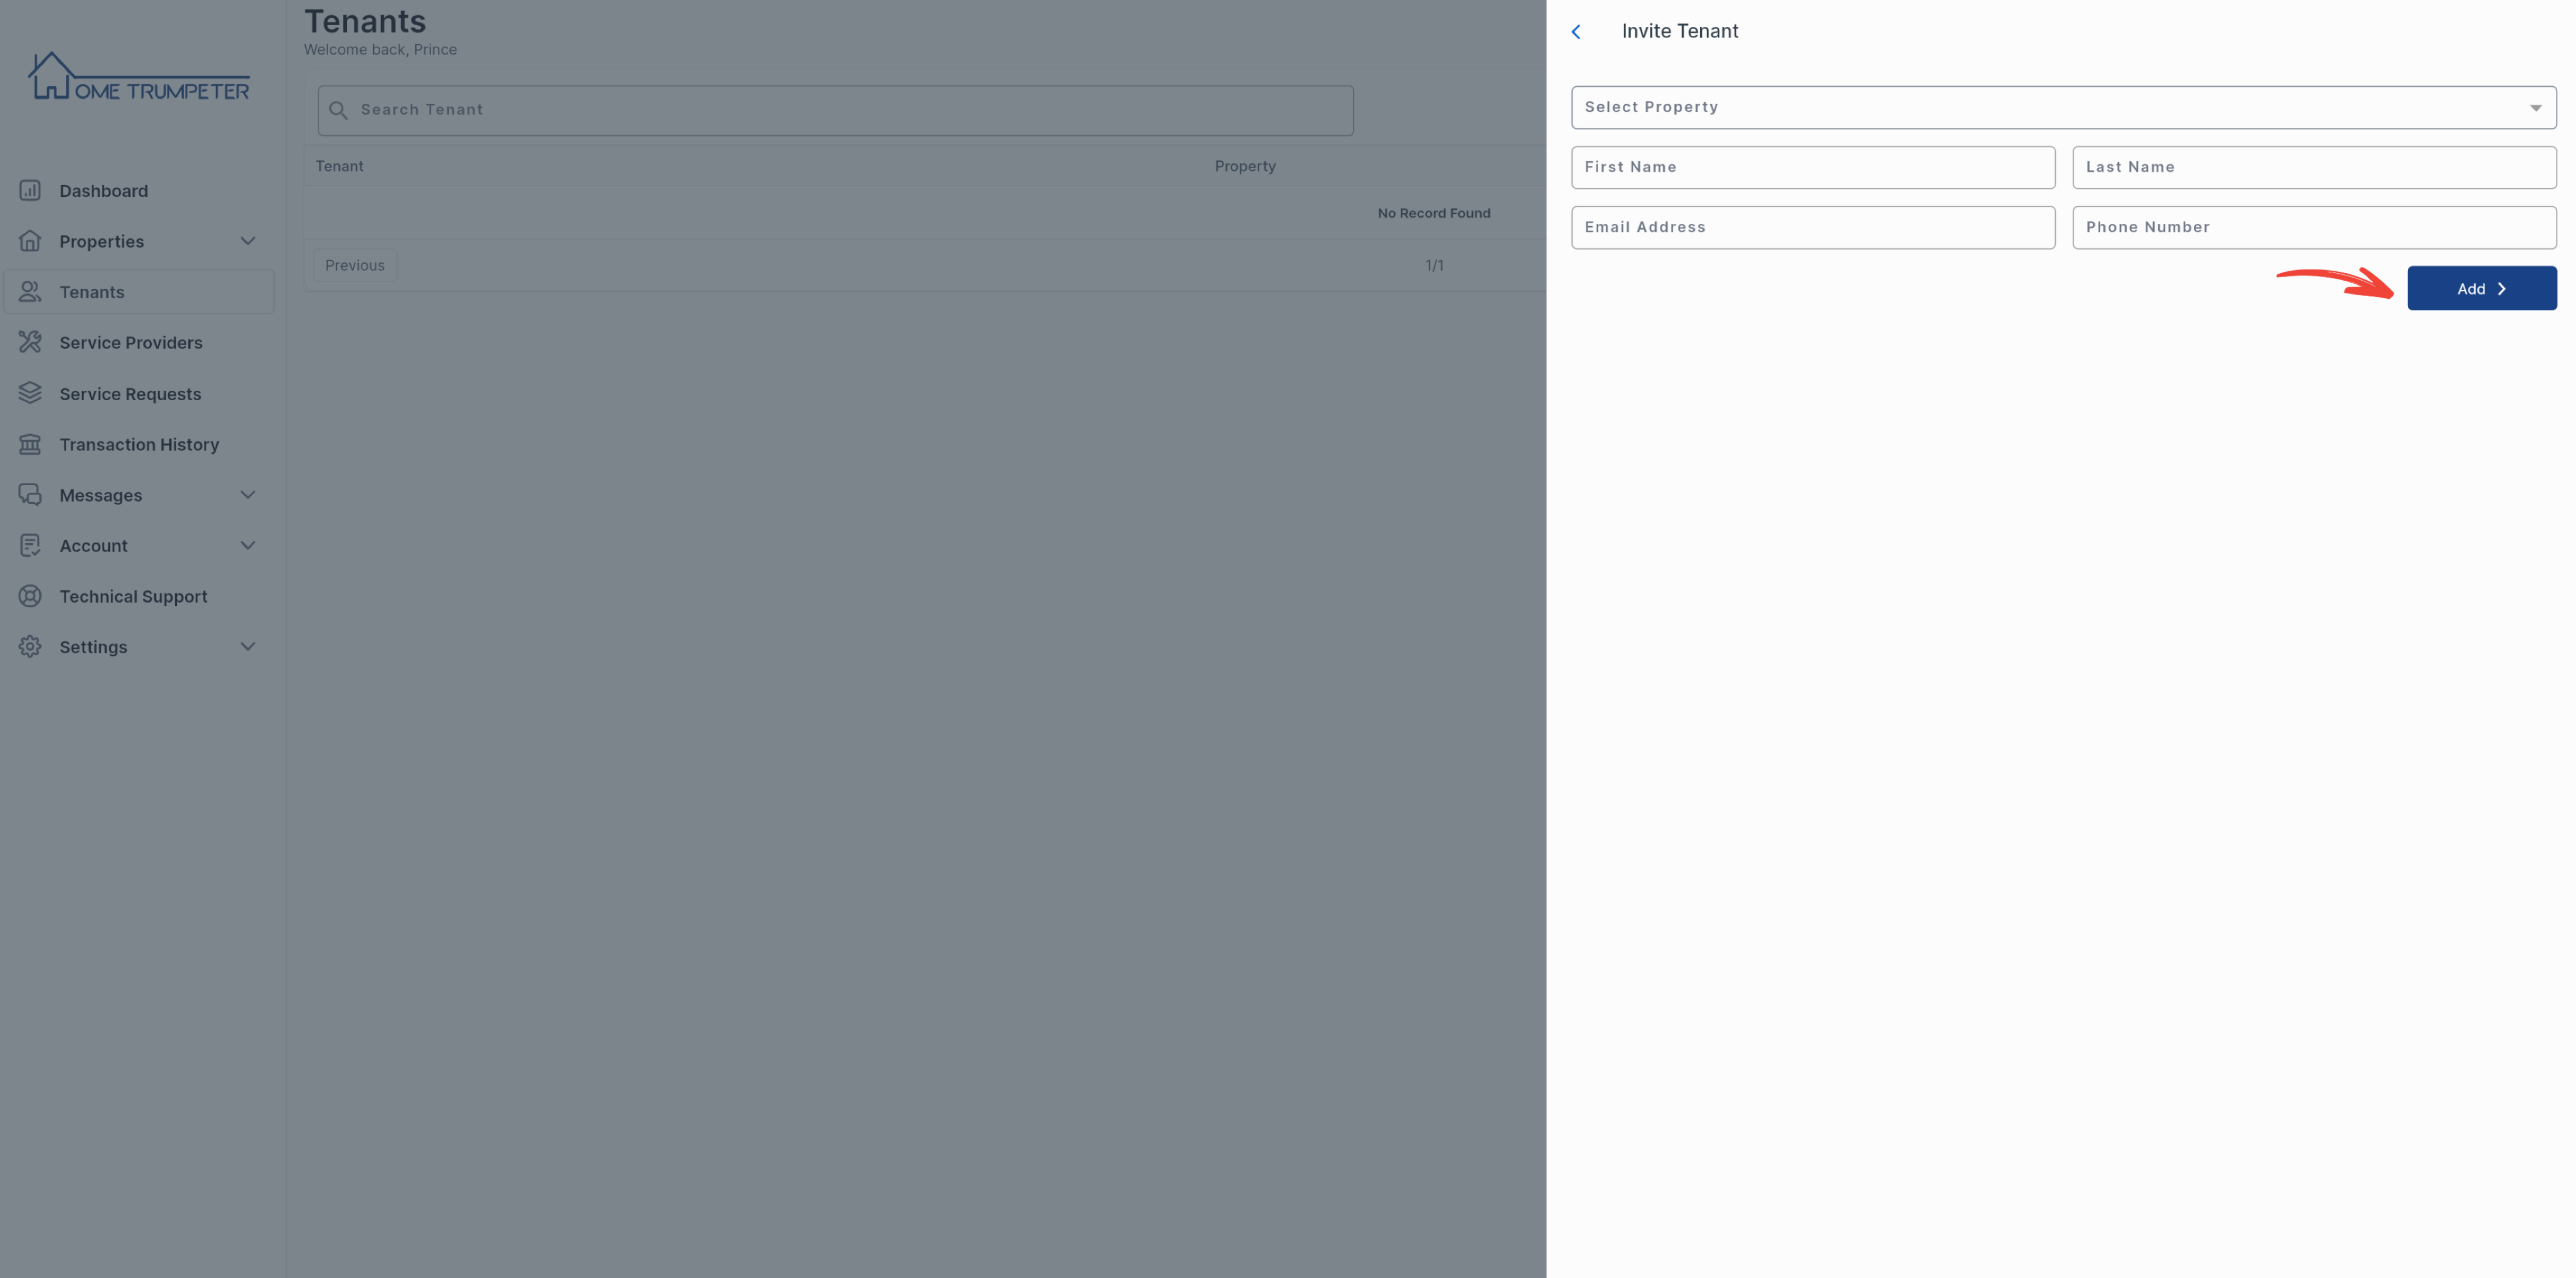
You will then get a pop-up notification that the invitation has been sent.

You will also see a record of the sent invitation on your tenants’ page.
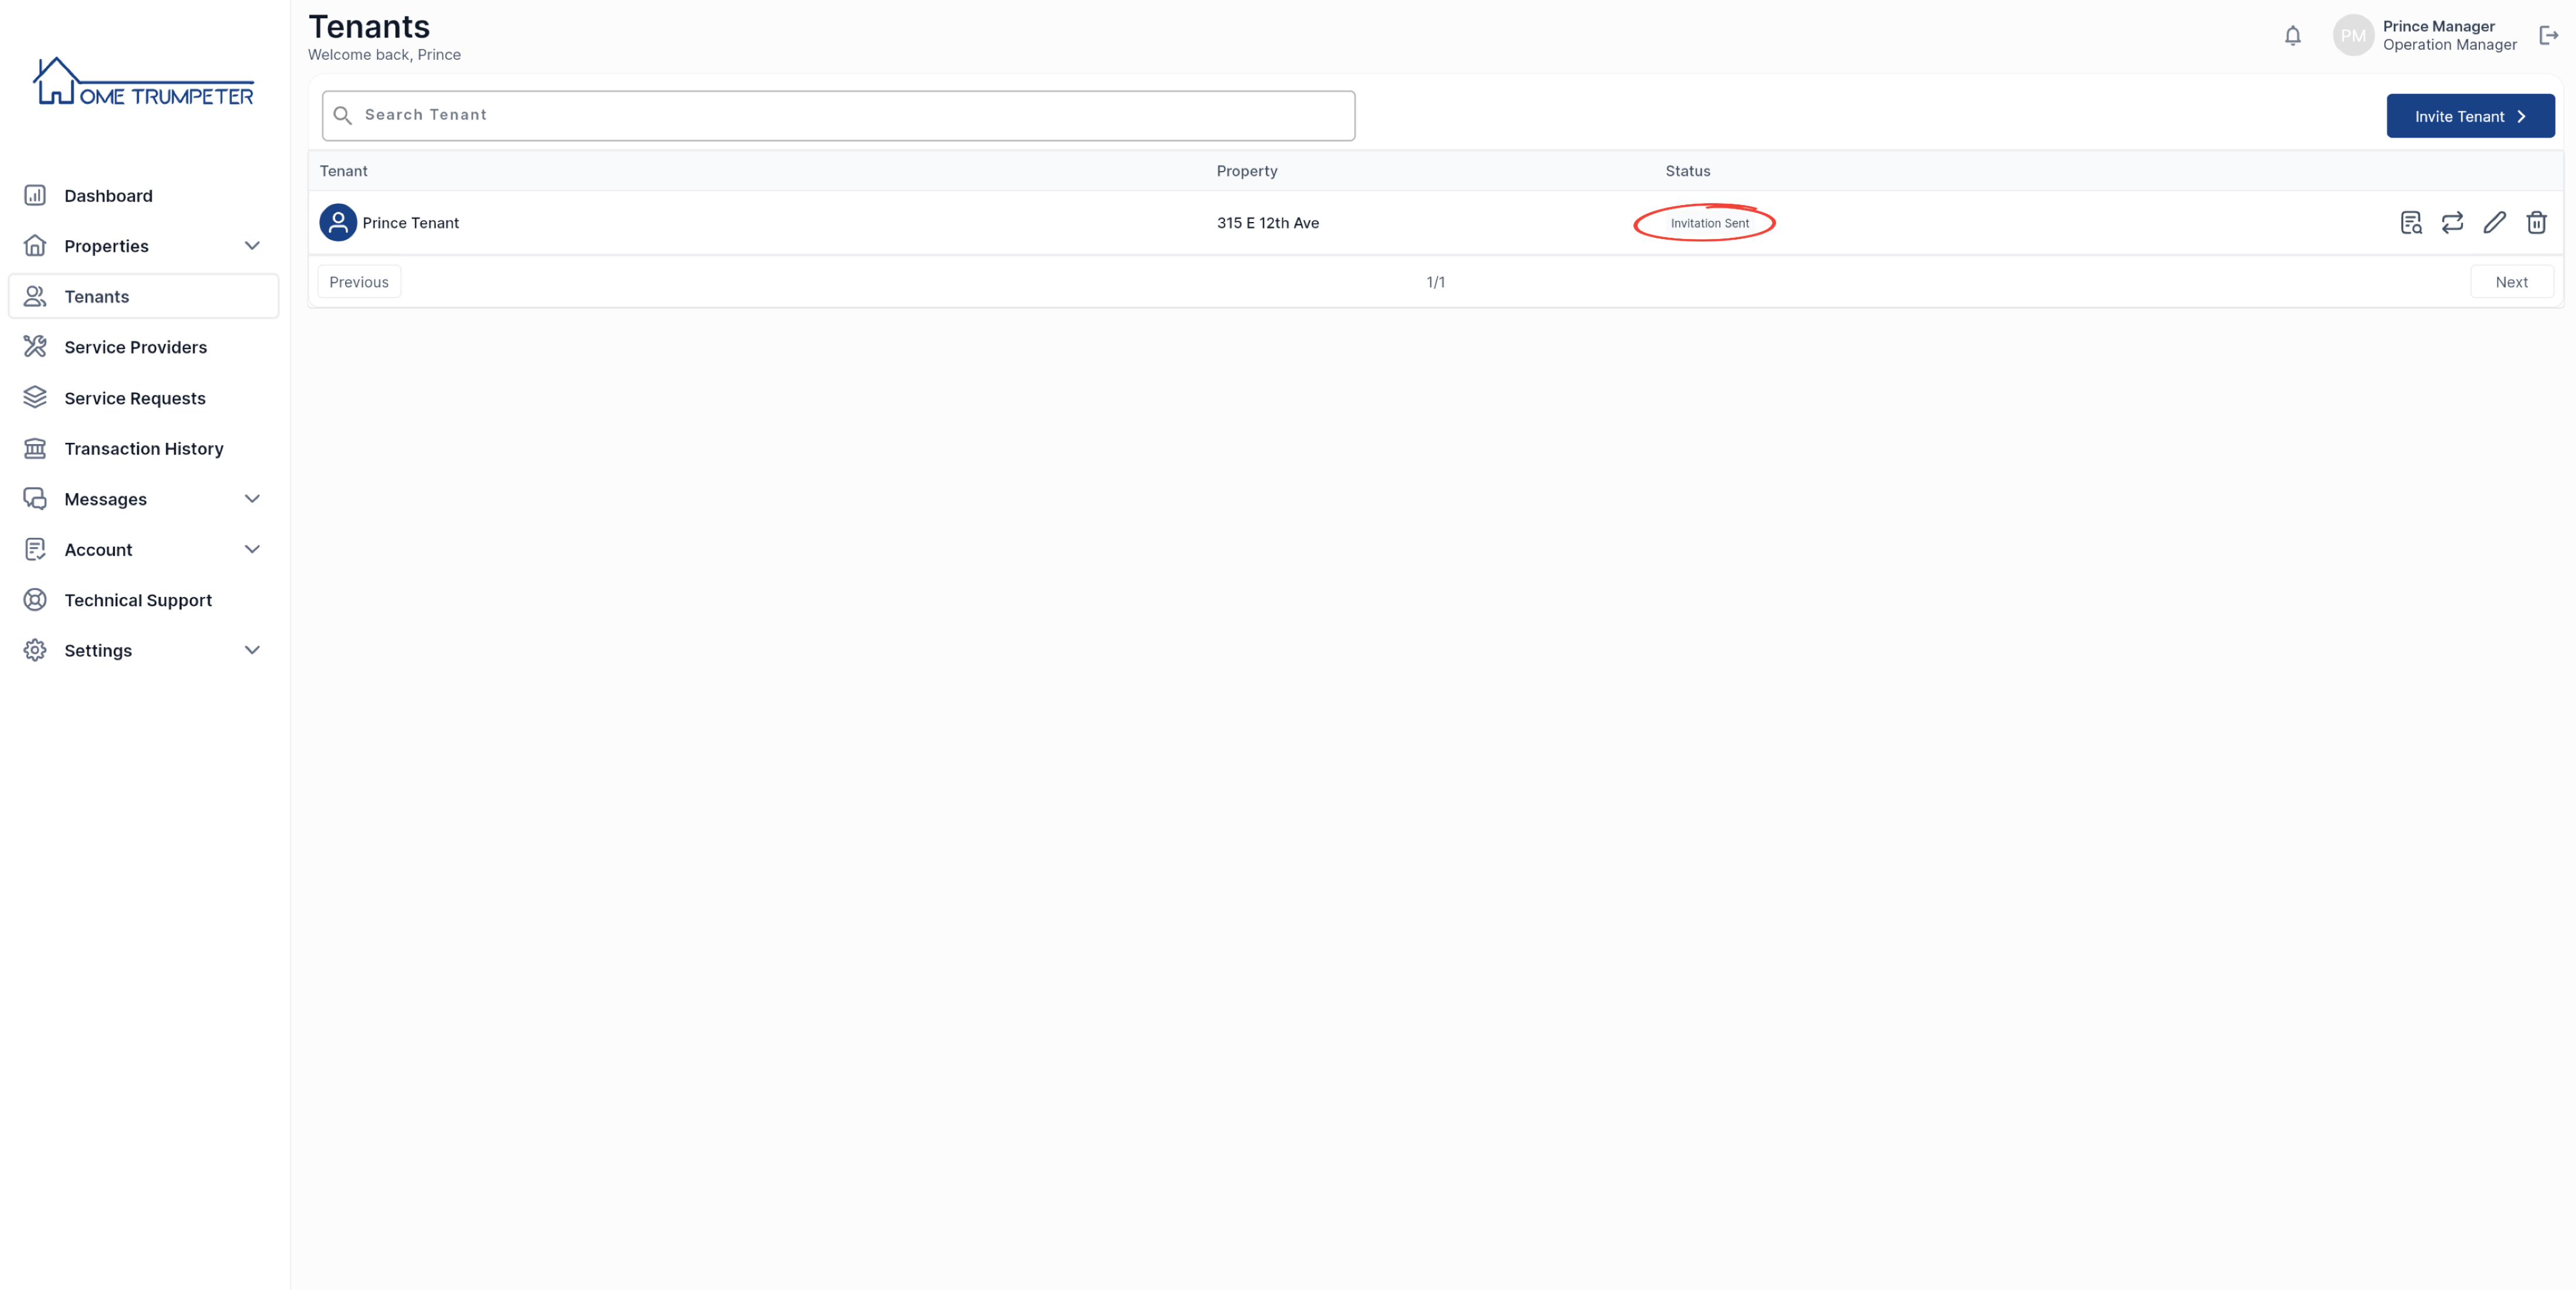
2. Approve Tenant’s Application Questionnaire Response
You will get a notification on your dashboard once your tenant accepts the invitation and completes the onboarding questionnaire. You can view their responses by navigating to the tenants’ tab, and clicking on the icon as shown below.
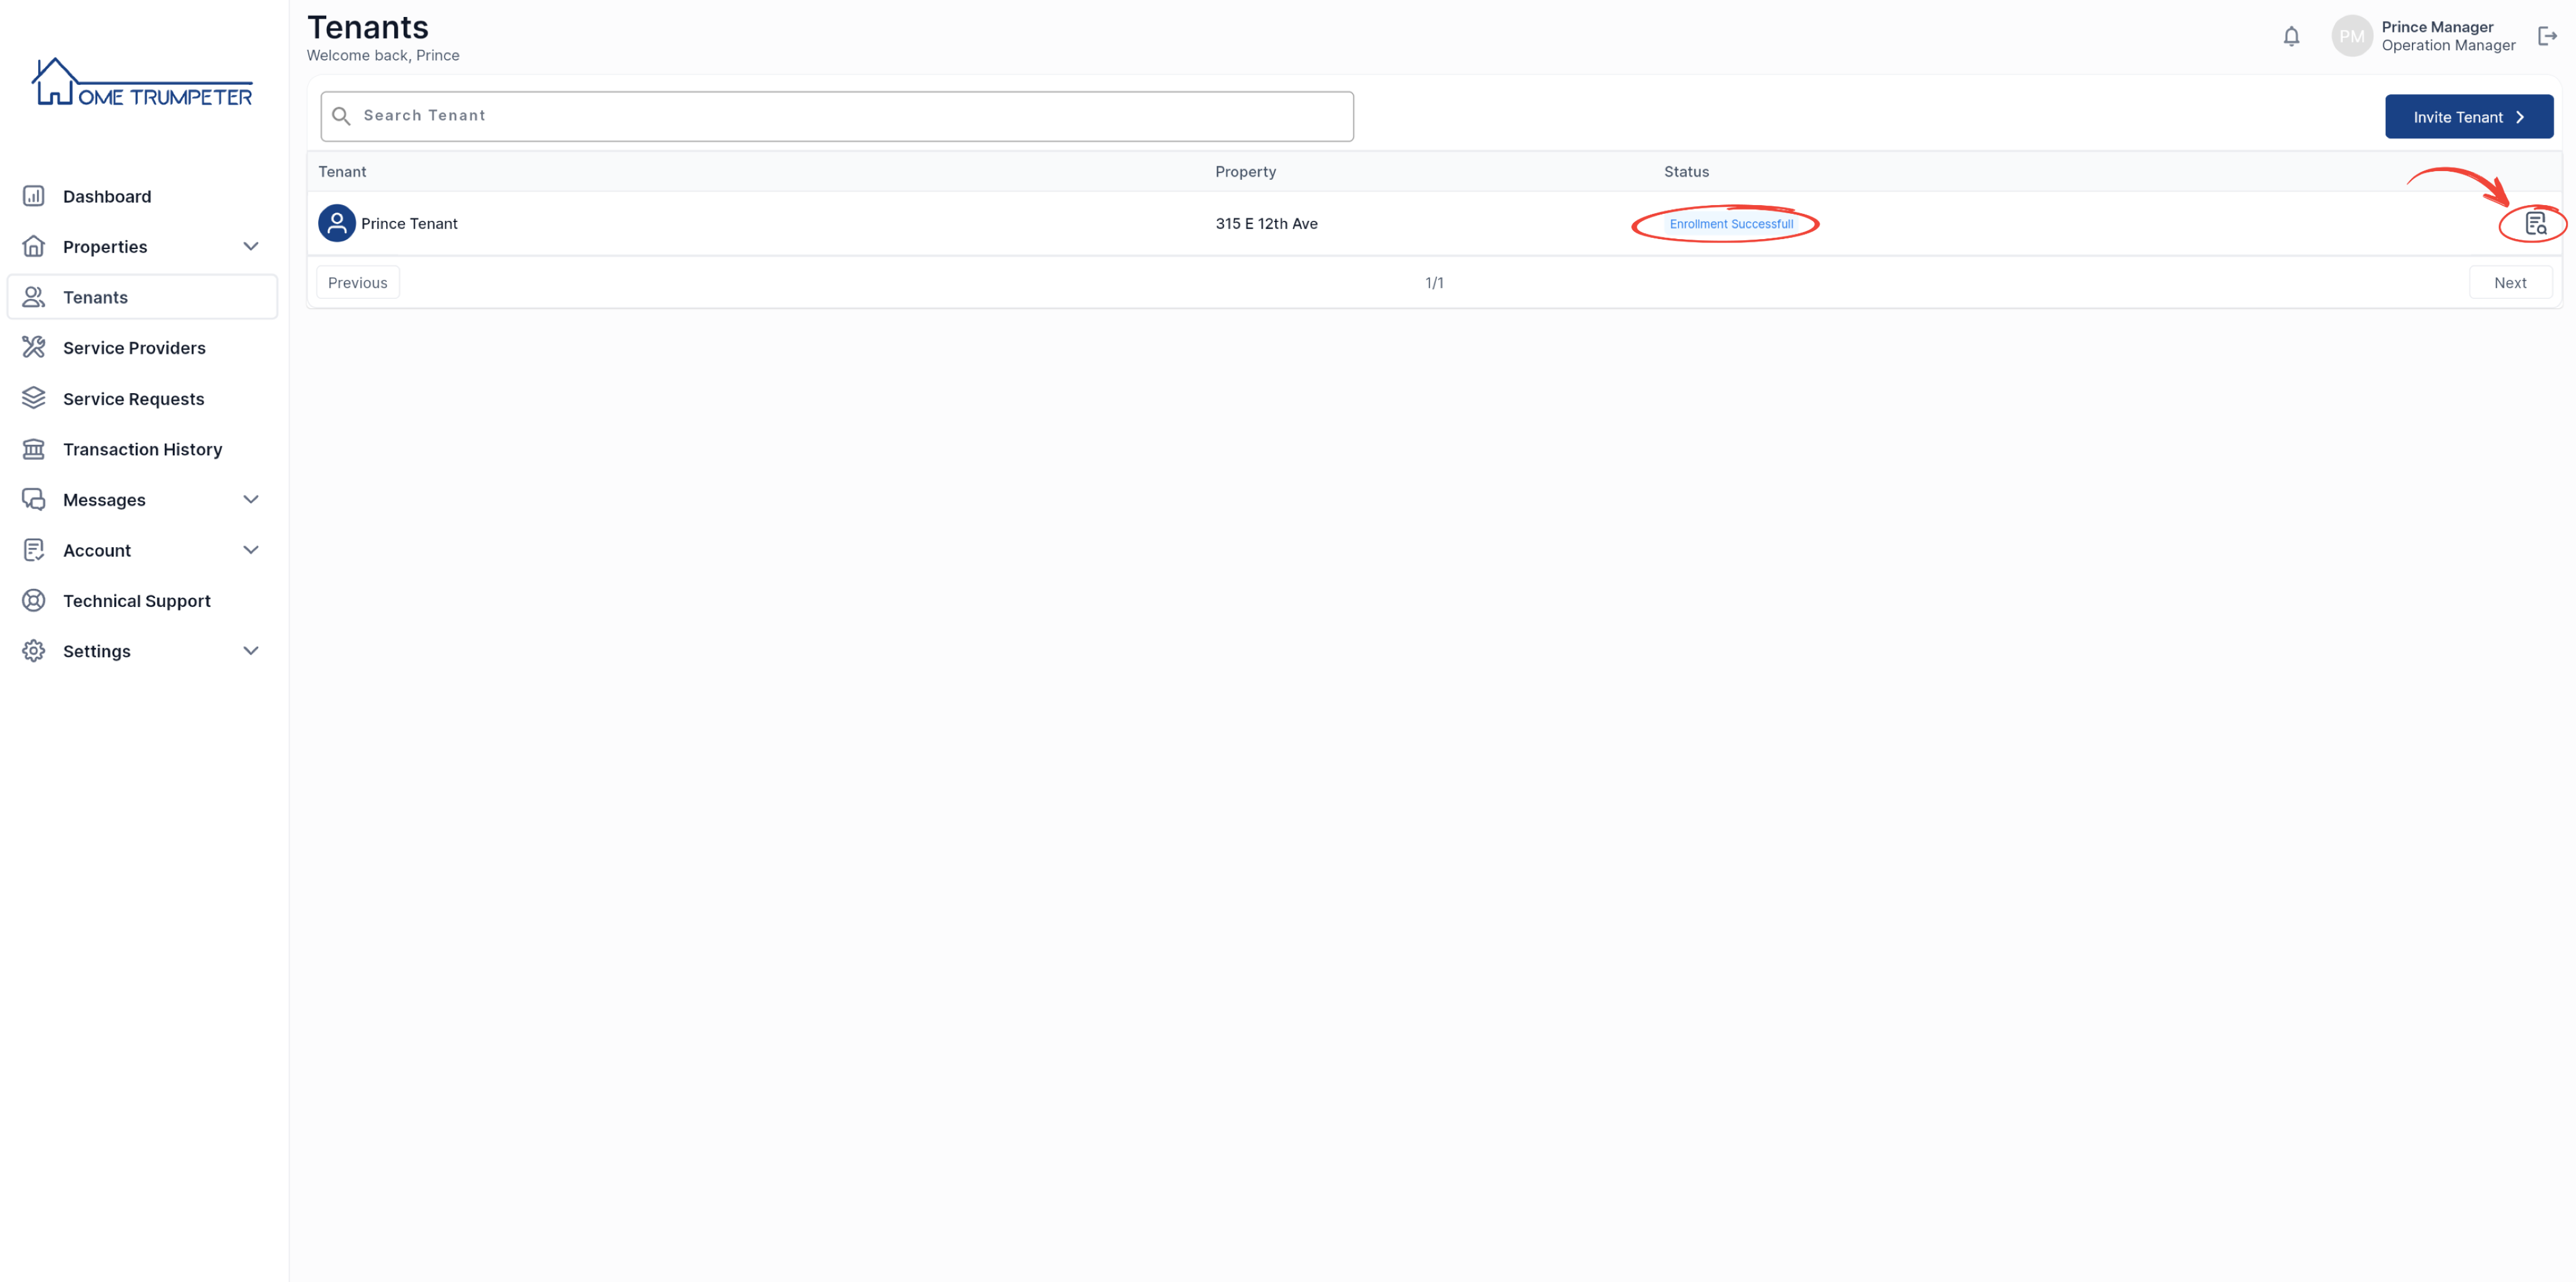
Clicking on the icon will open the slide menu on which you can click on the down arrow to view the questionnaire responses.
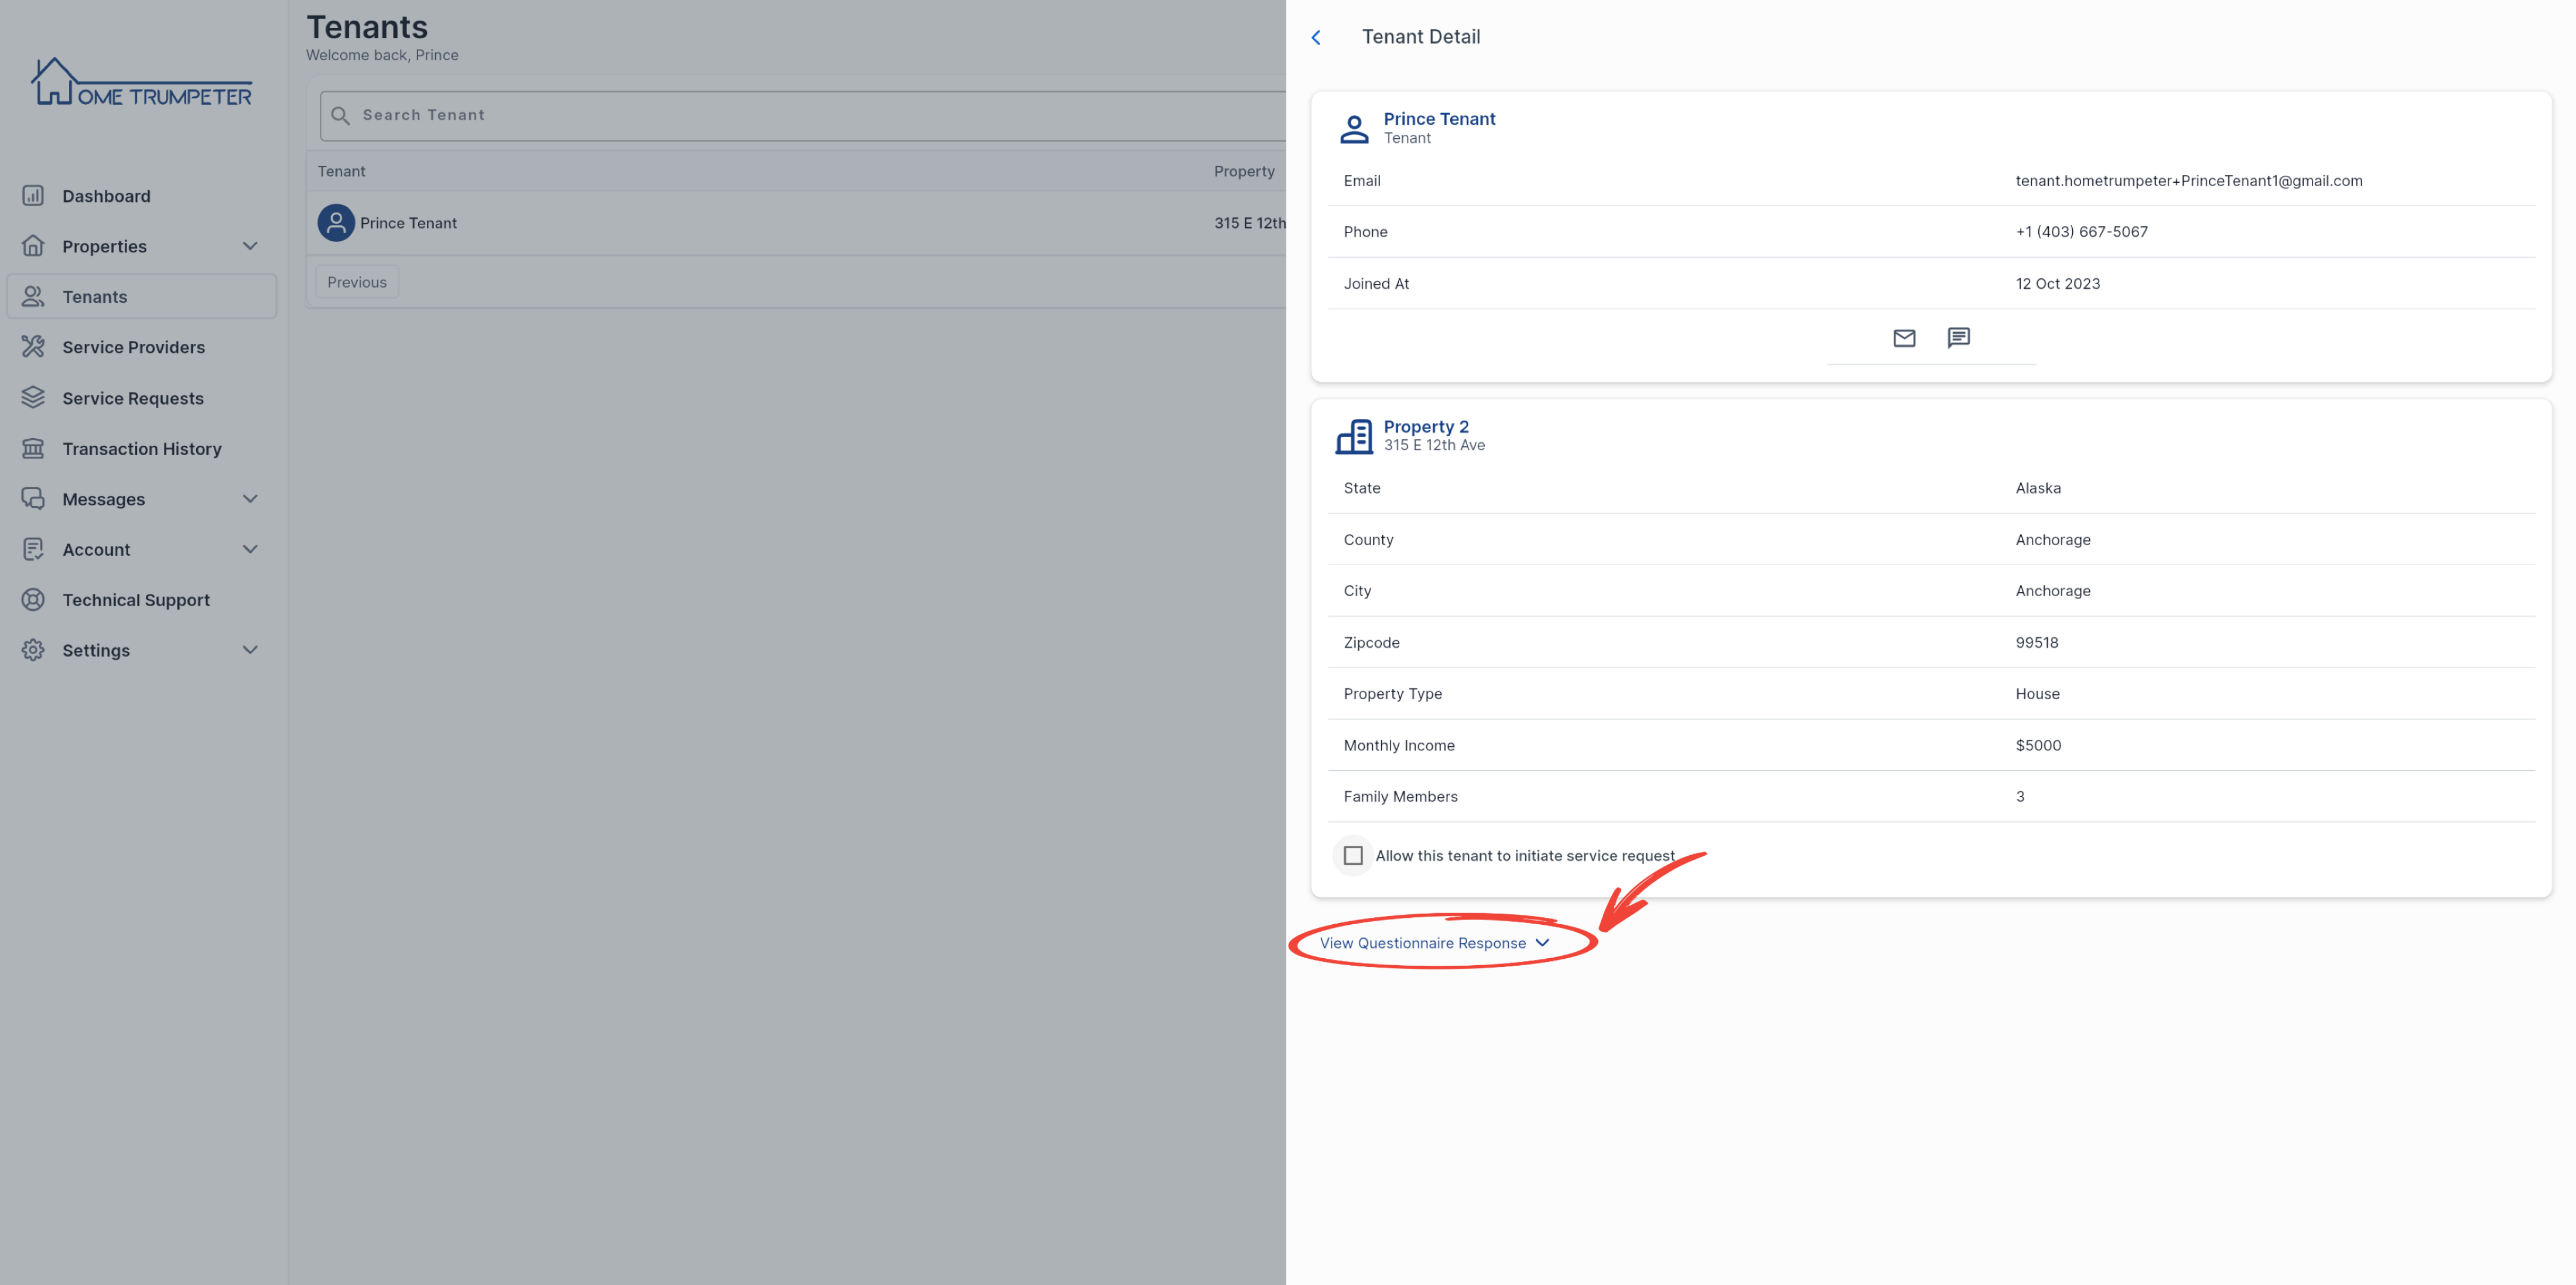
Depending on whether the tenant’s information aligns with your requirements or not,, you can ‘Approve’ or ‘Decline’ the tenant’s application.
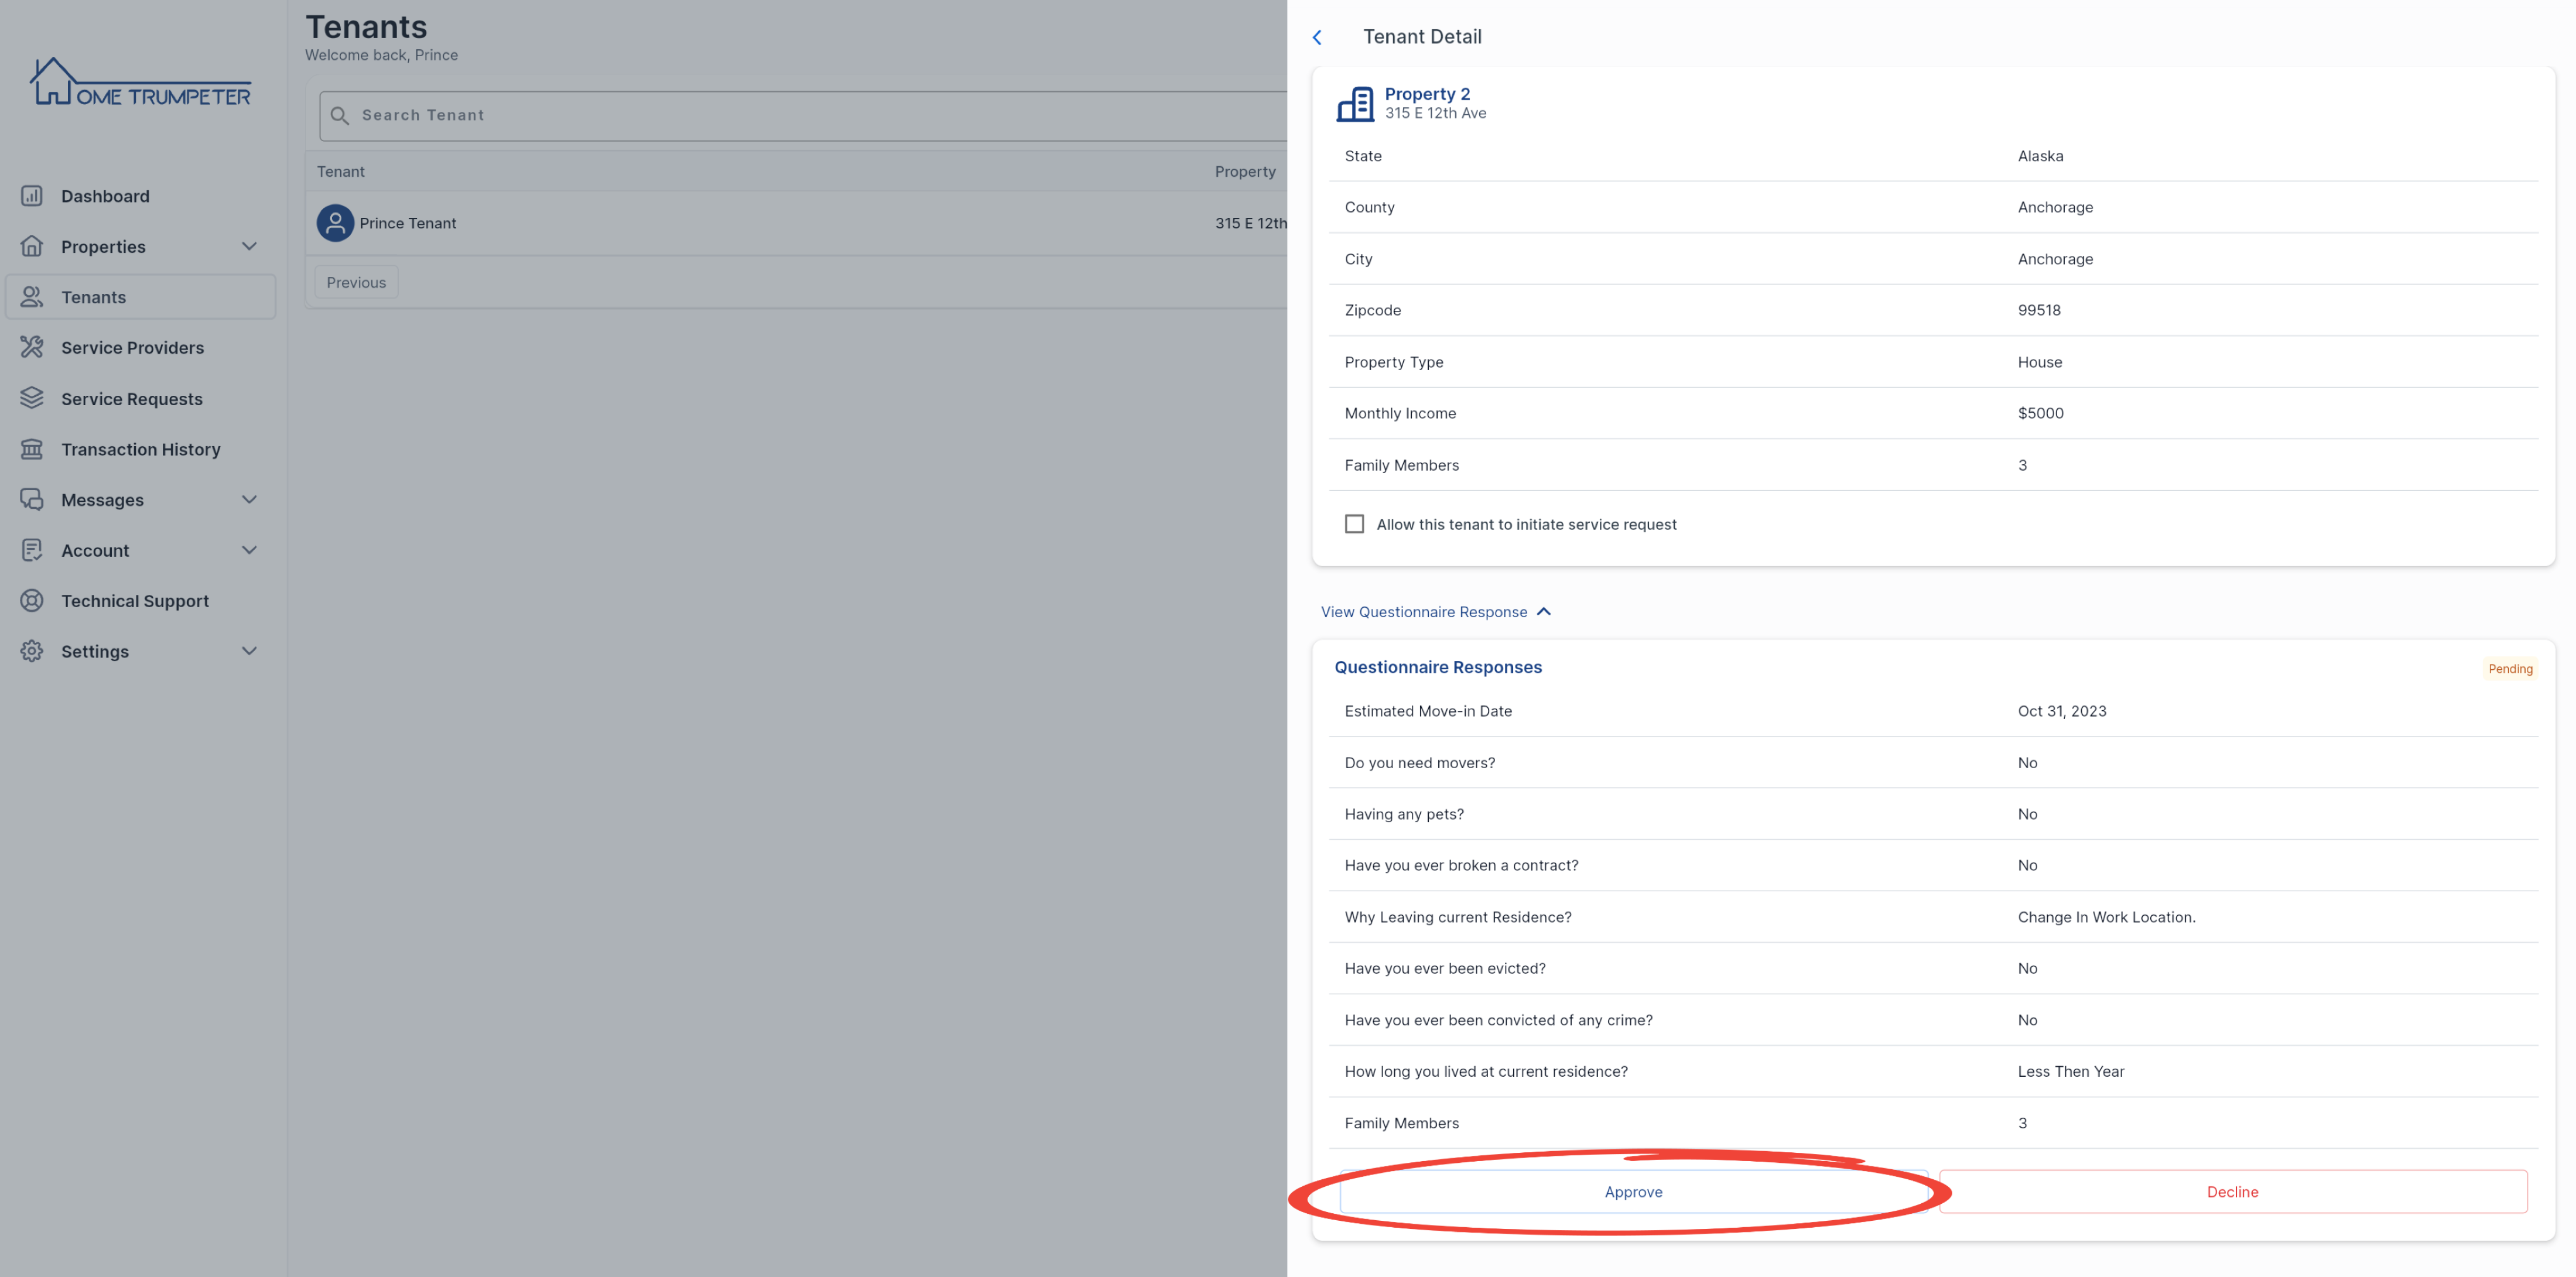
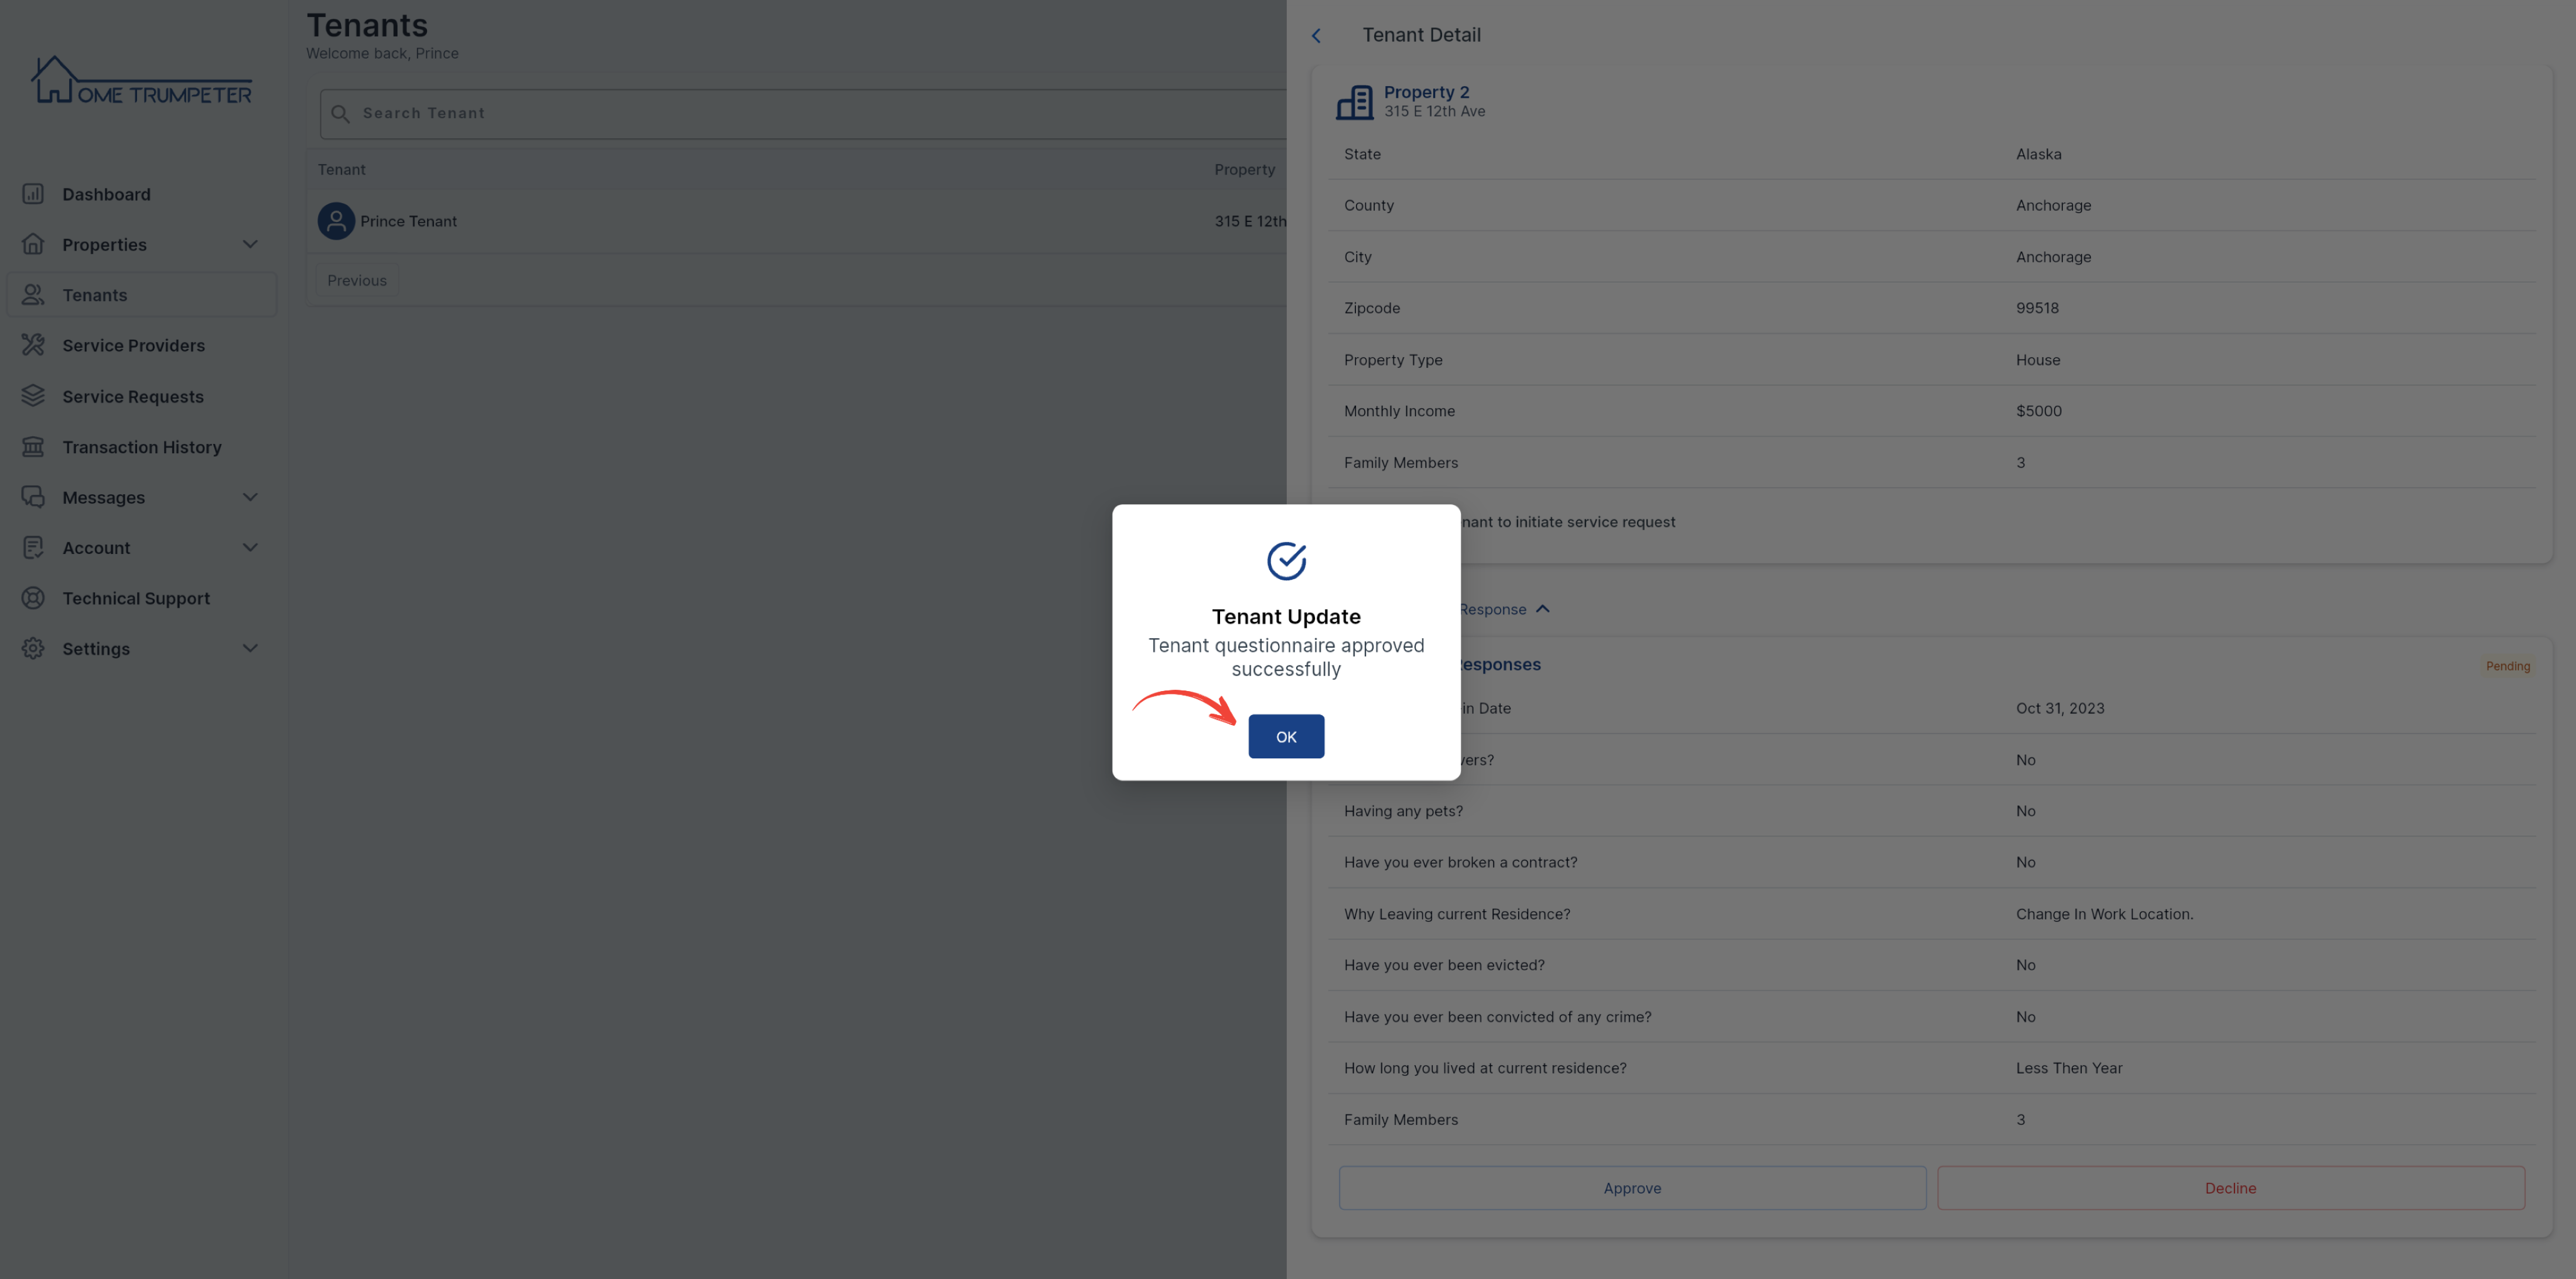
You will confirm your approval by clicking on ‘OK’ on the pop-up confirmation message.
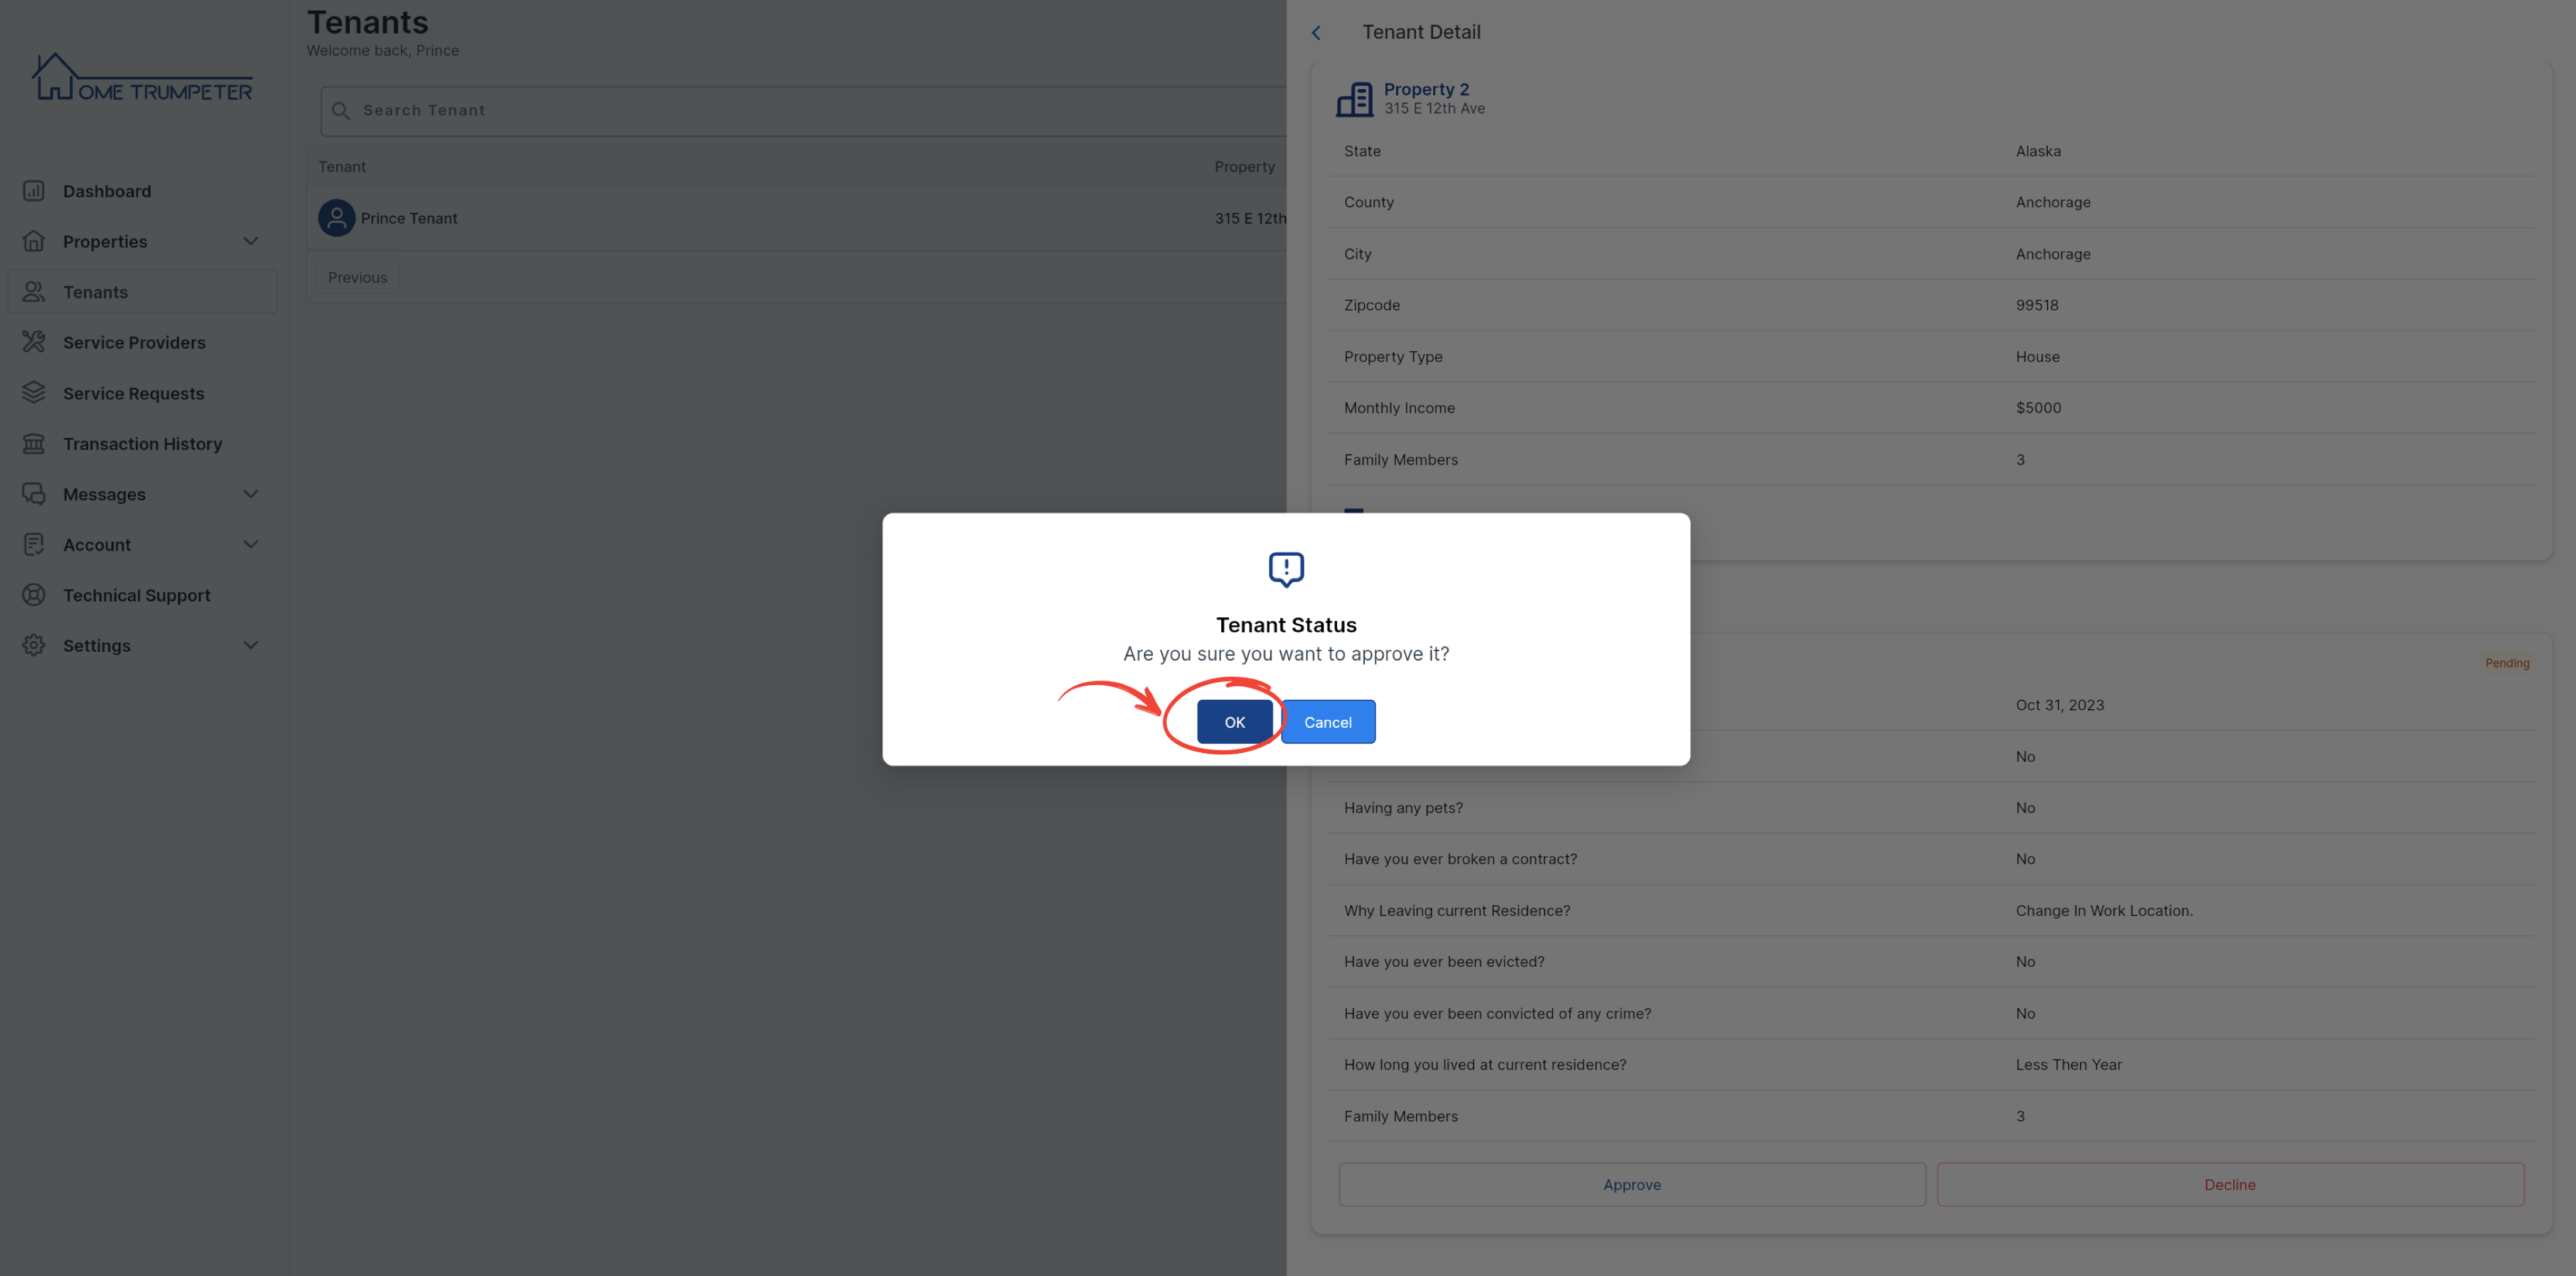
A confirmation message will indicate a successful approval. Click ‘OK’ to proceed.
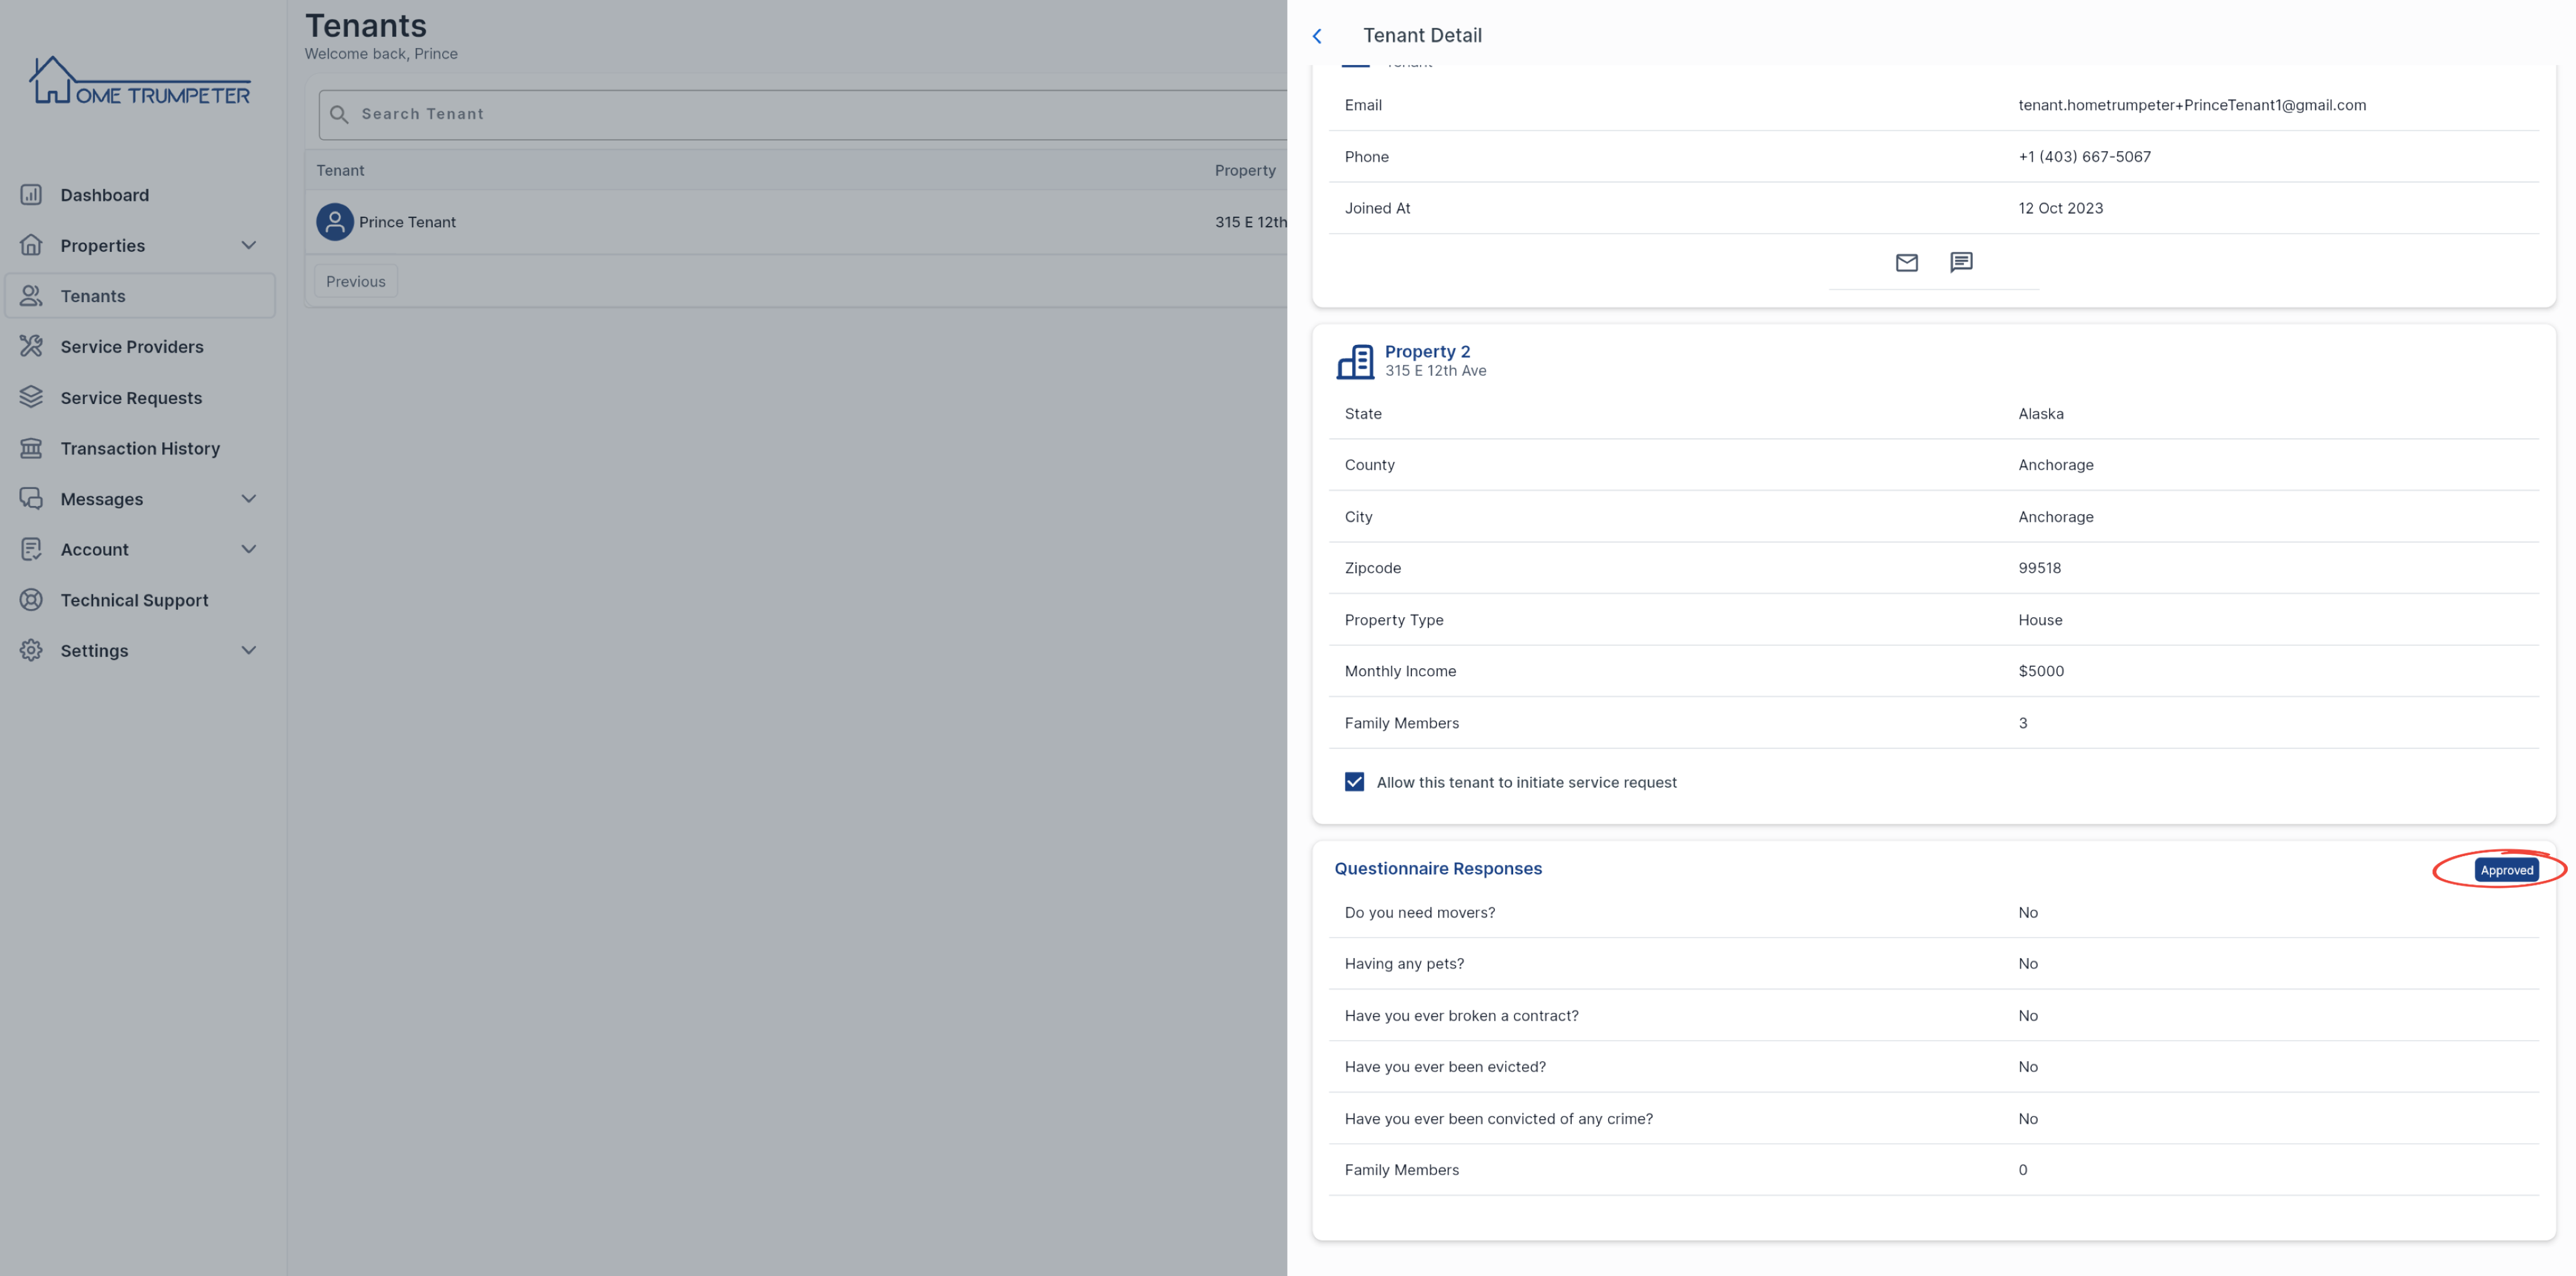
You will notice that the status will indicate that the tenant has been approved.
3. Initiate Background Check
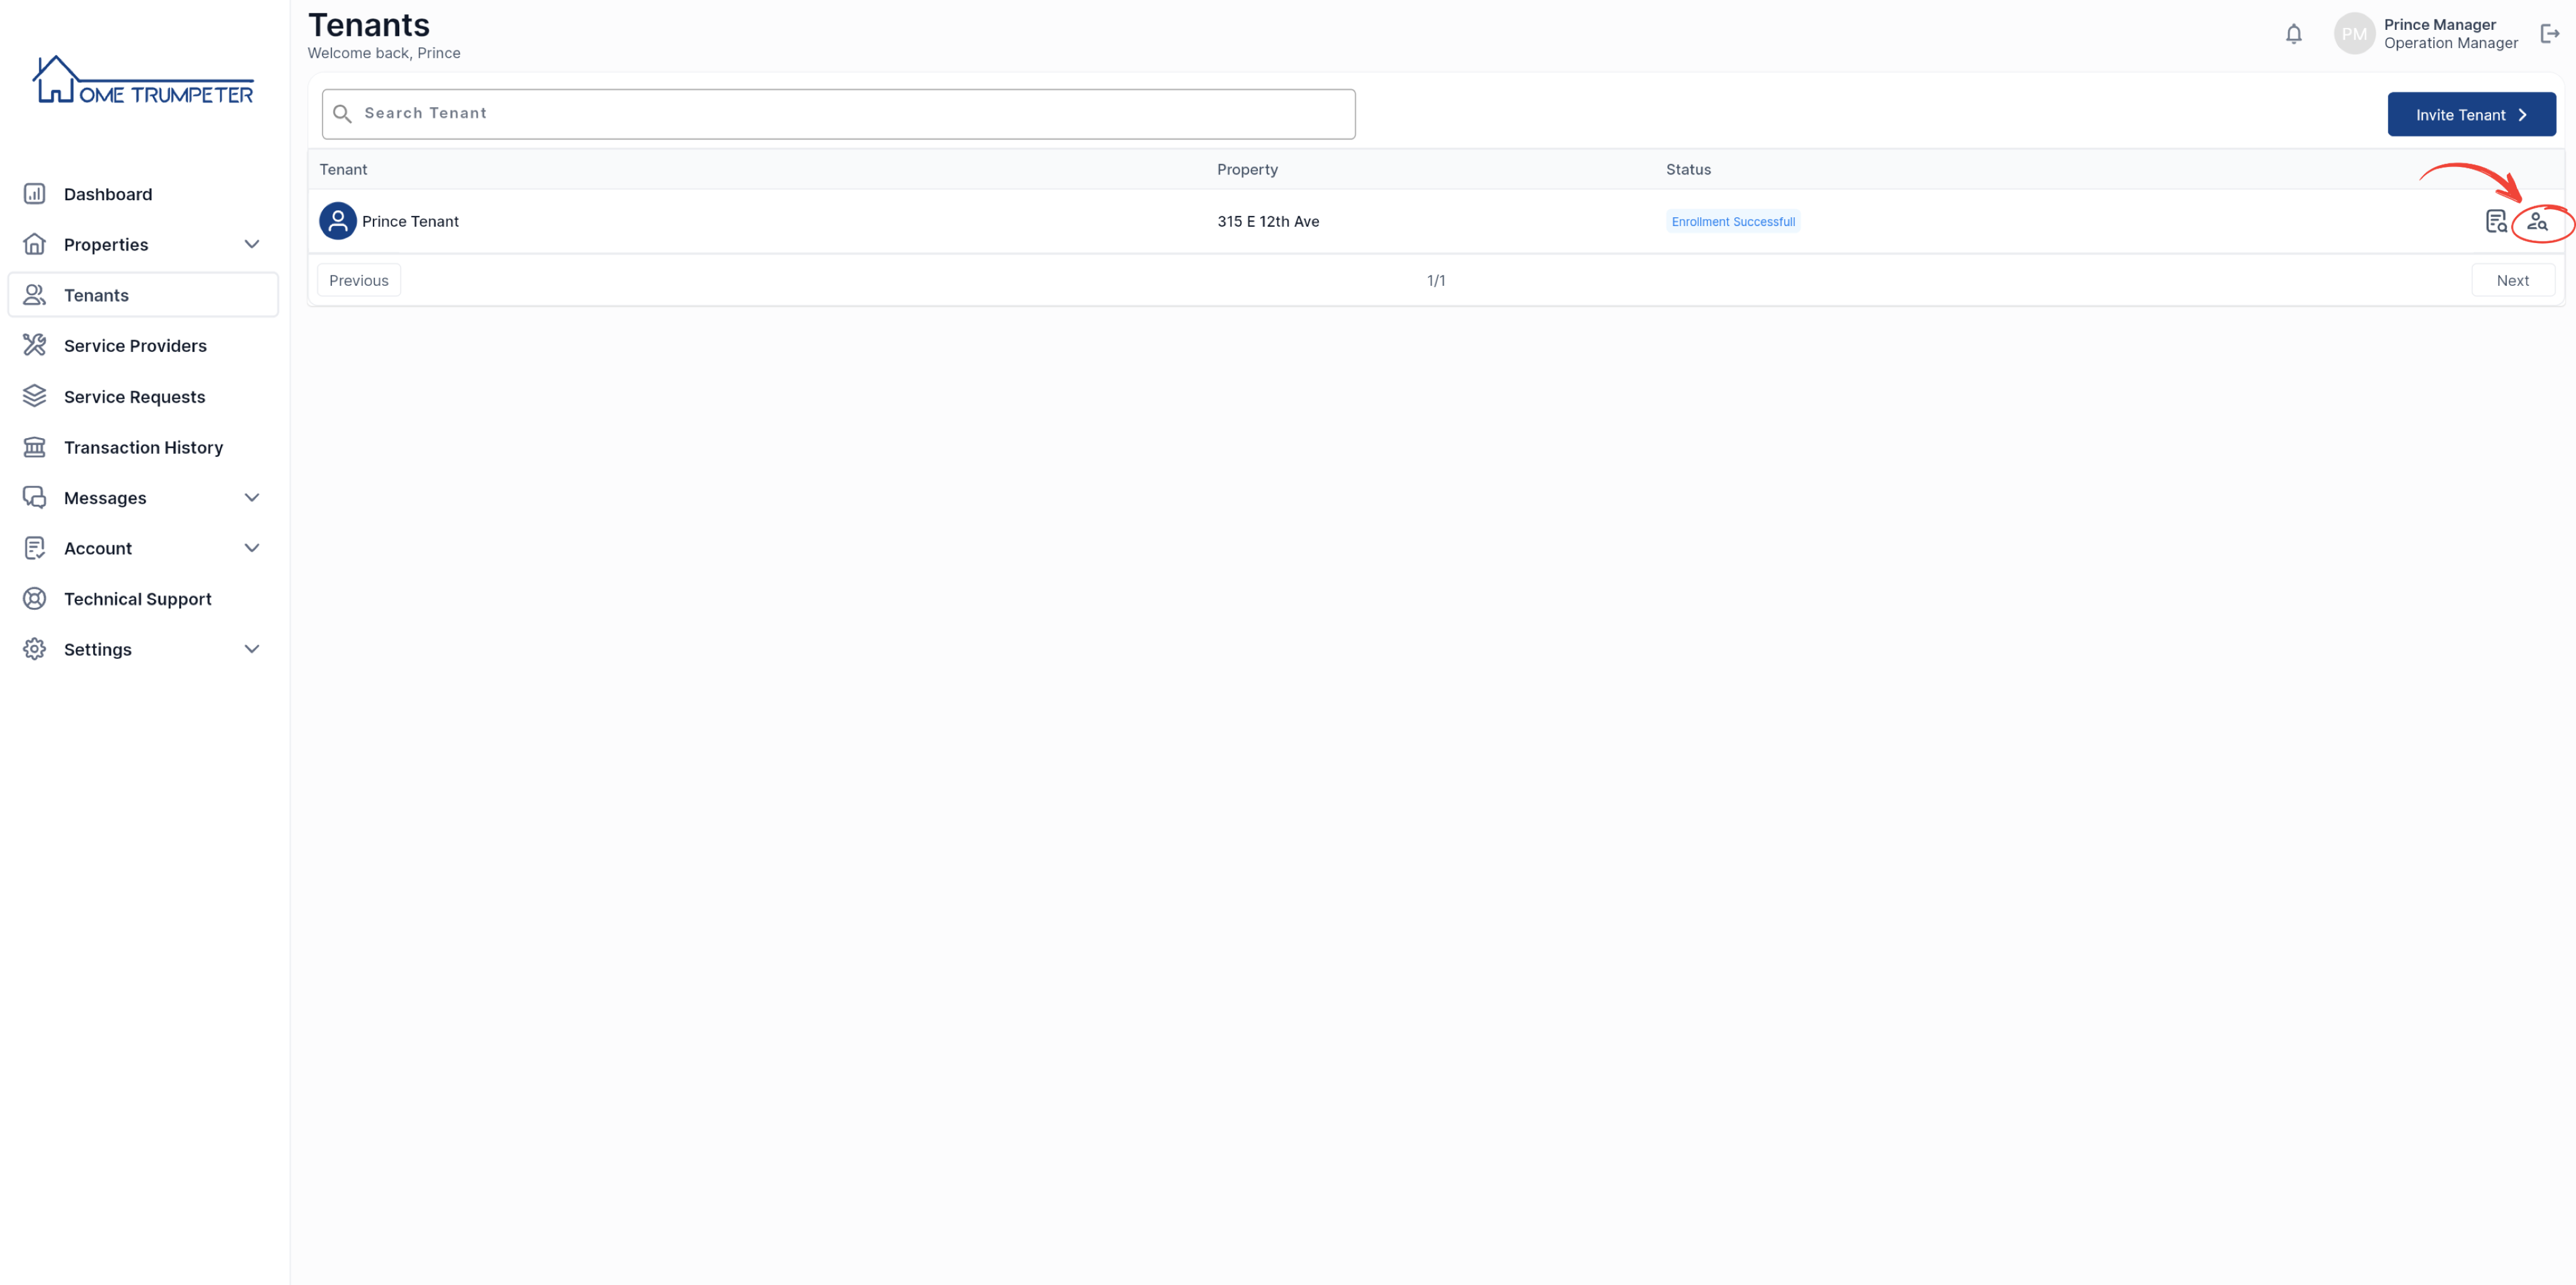
The next step in the process will be to initiate a background check. To do so, click on the icon as shown in the image below.
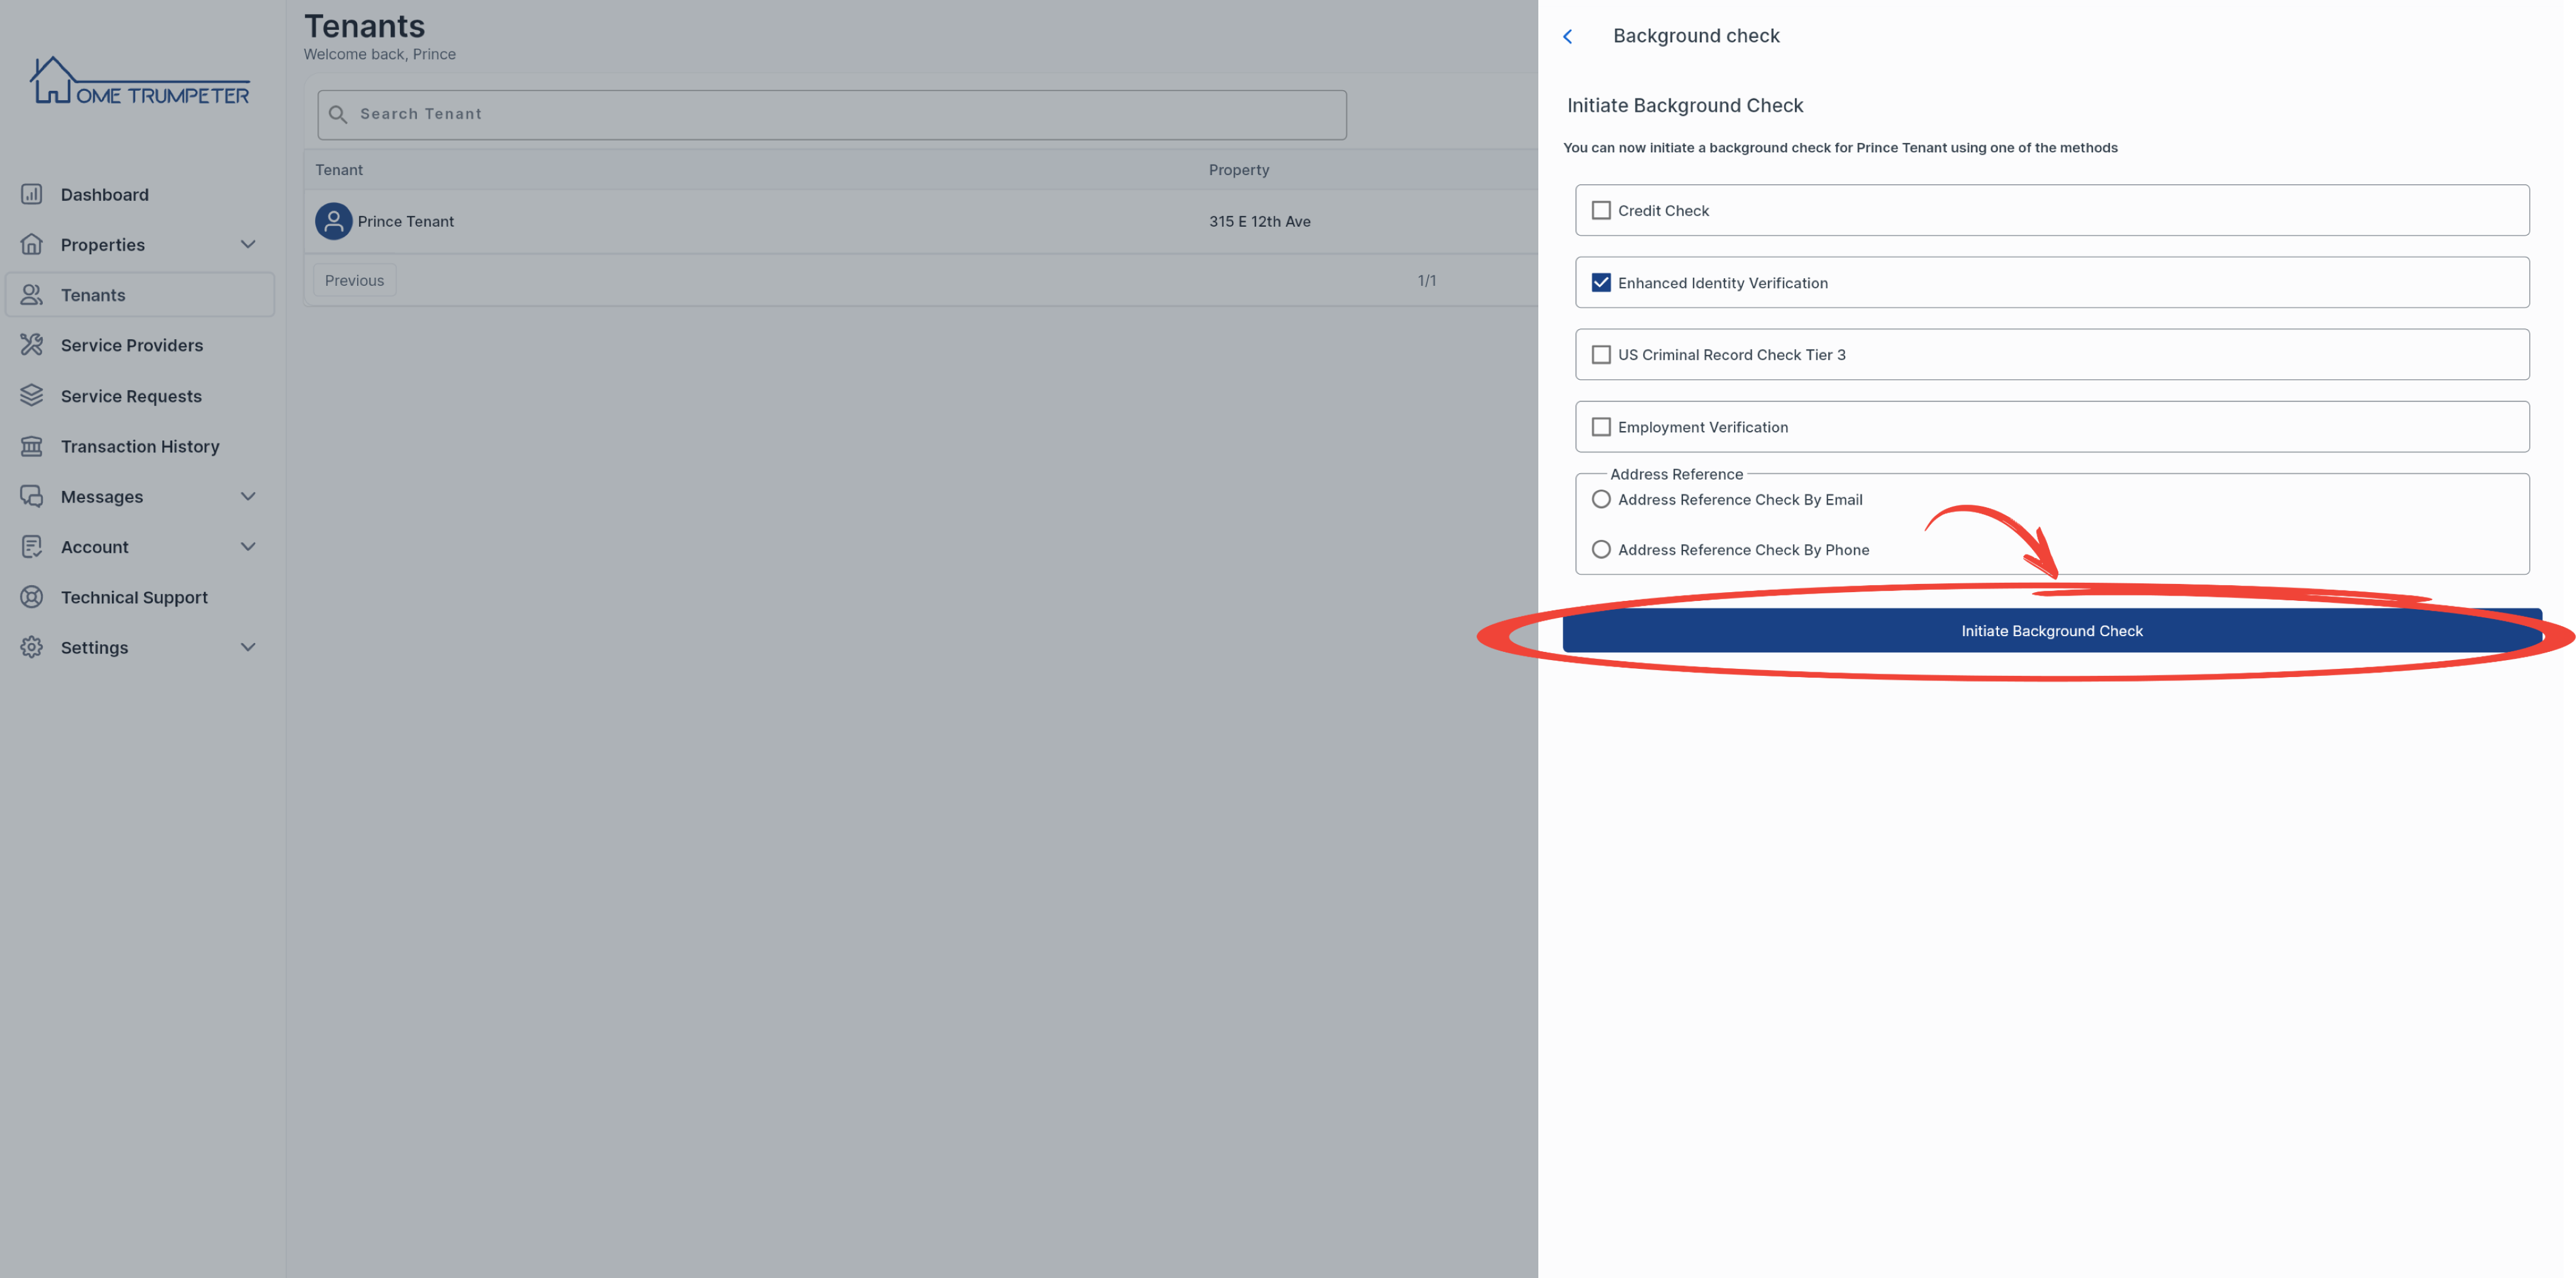
On the slide-out menu, make a selection(s) of what types of background checks suit your requirements, and click on the ‘Initiate Background Check’ button.
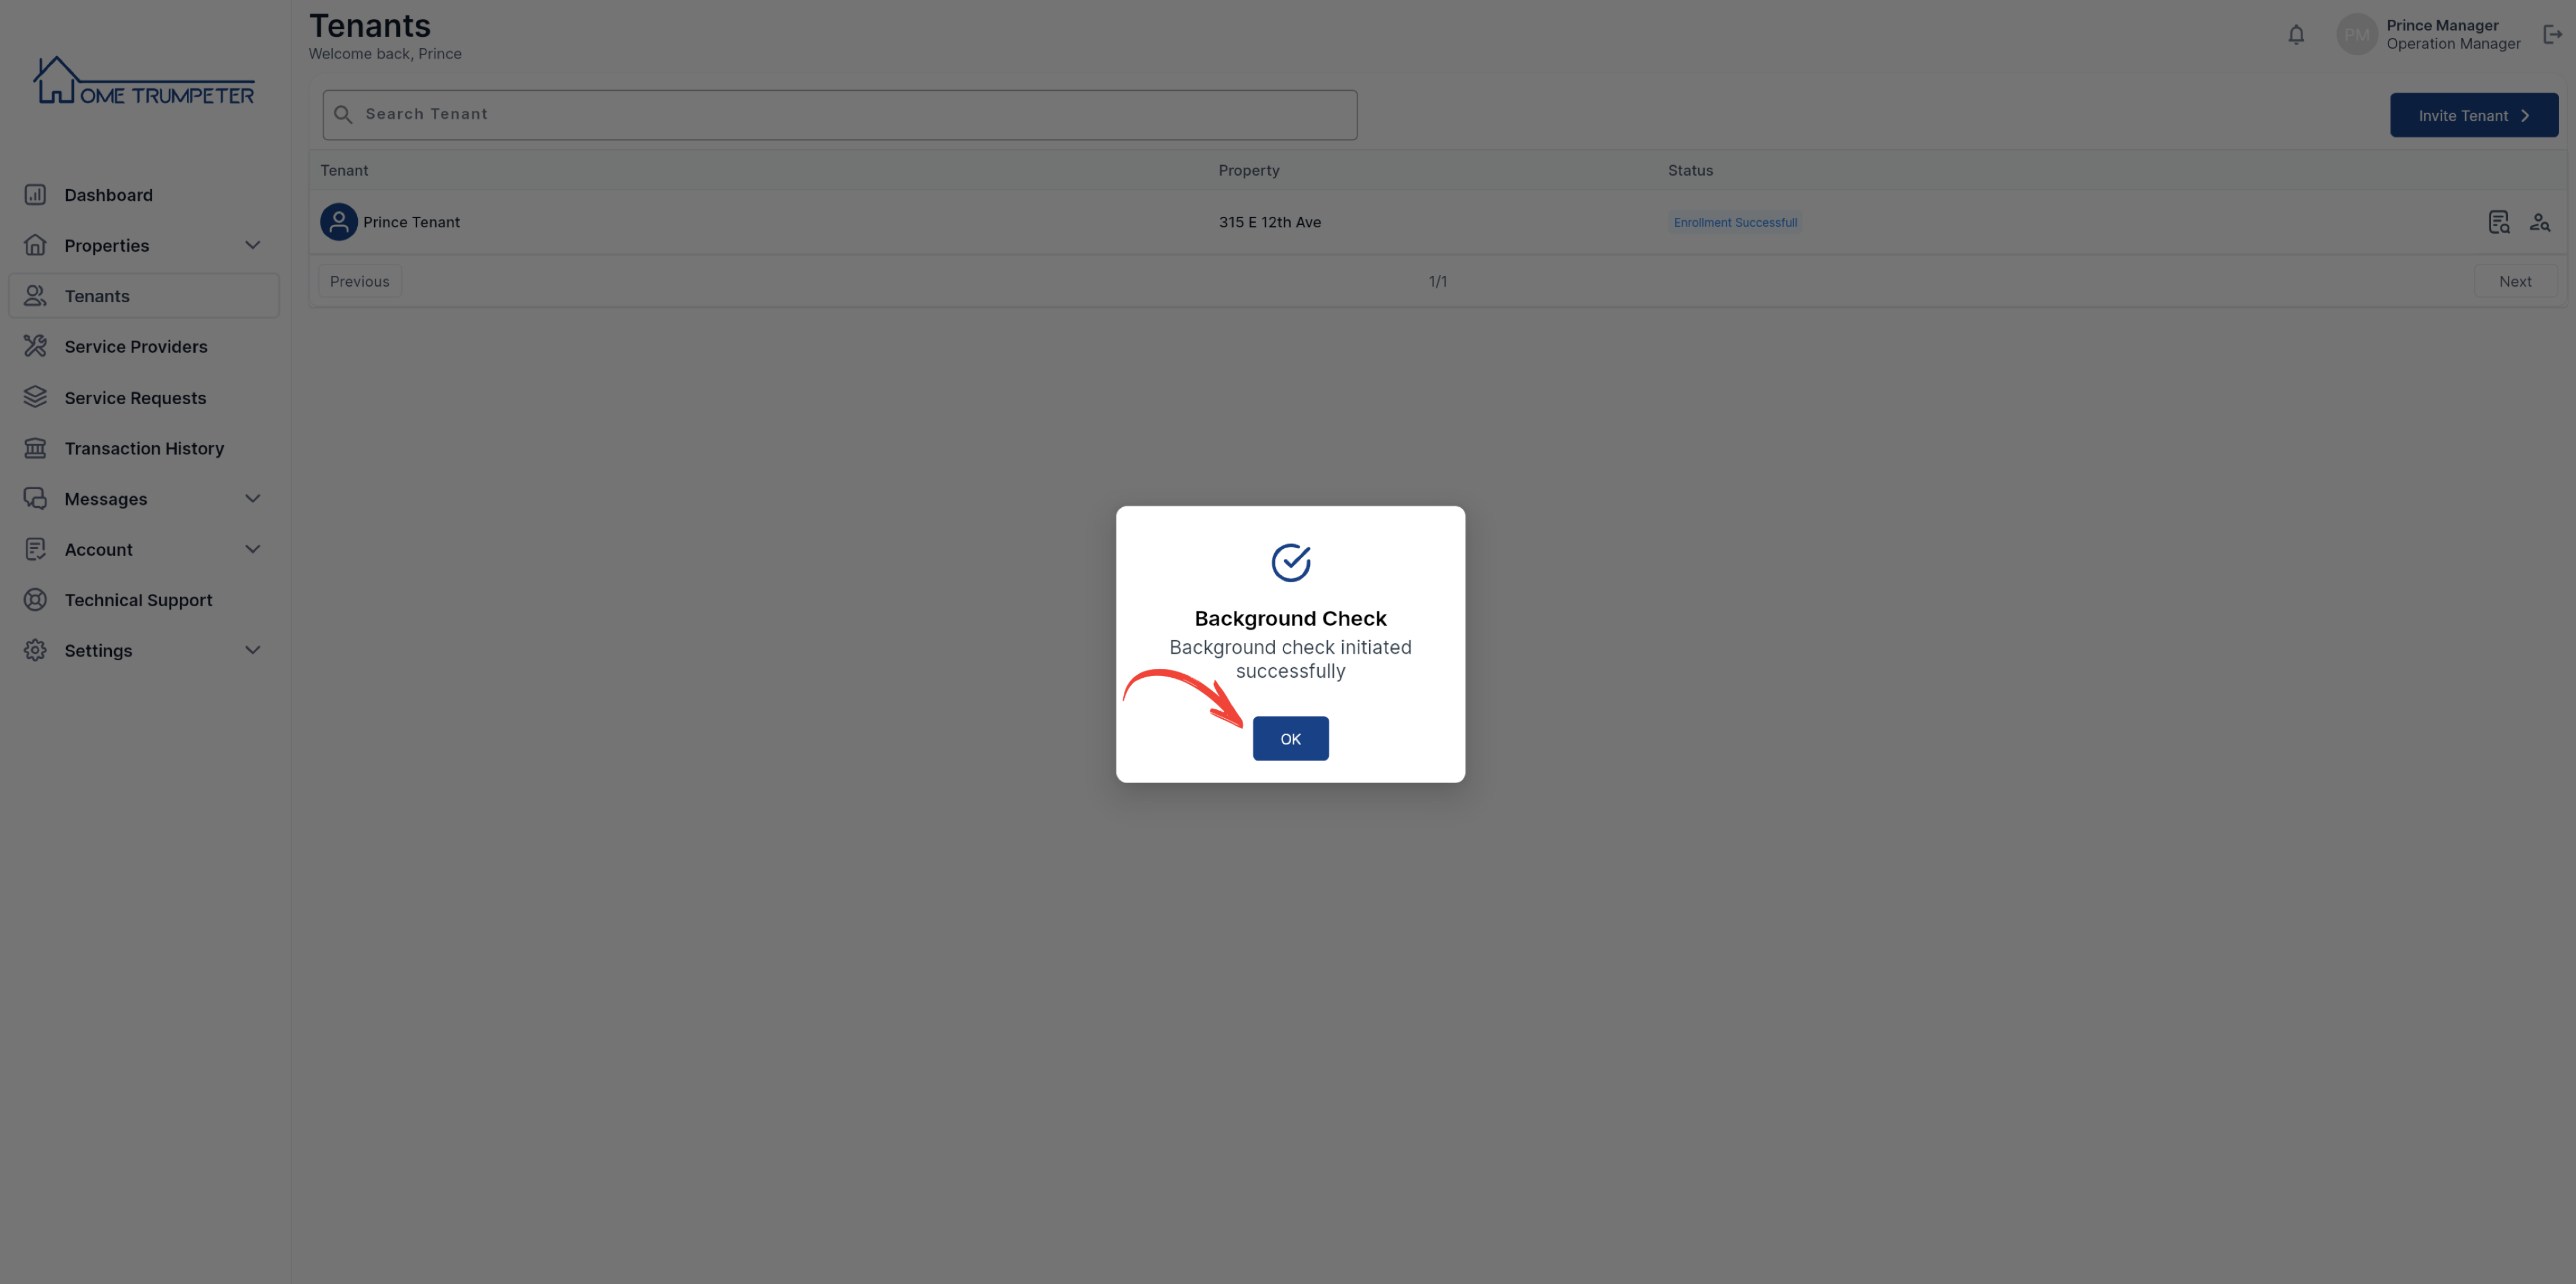
Click ‘OK’ on the confirmation pop-up message that follows to acknowledge the successful initiation of a background check.
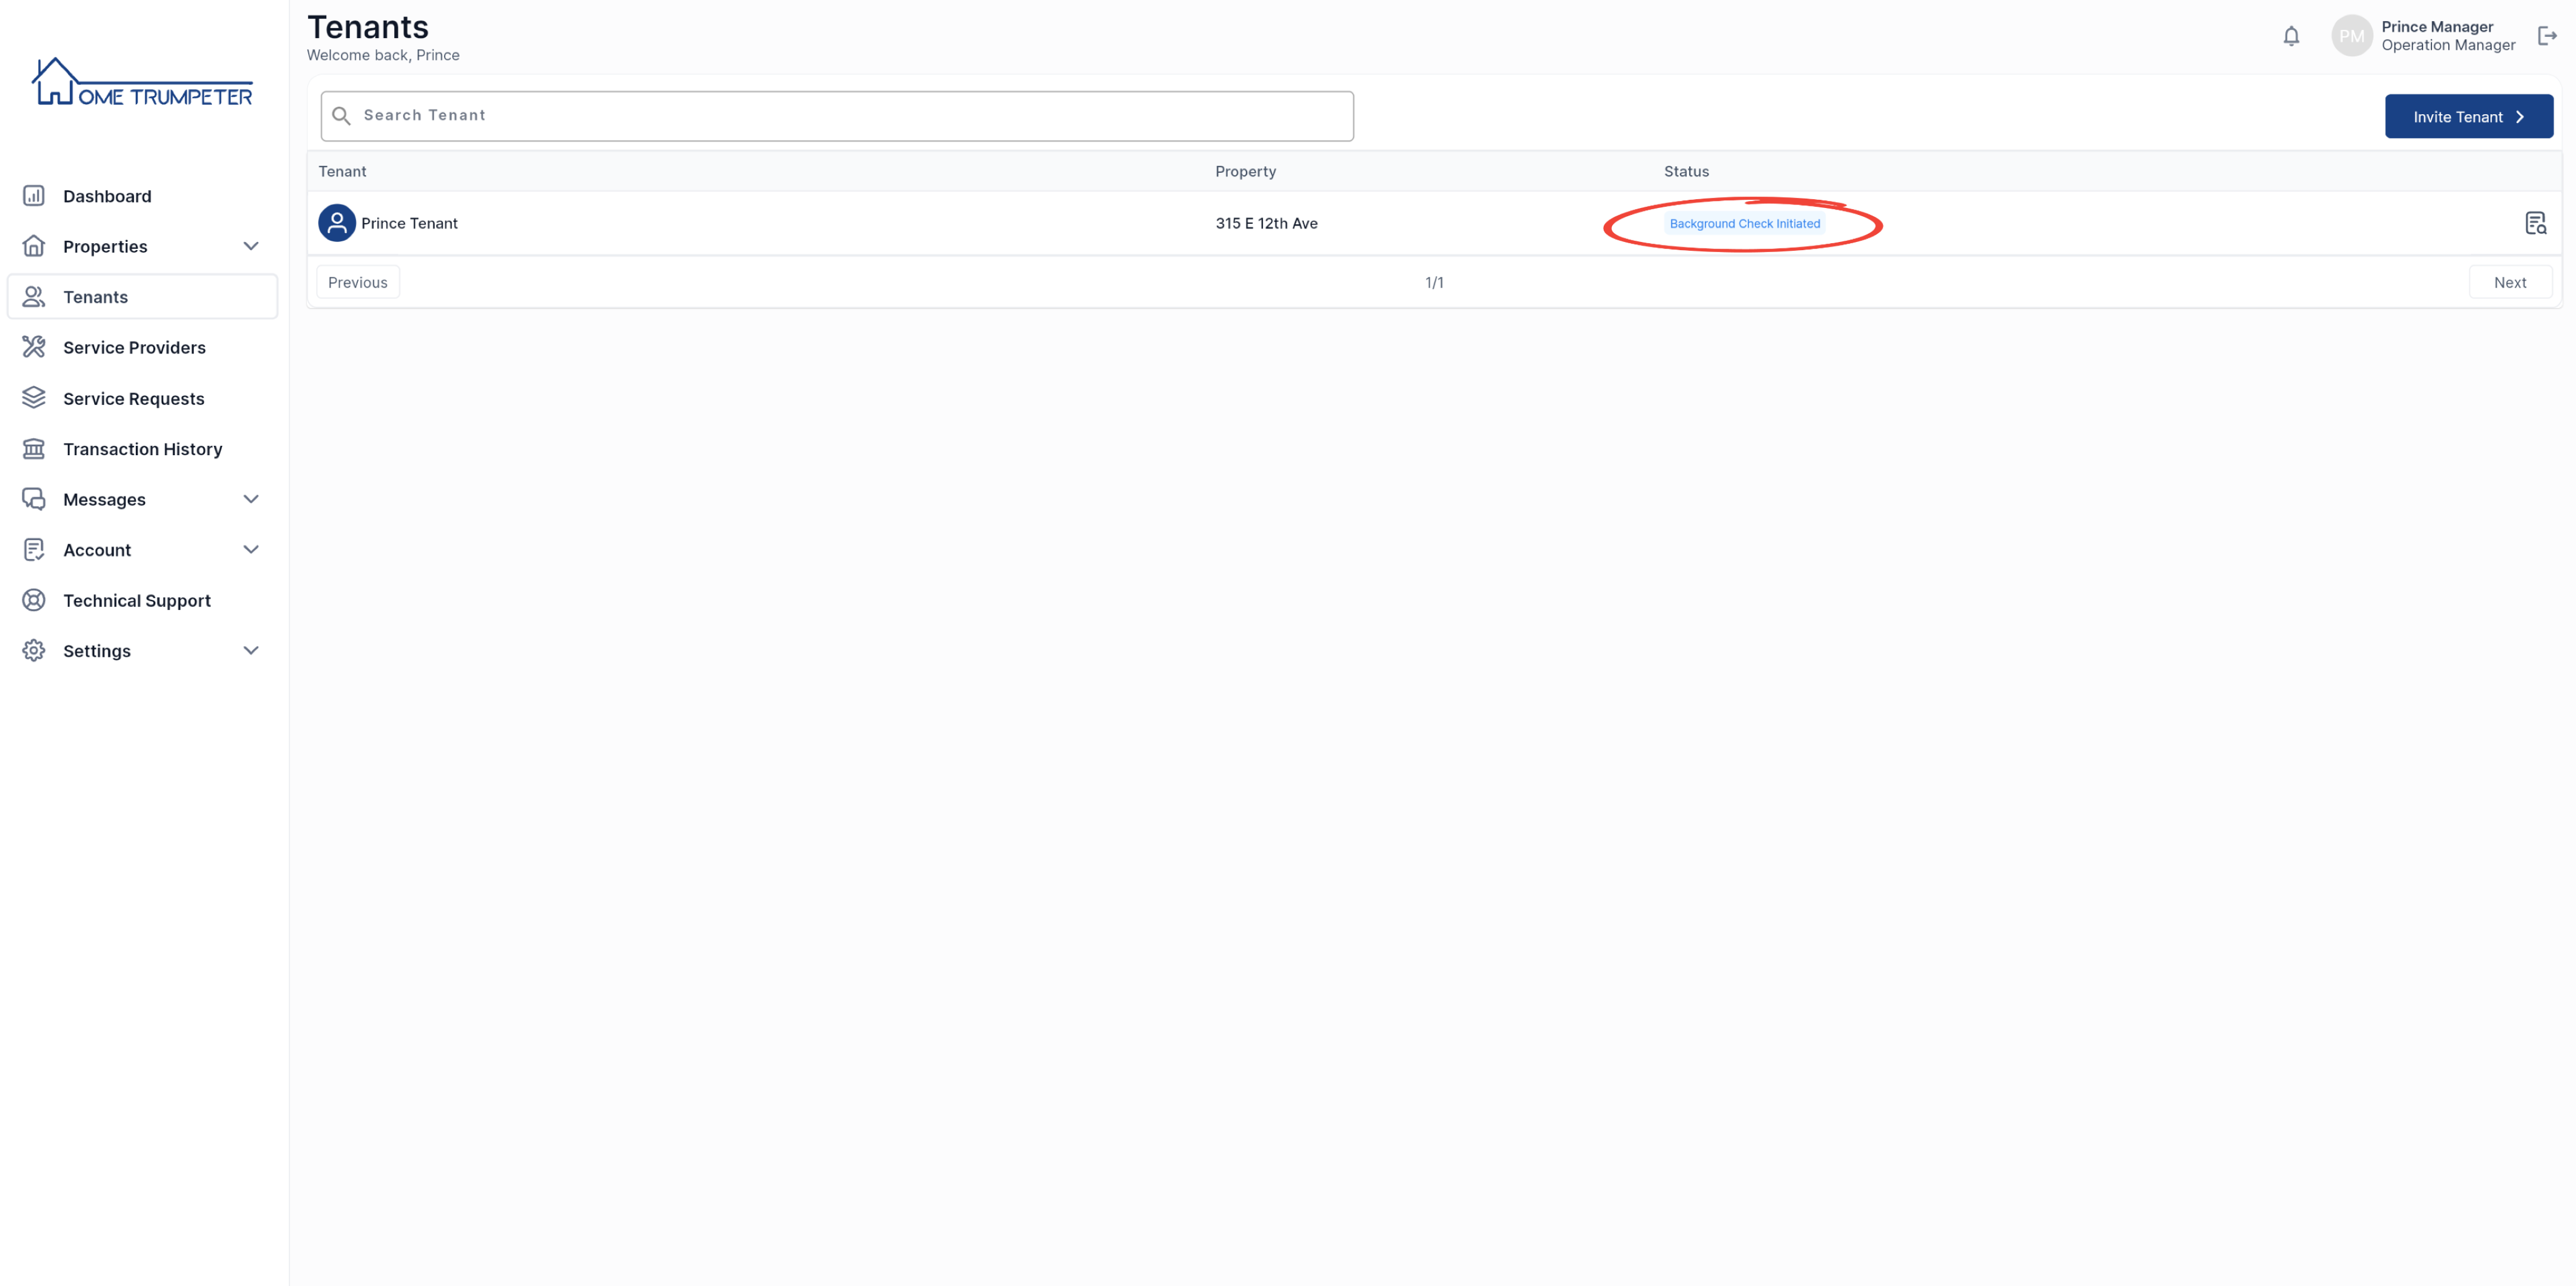
The tenant’s status on the tenants’ page should also indicate ‘Background check initiated’.
4. Approve Background Check
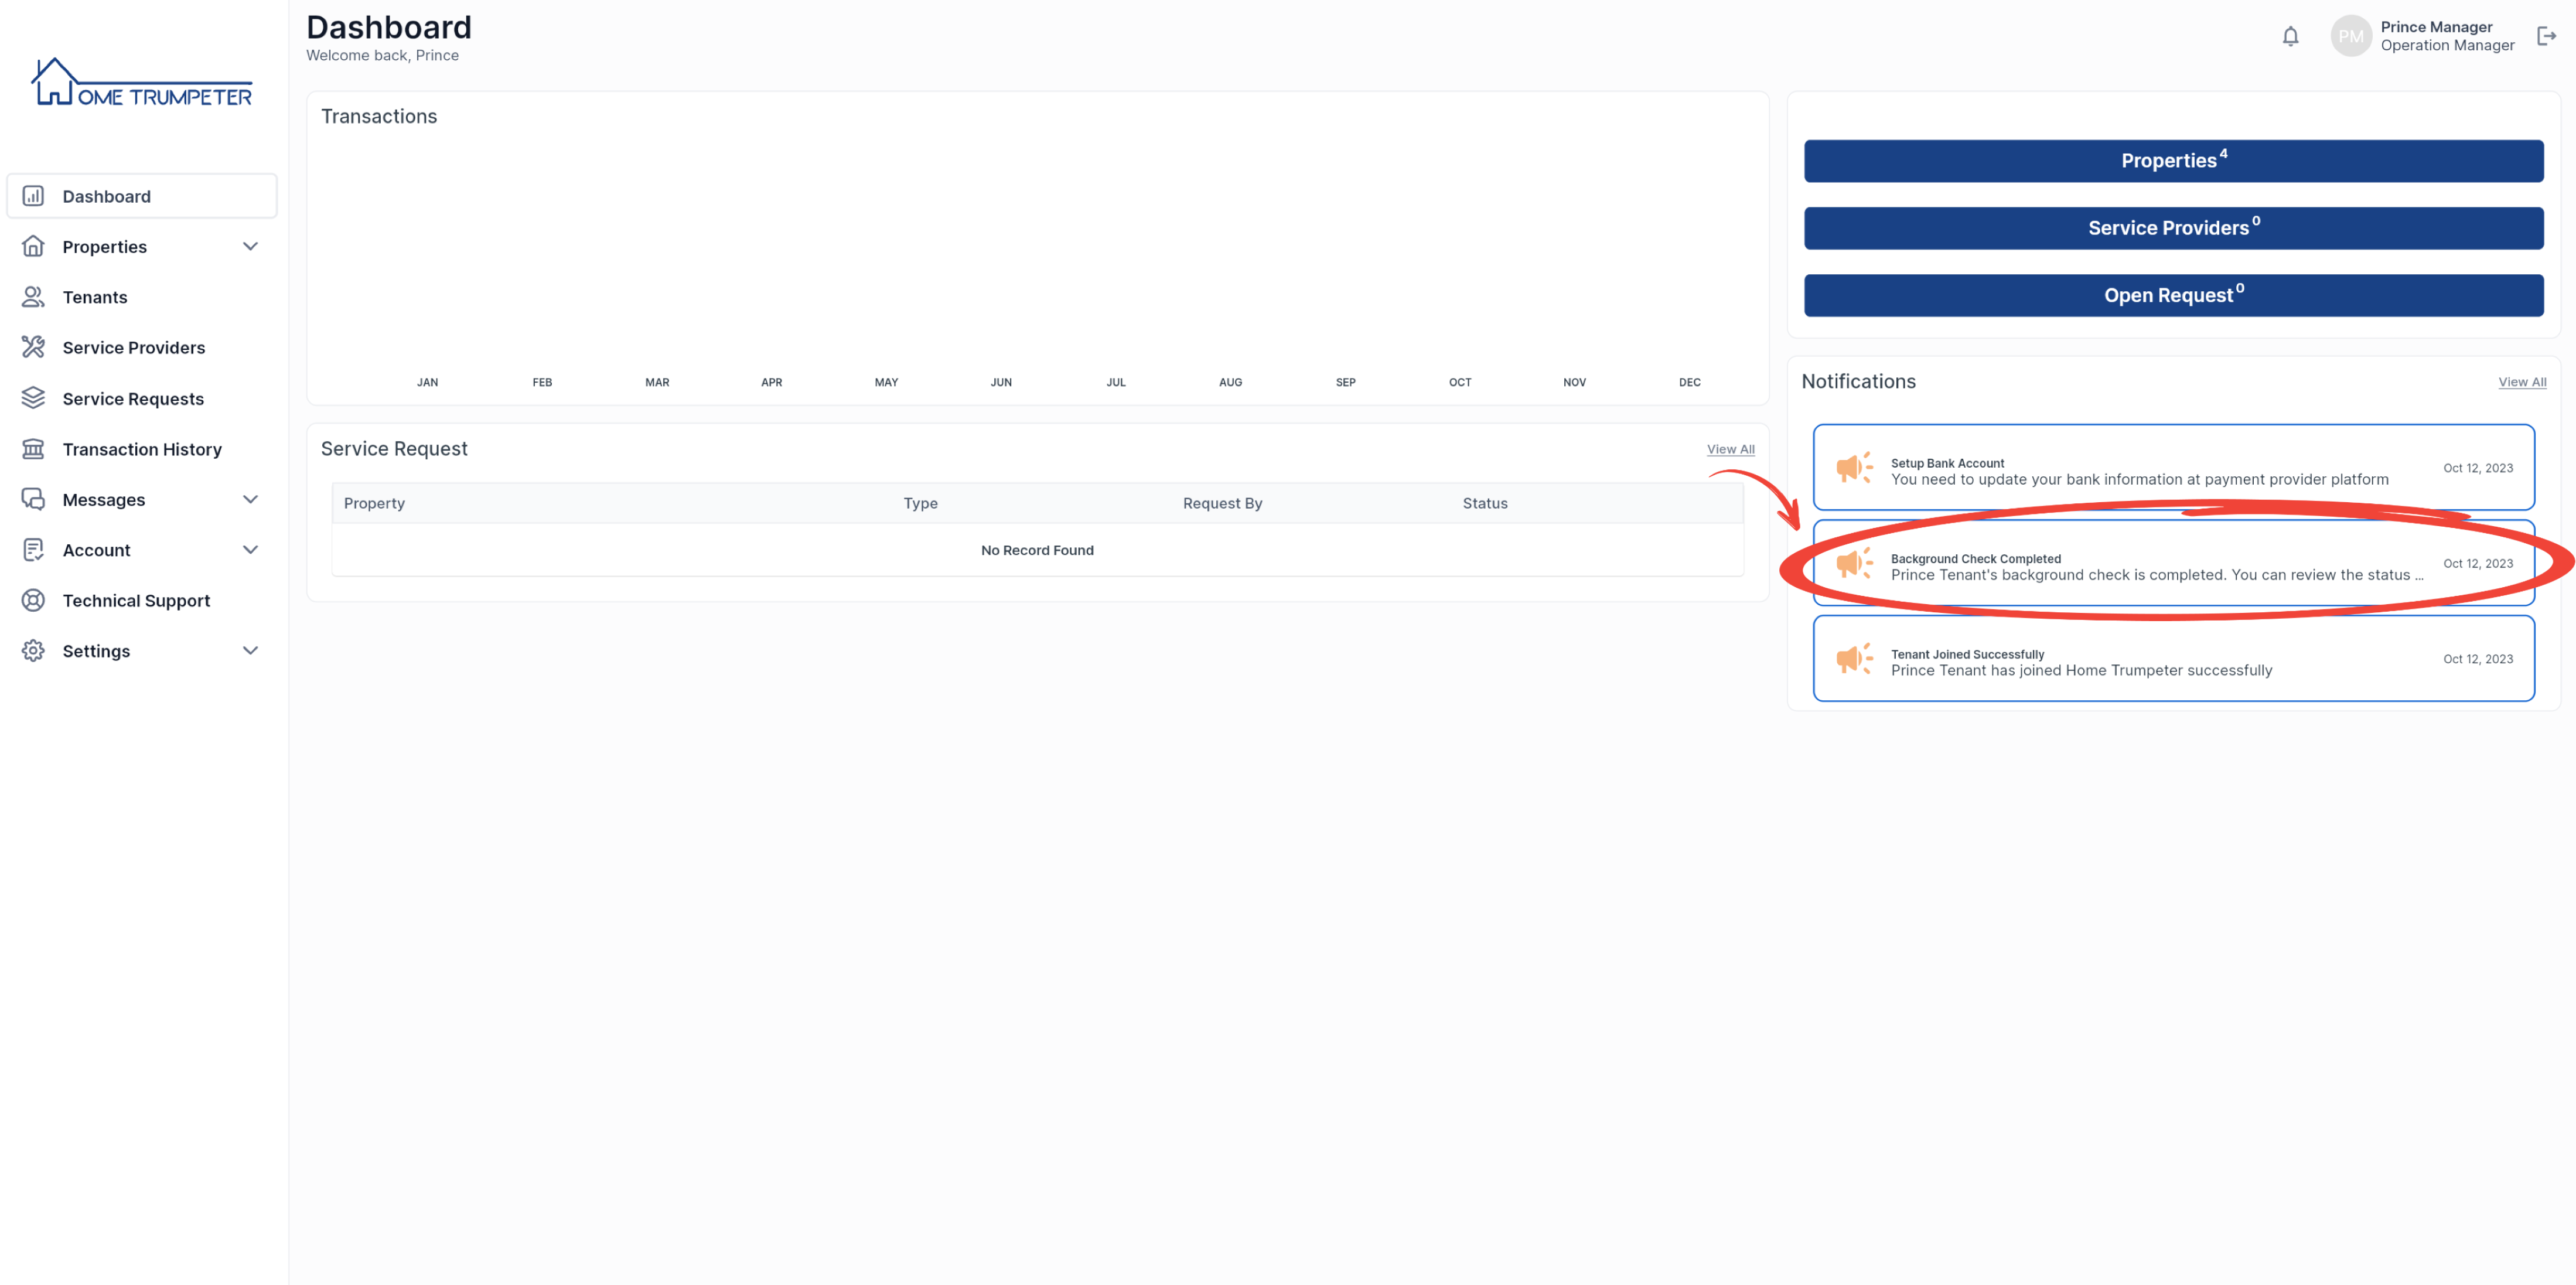
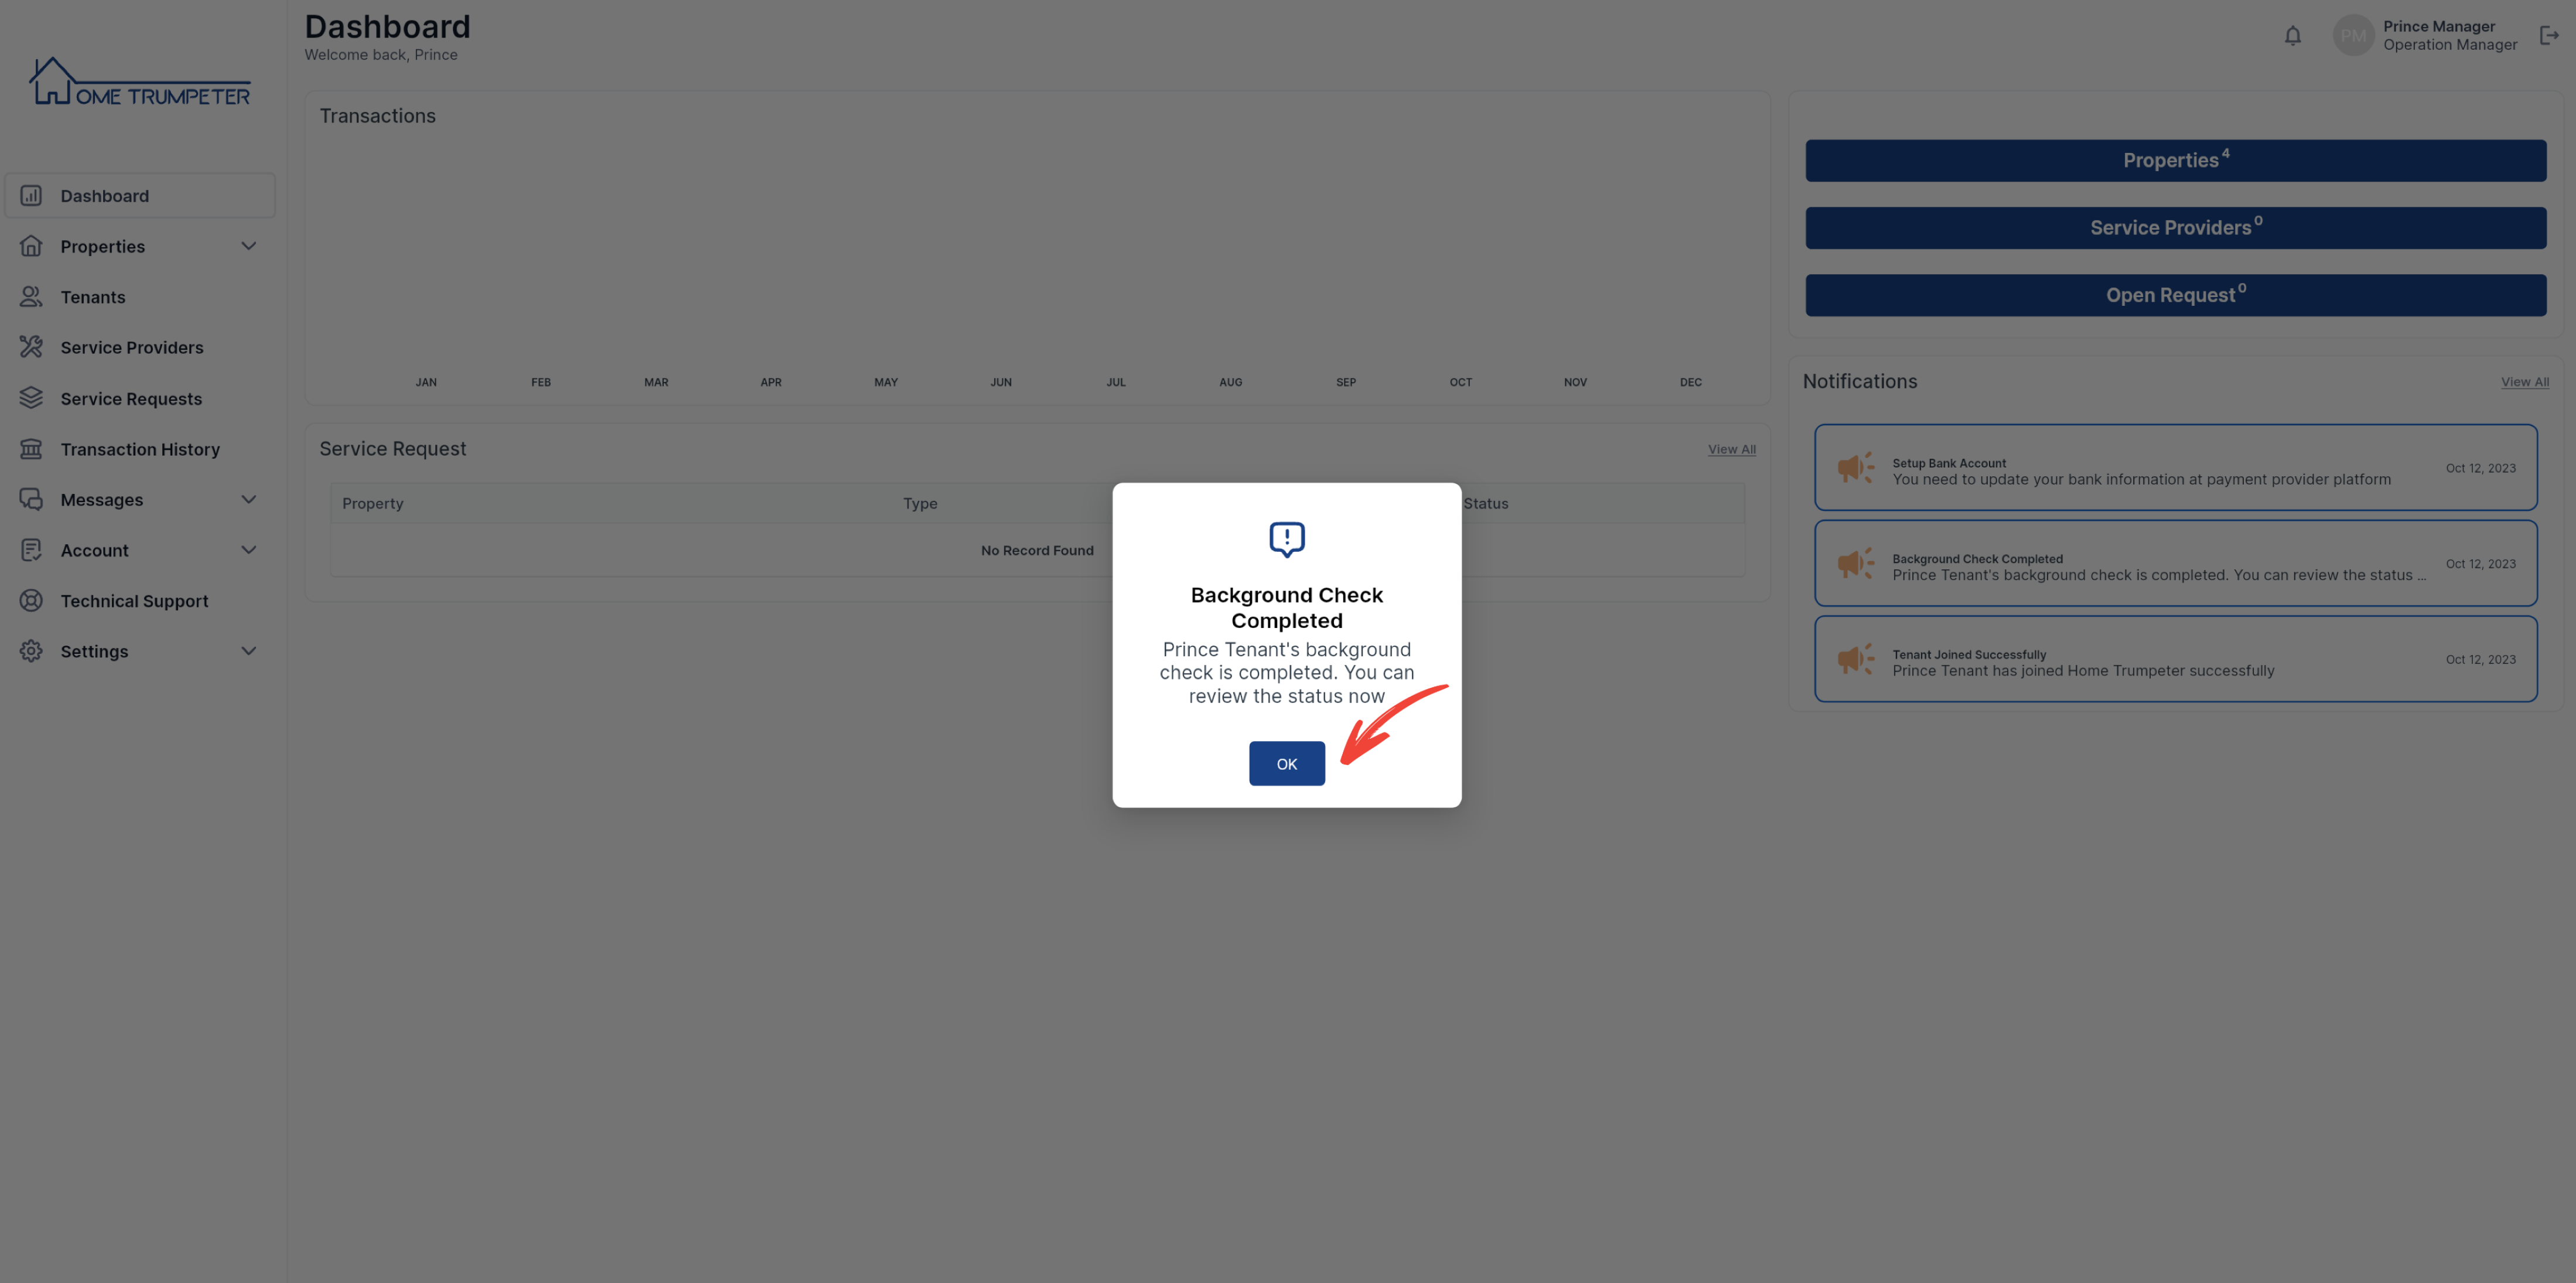
You will receive a notification on your dashboard informing you that your tenant has completed the background check.
The tenant’s status on the tenants’ page should also show as ‘Background Check Completed’.
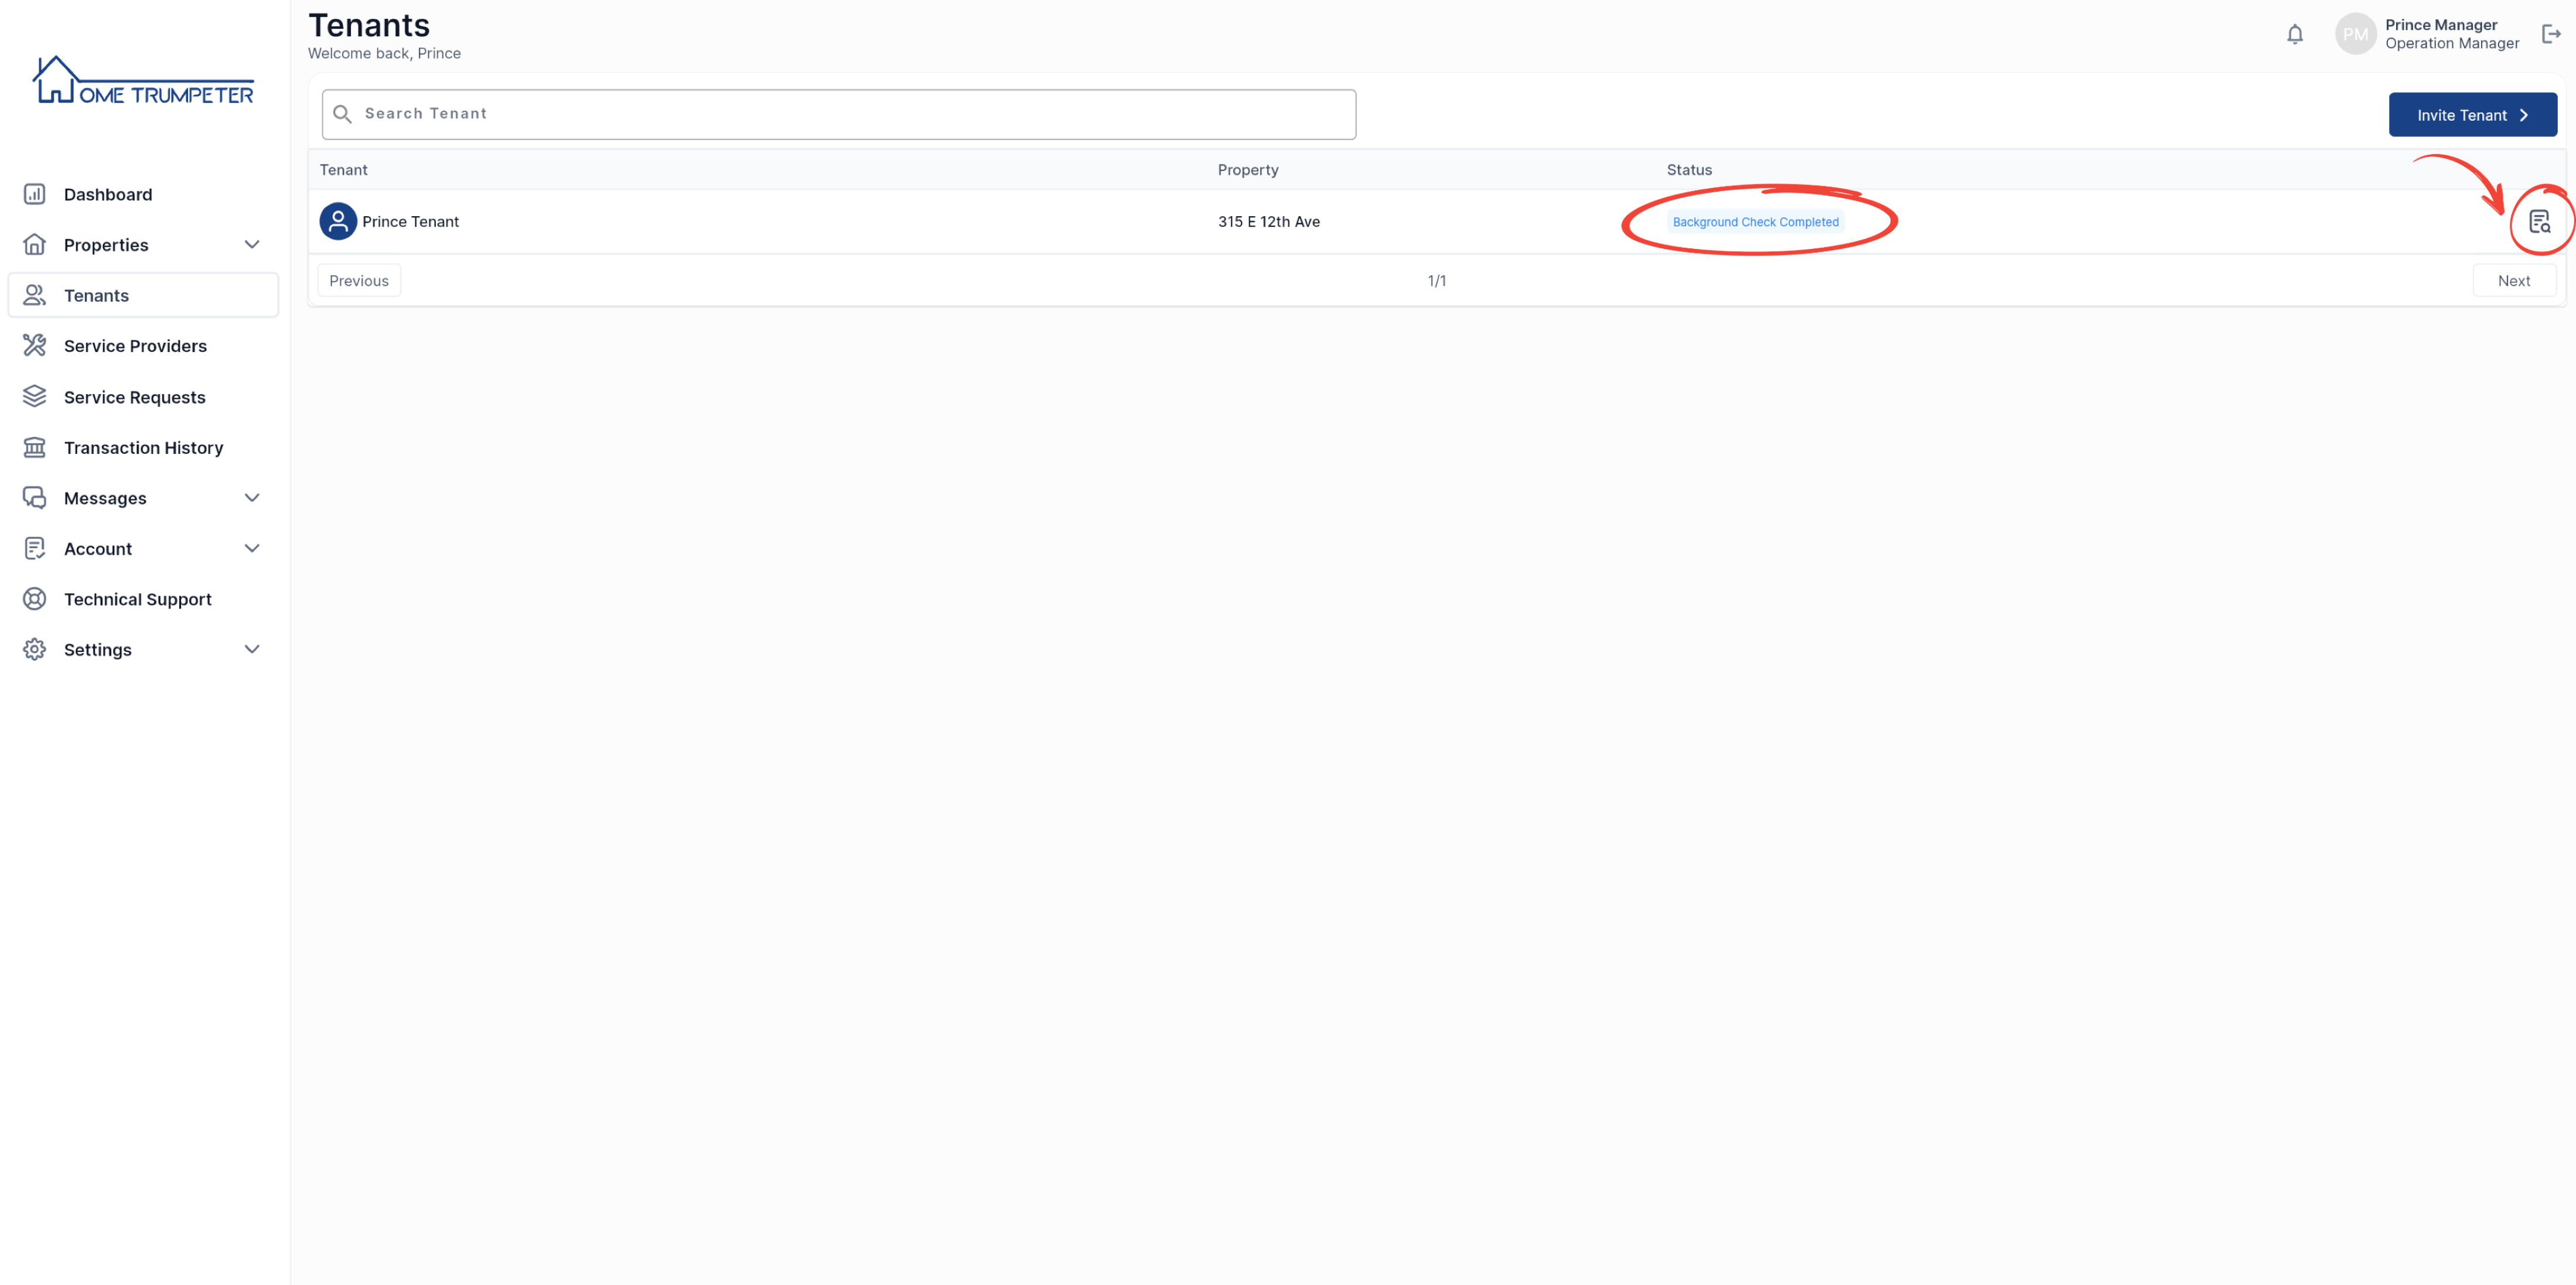
Clicking on the icon as shown above will open up the slide-out menu letting you approve or disapprove the background check.
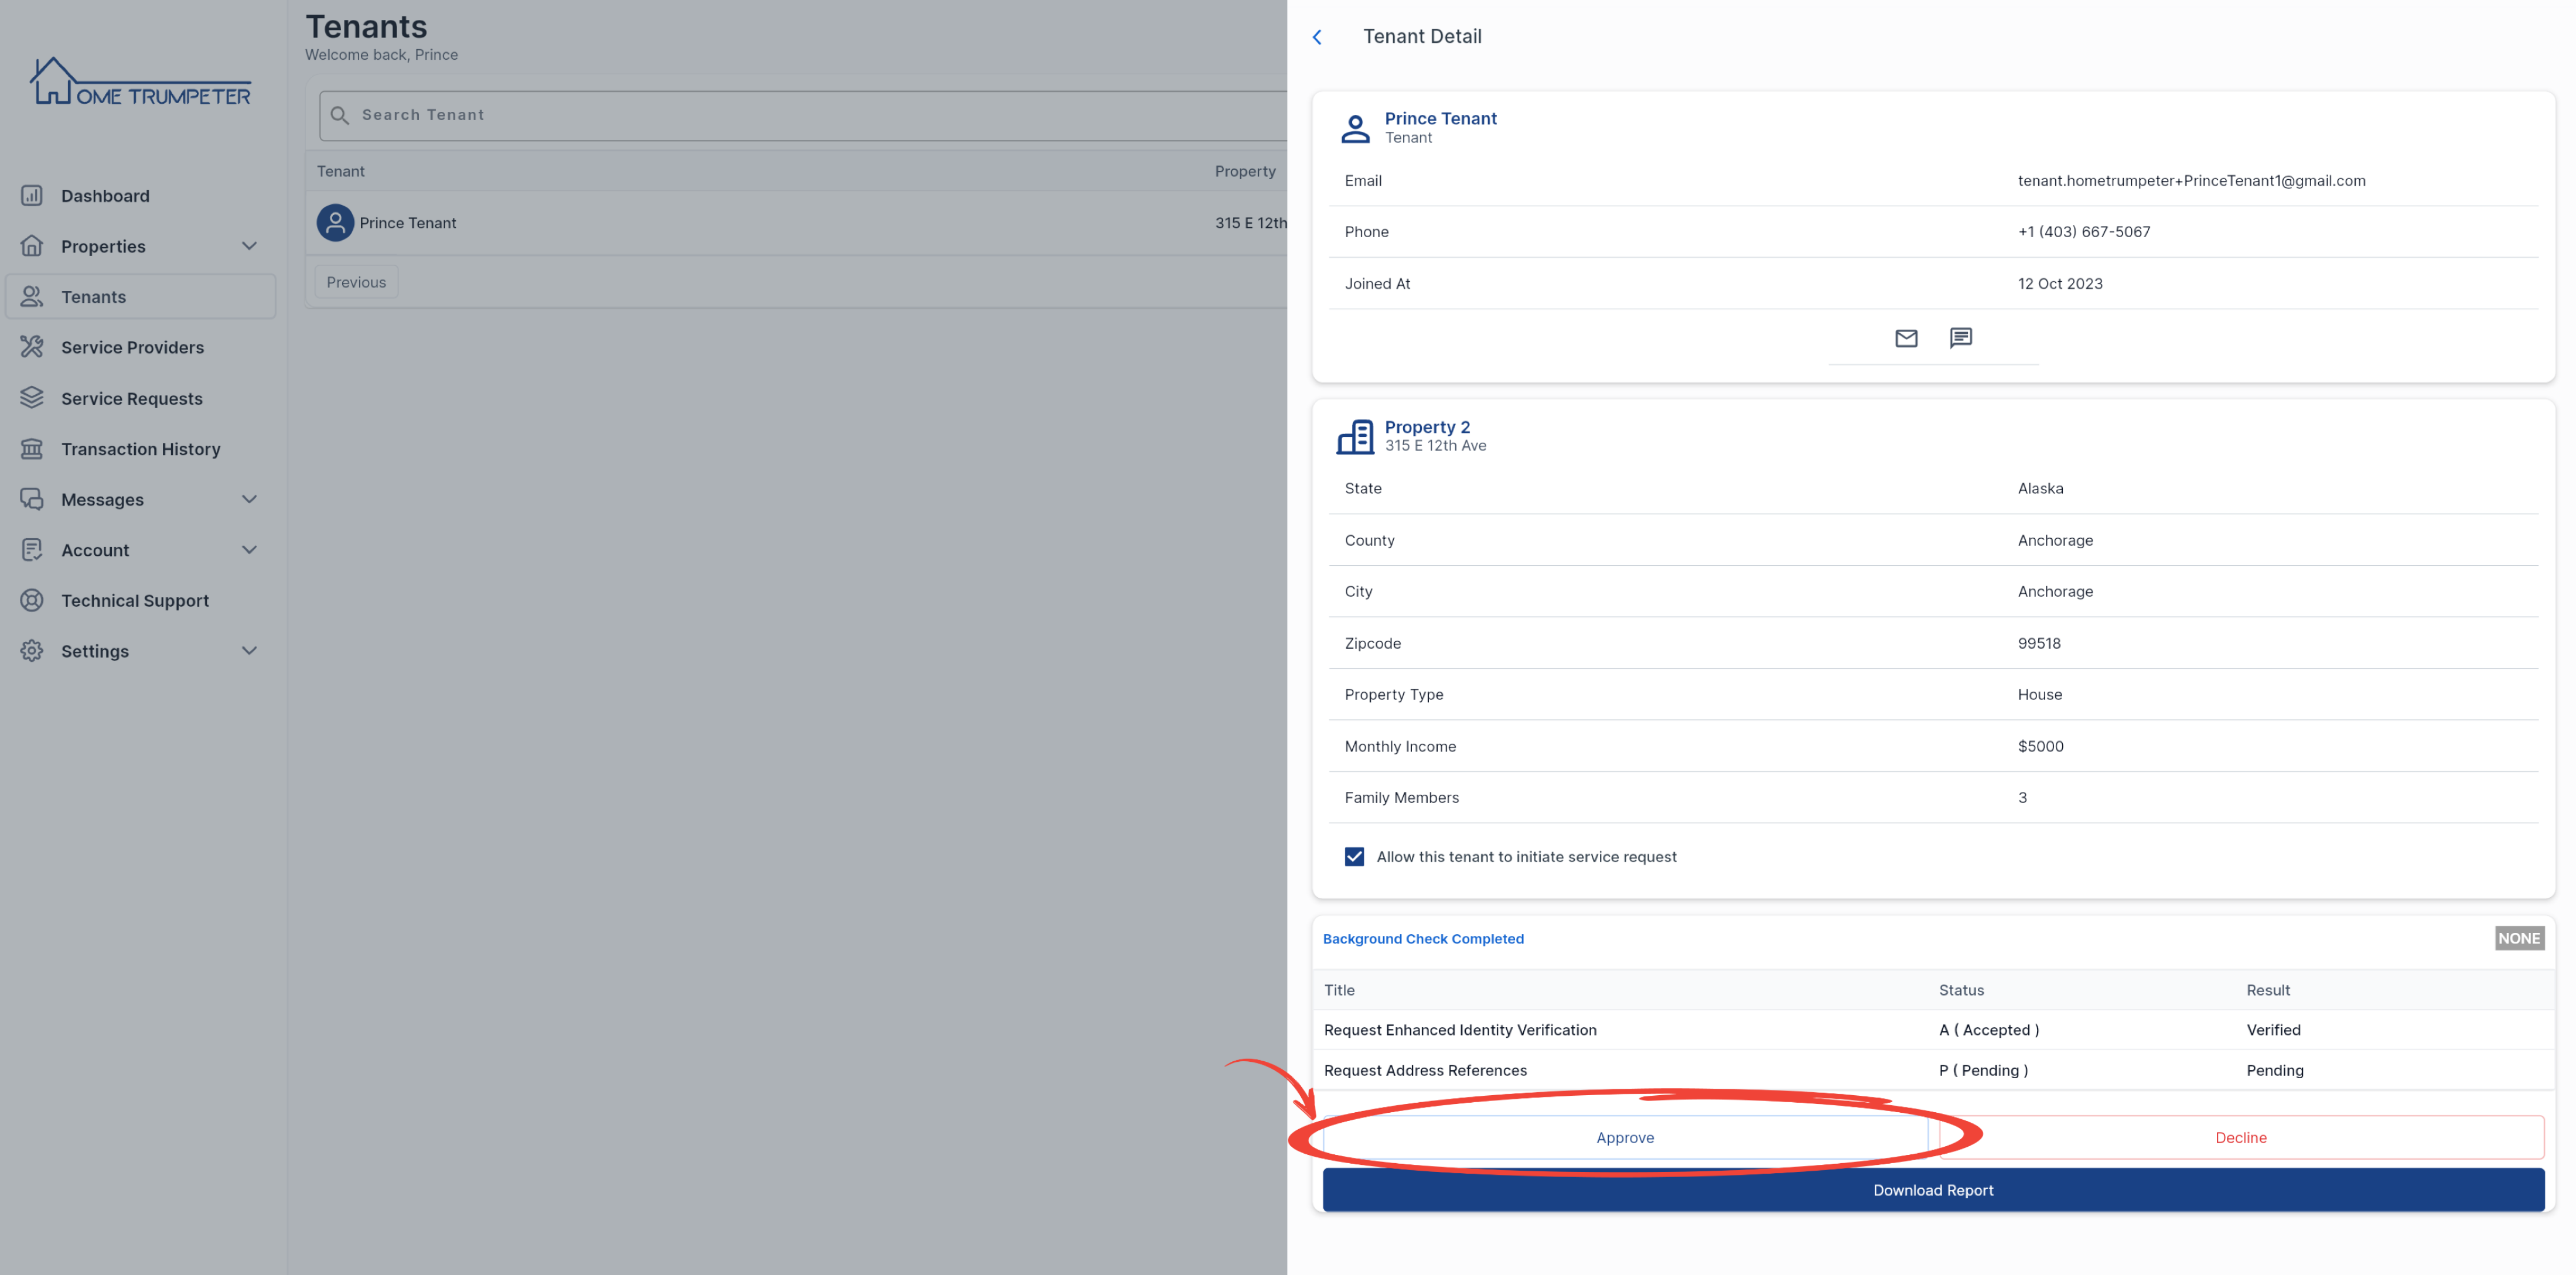
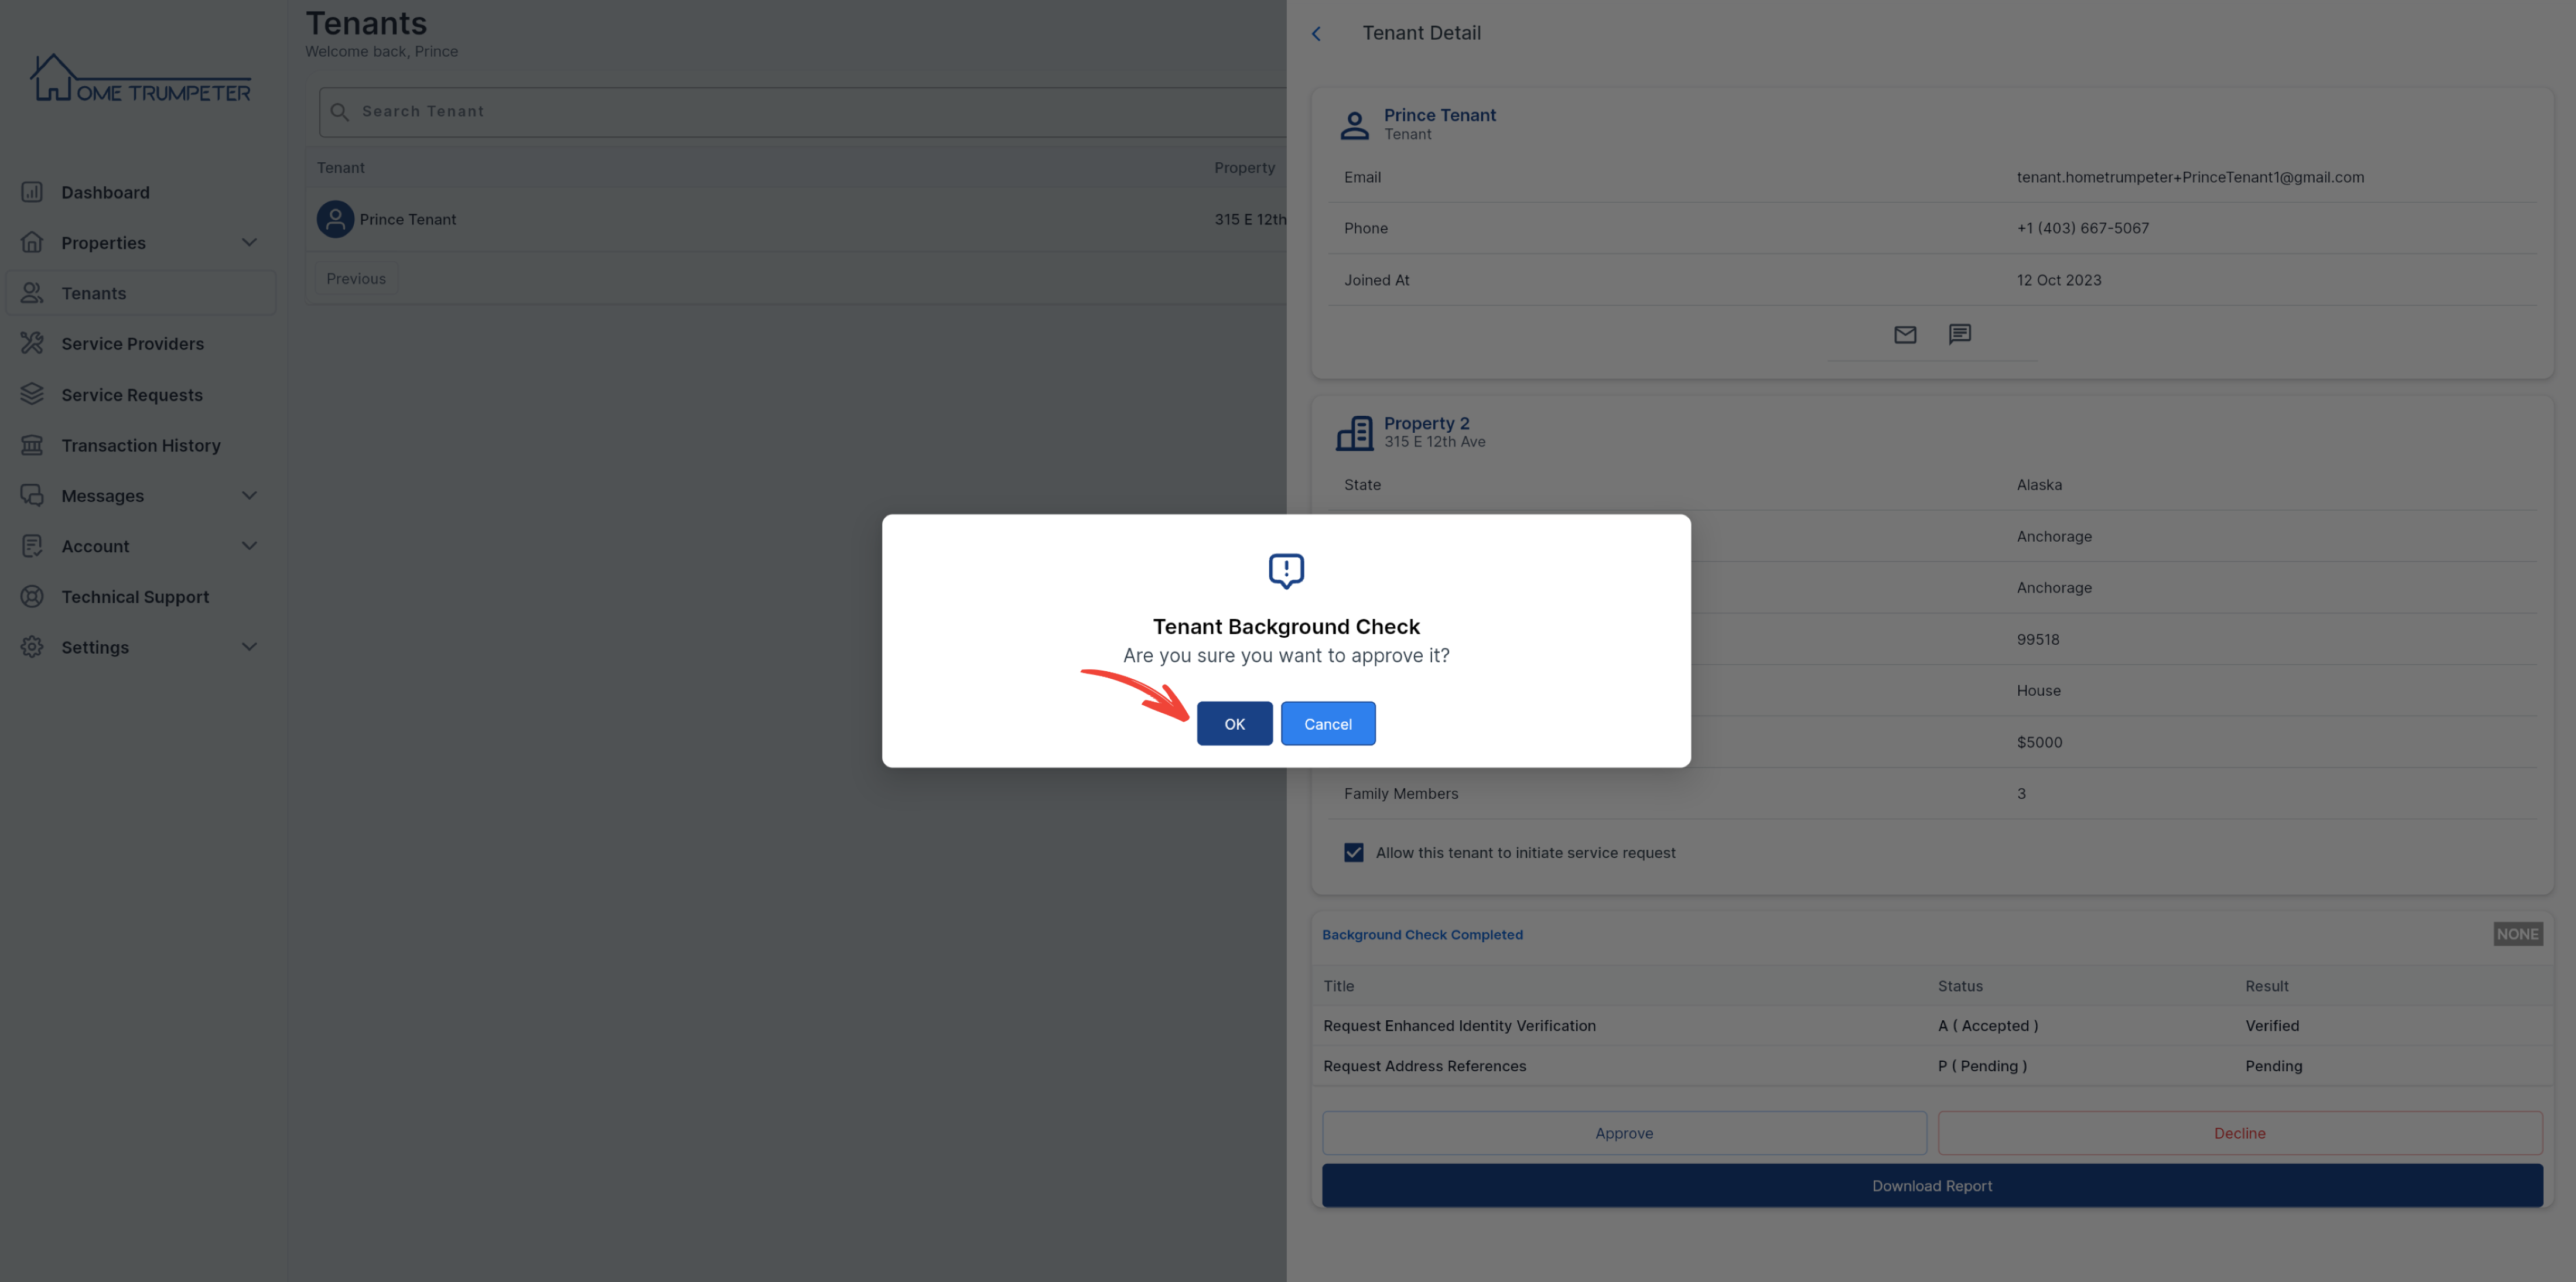
To complete the background check approval, click ‘OK’ on the confirmation message that follows.
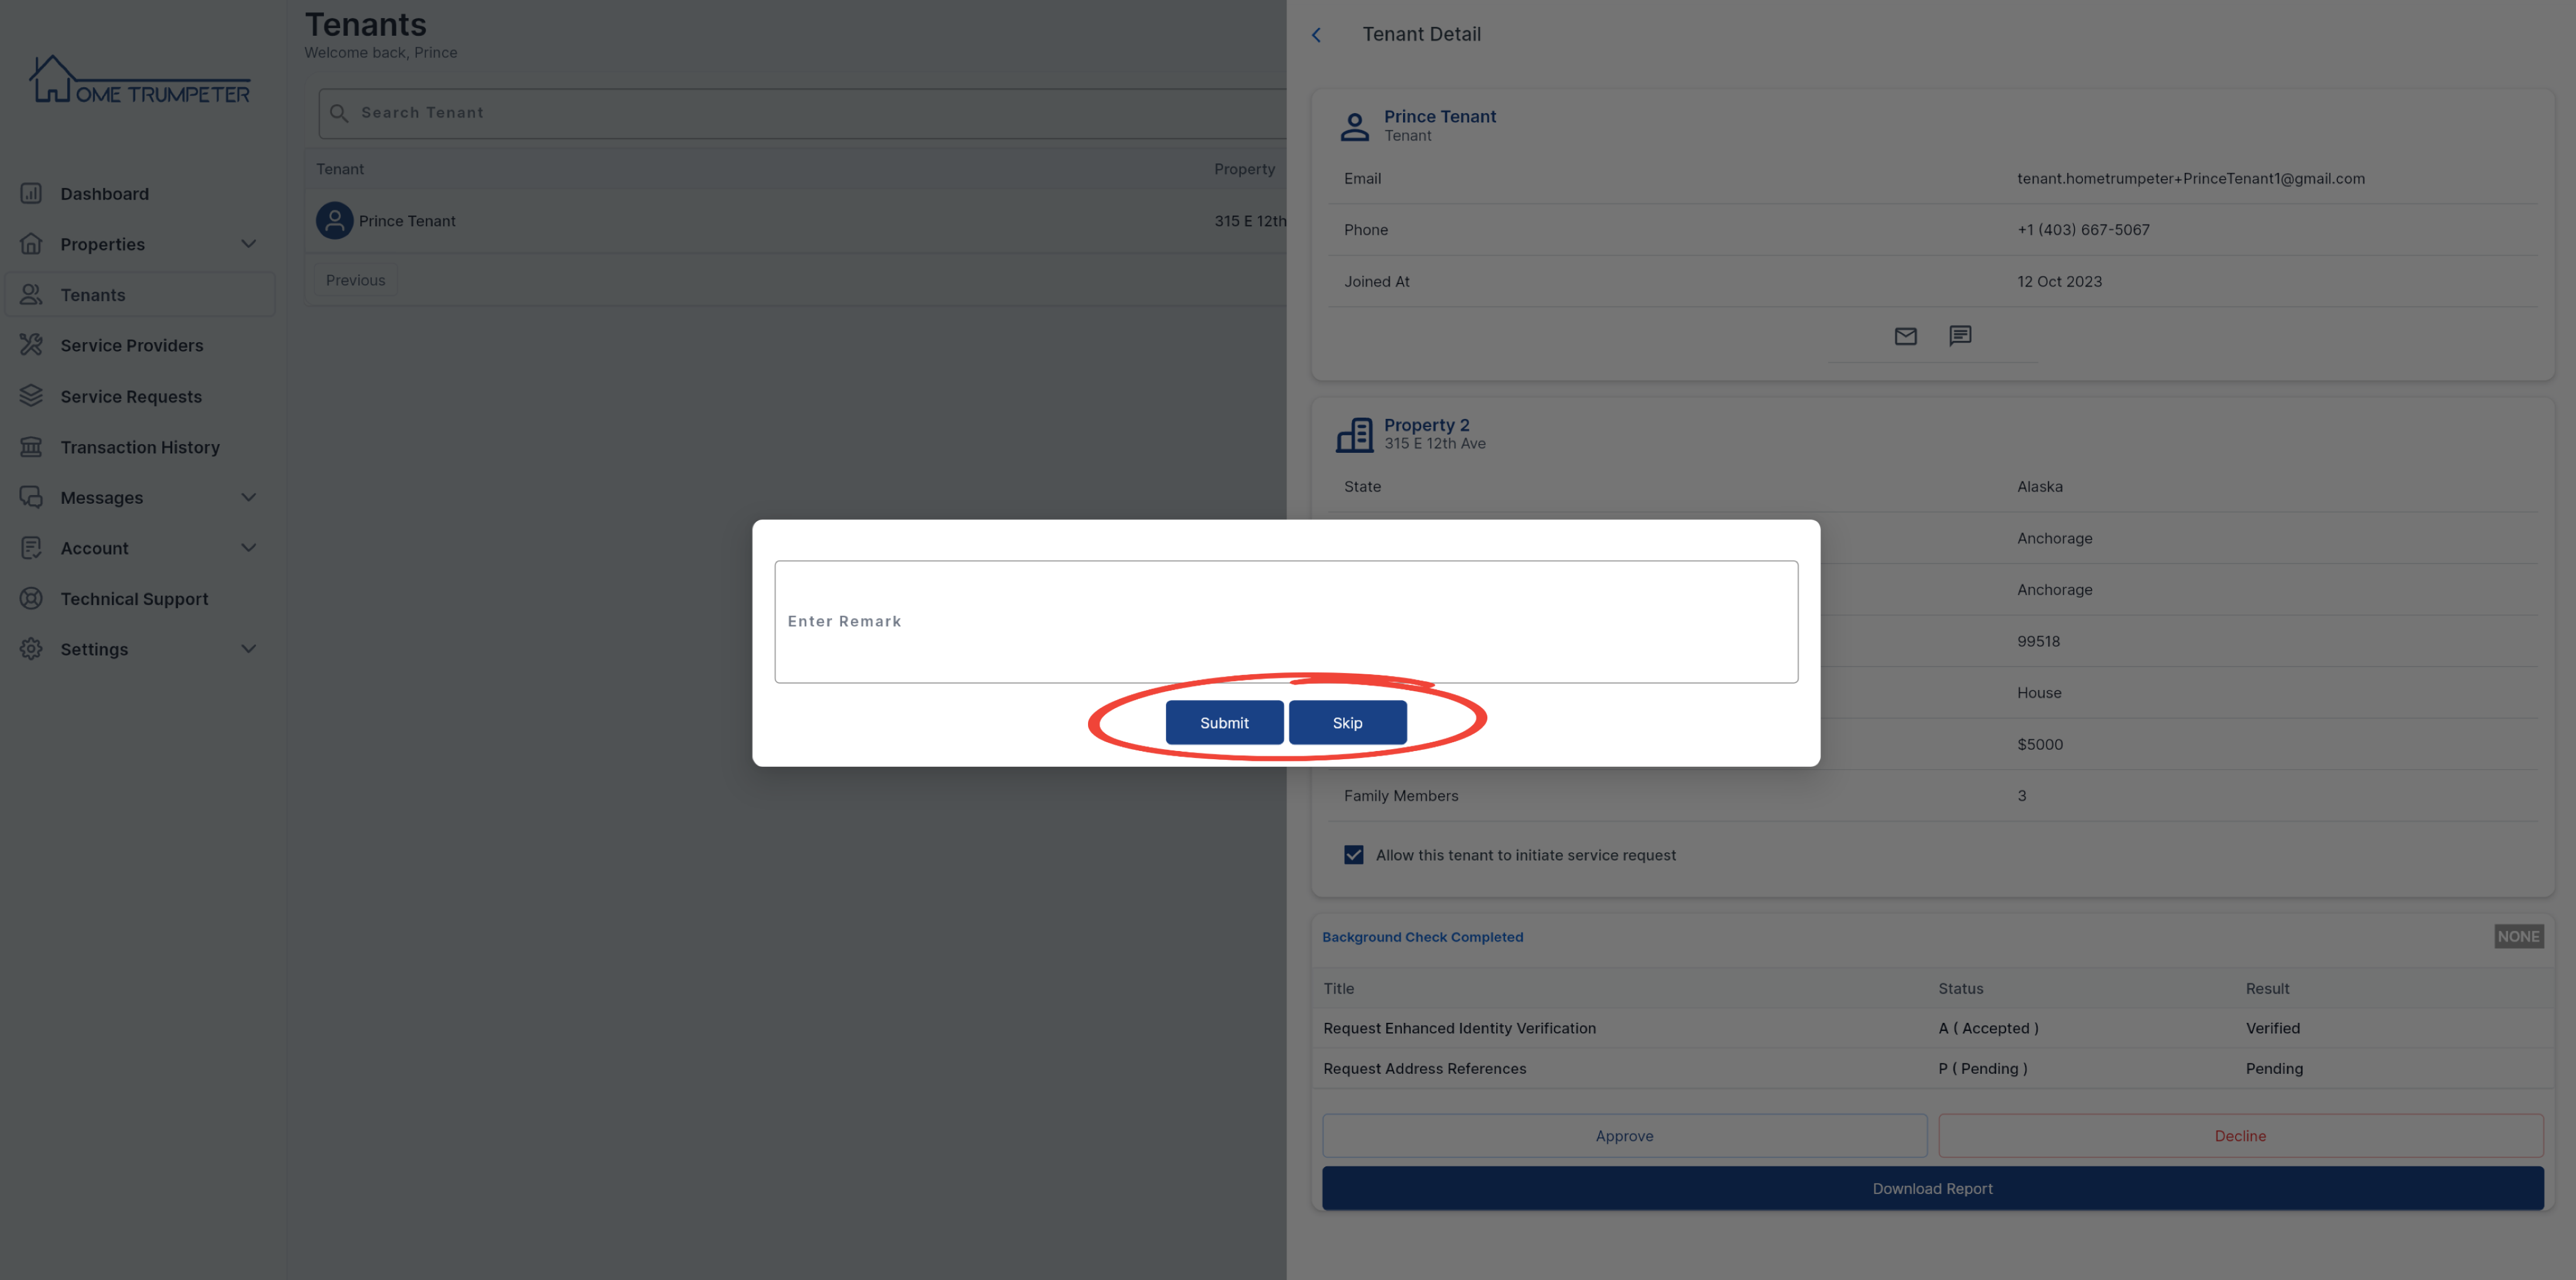
You will then be shown an optional remark page to insert a message for your tenant, noting your reason for approval or disapproval of the background check.
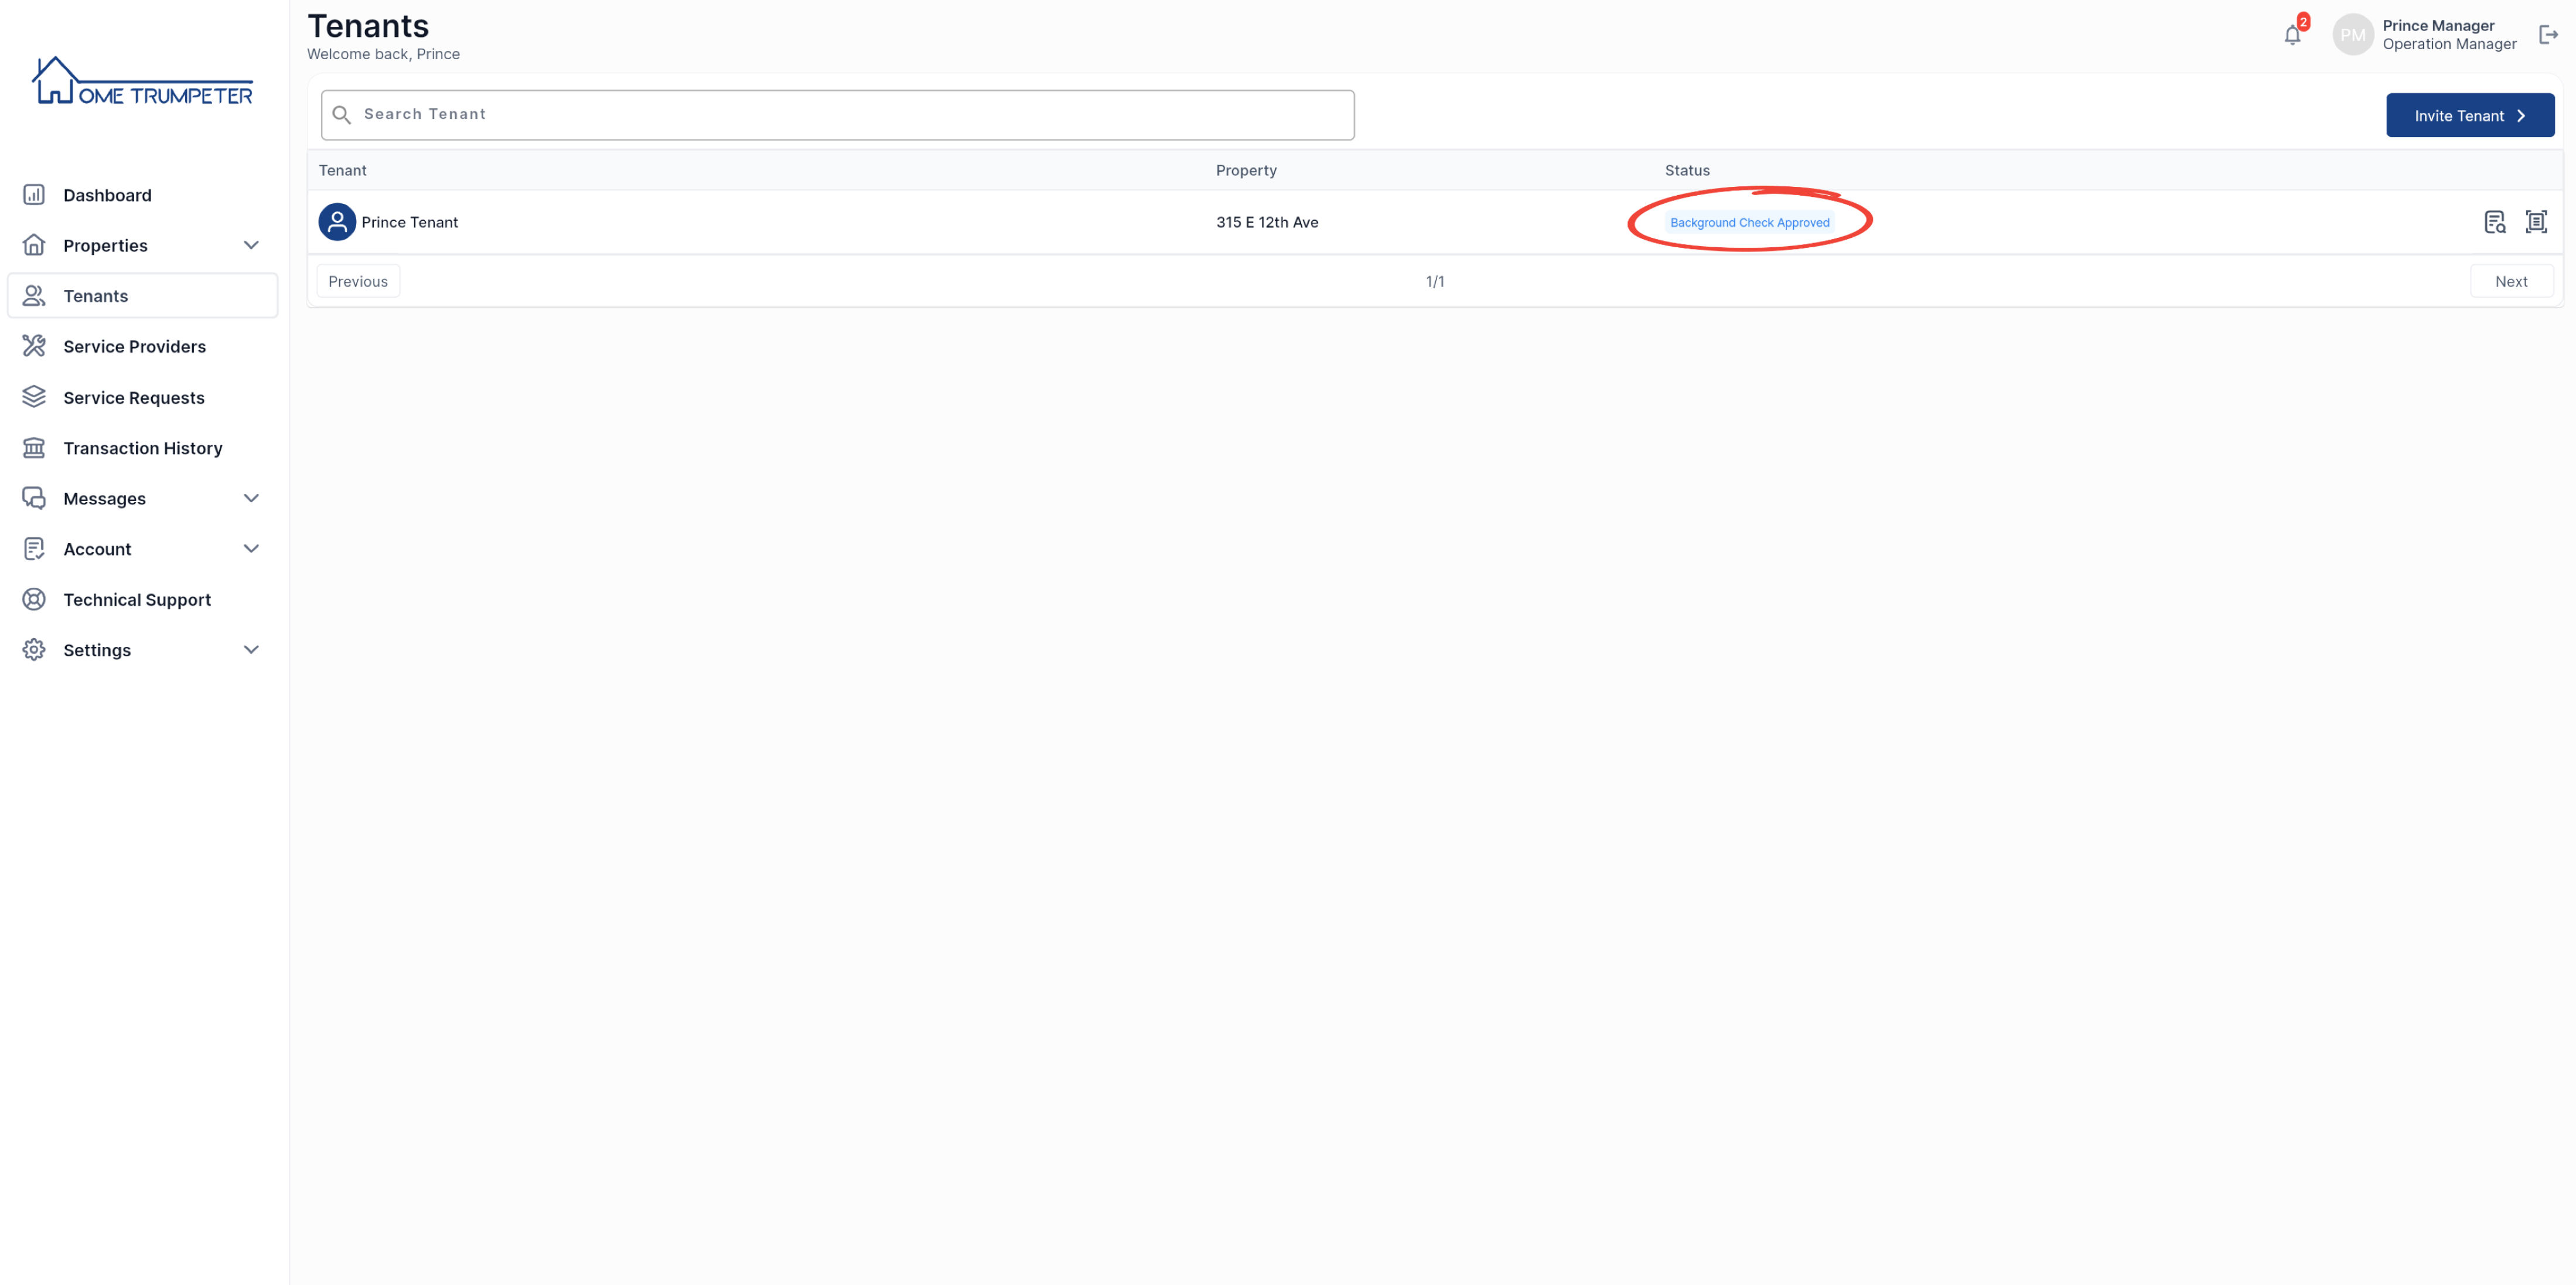
The status should also now show as ‘Background Check Completed’.
5. Initiate Tenancy Agreement
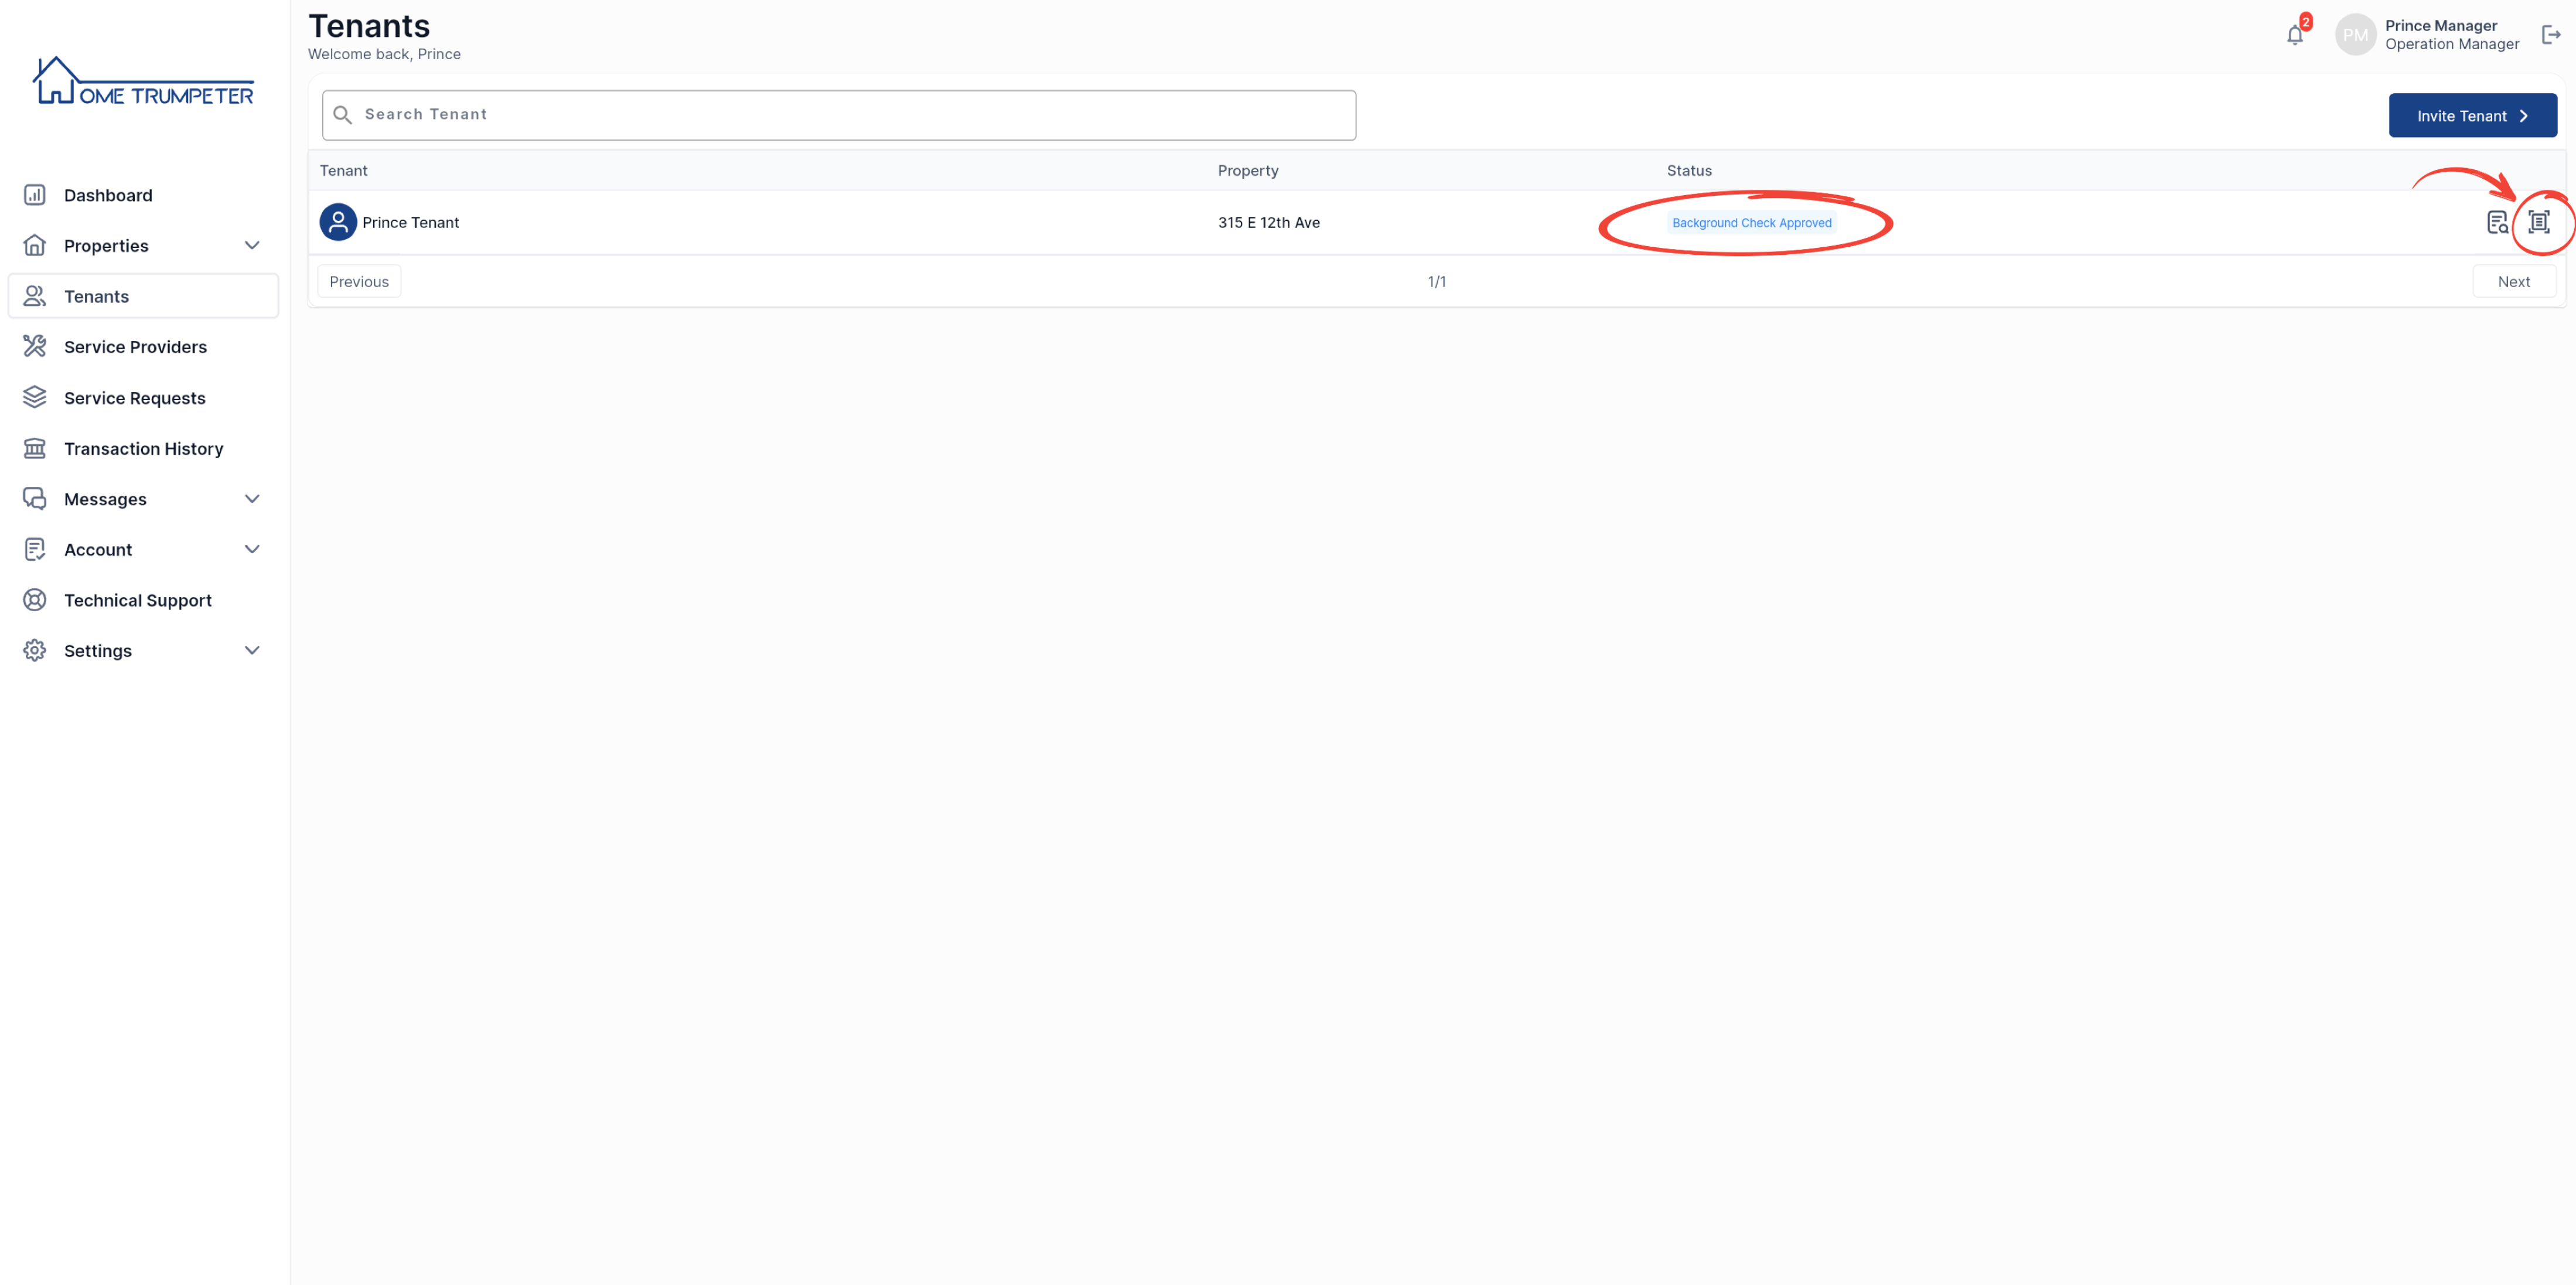
Next, you will need to initiate a tenancy agreement for your tenant. To do this, click on the icon on your tenants’ page as shown below.
Click ‘OK’ on the confirmation message that follows to initiate the agreement.
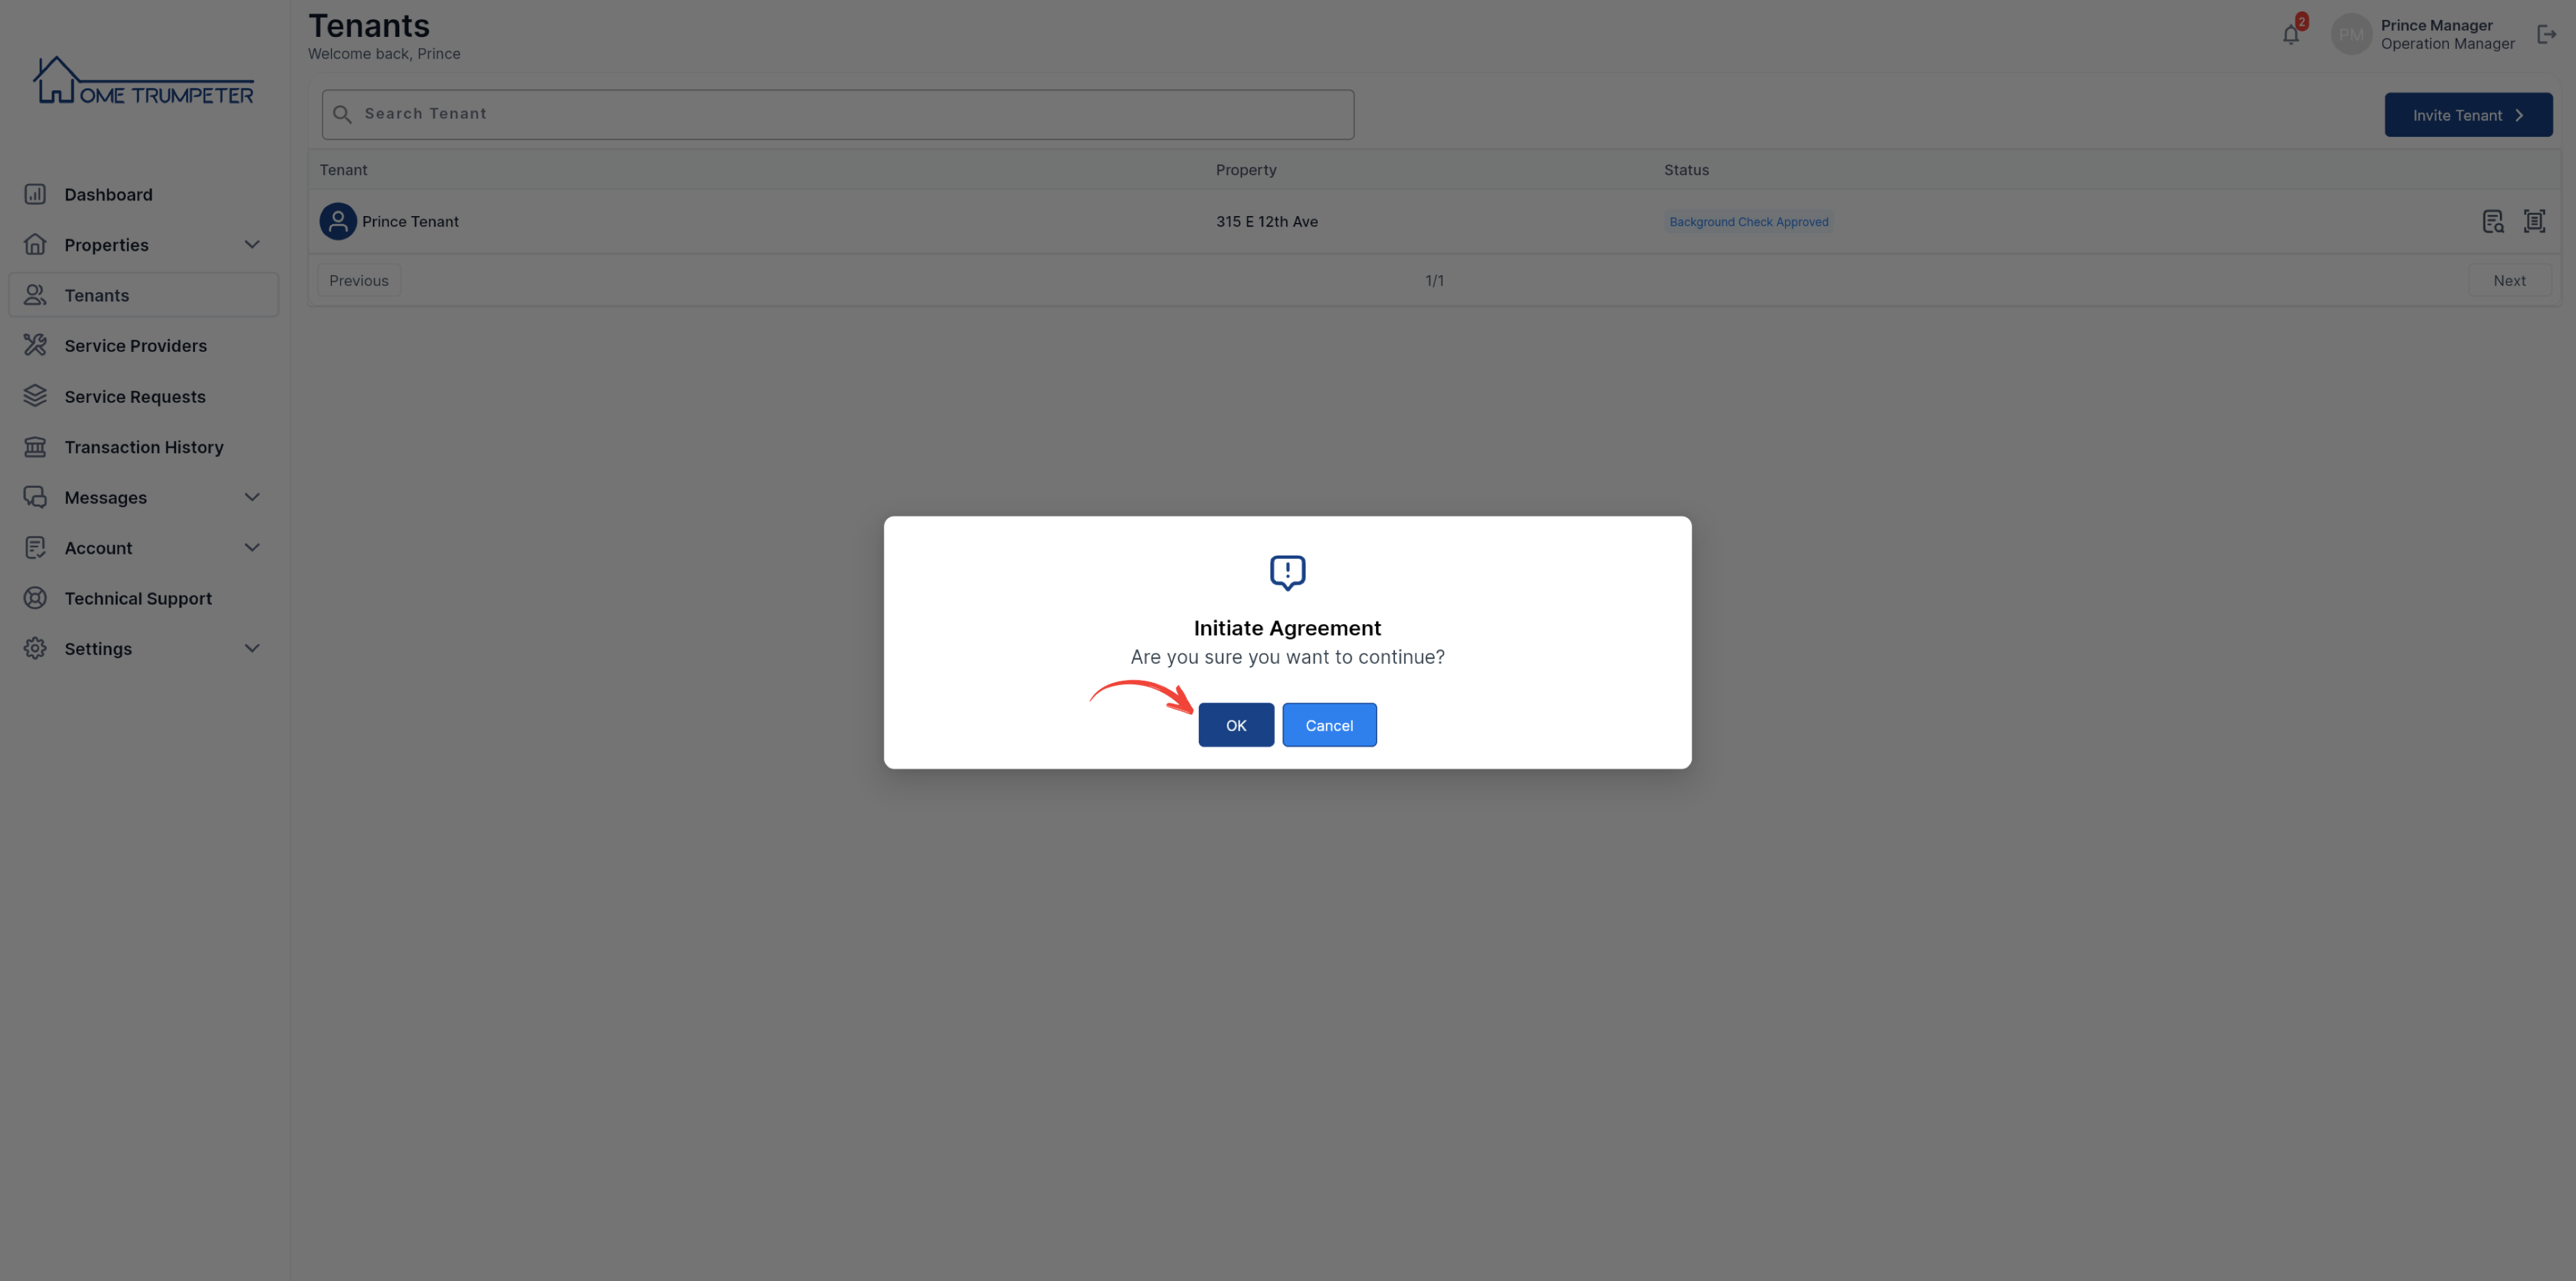
You will then click on ‘OK’ on the confirmation message.

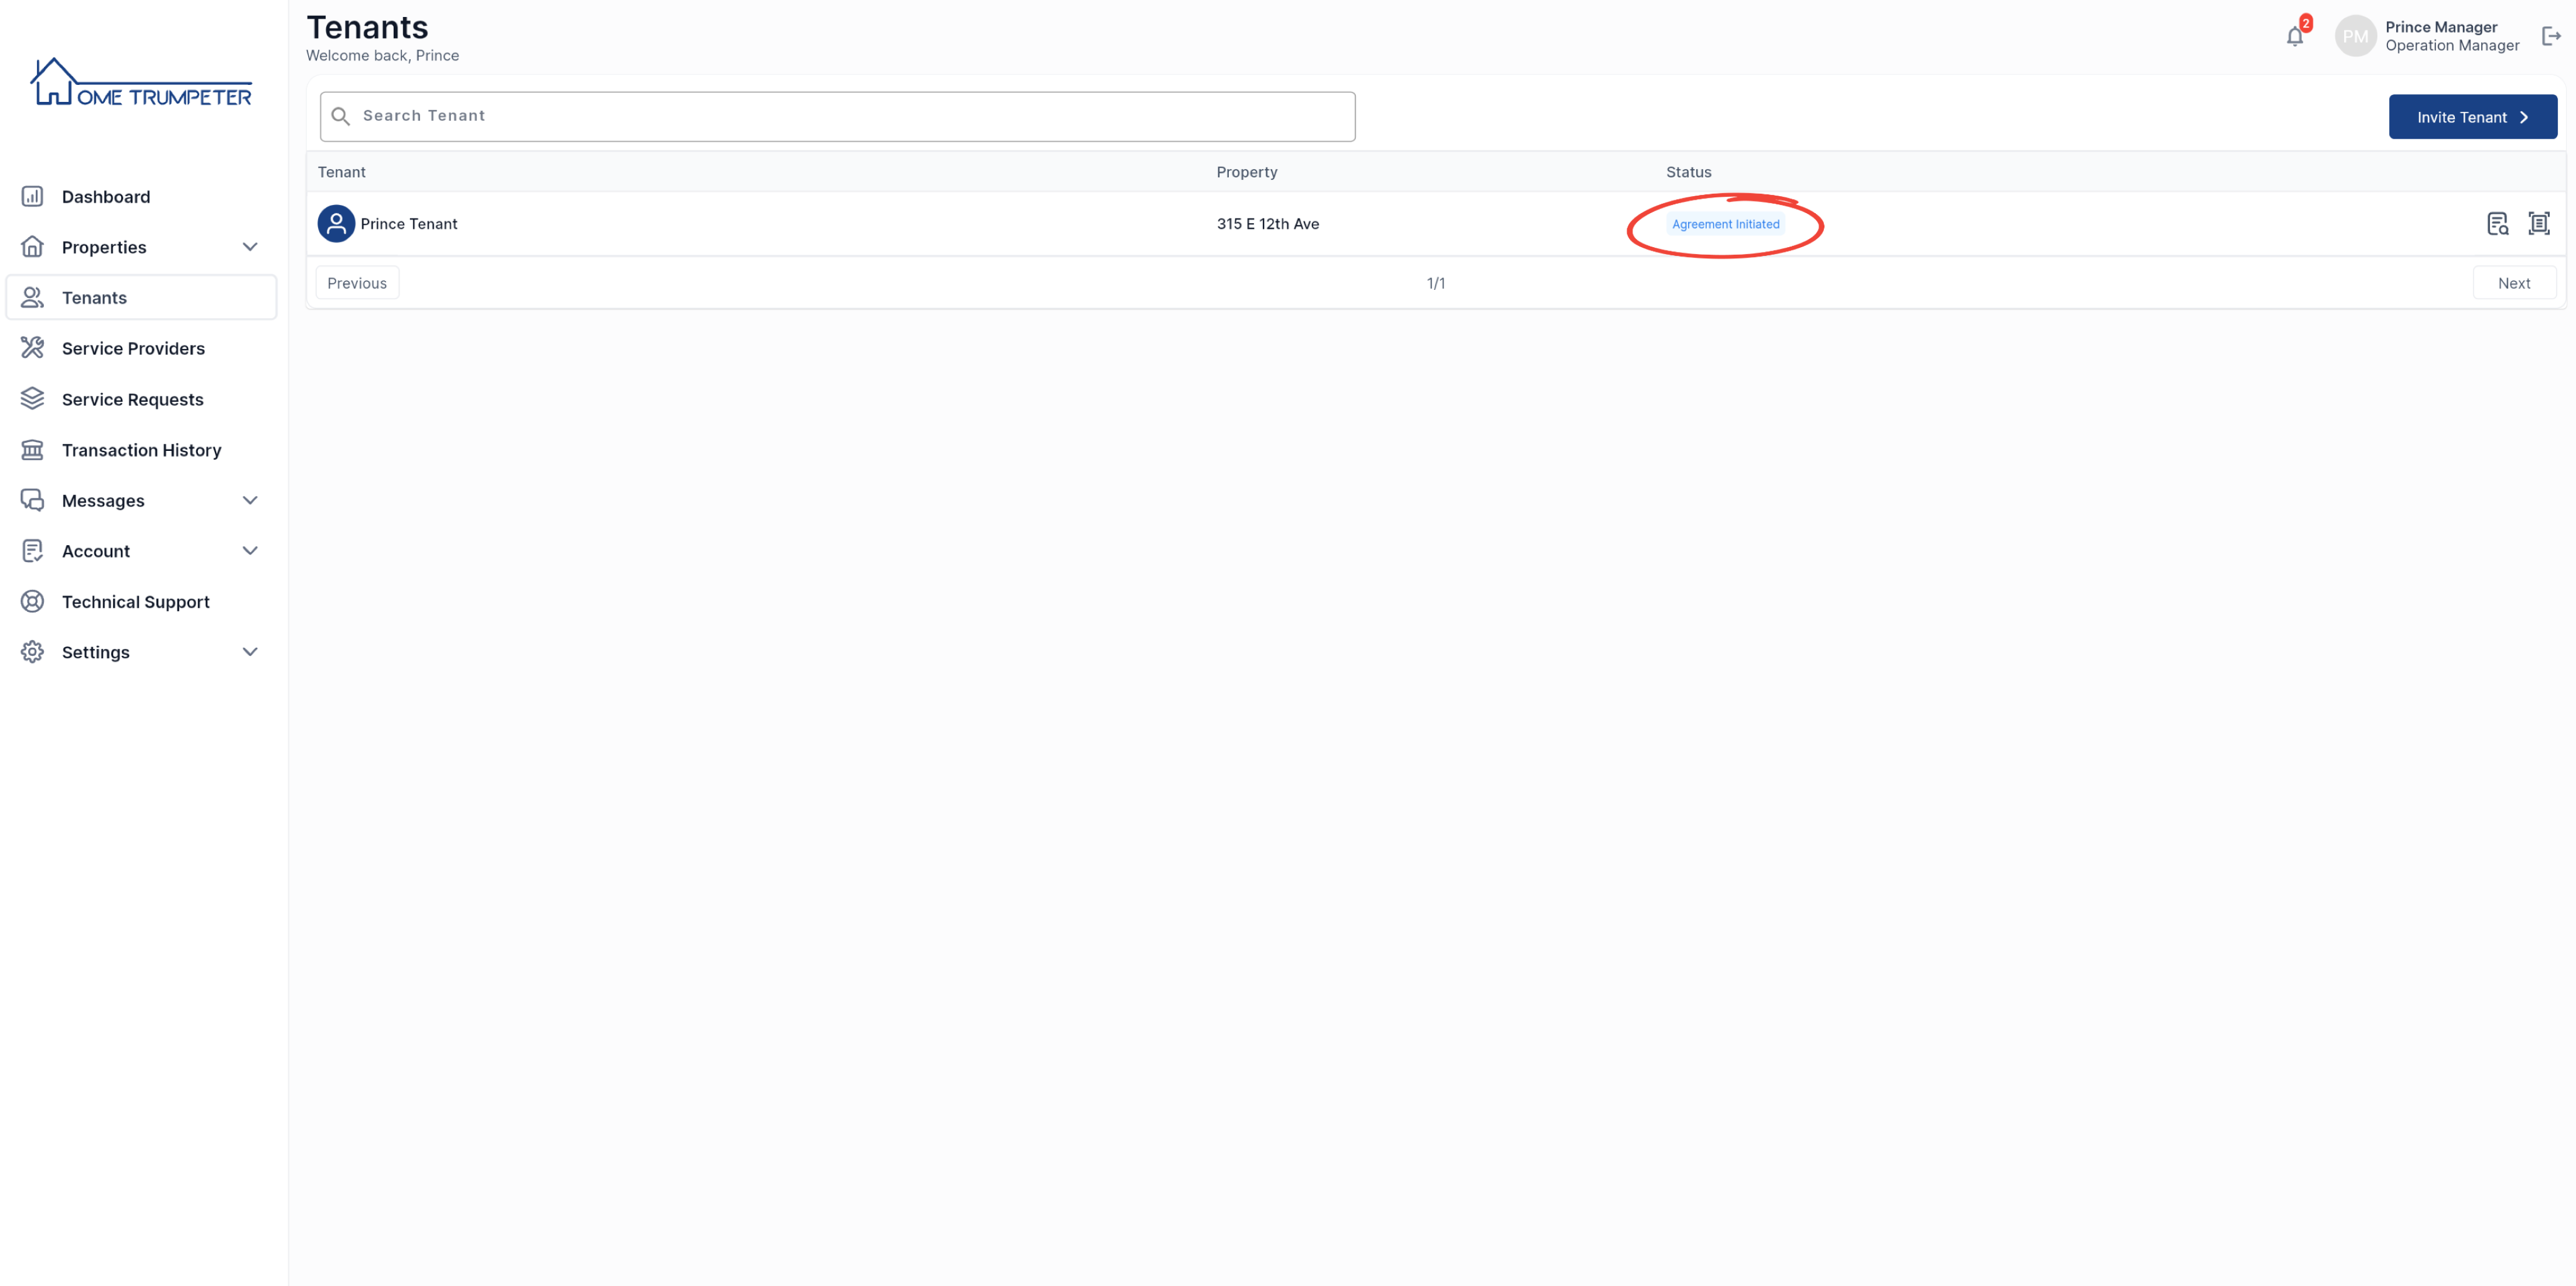
The tenant’s status should now be changed to ‘Agreement initiated’.
6. Submit Tenancy Agreement
You will need to submit the tenancy agreement for it to be made available for the tenant to view and acknowledge. To submit, click on the icon on your tenants’ page as shown below.
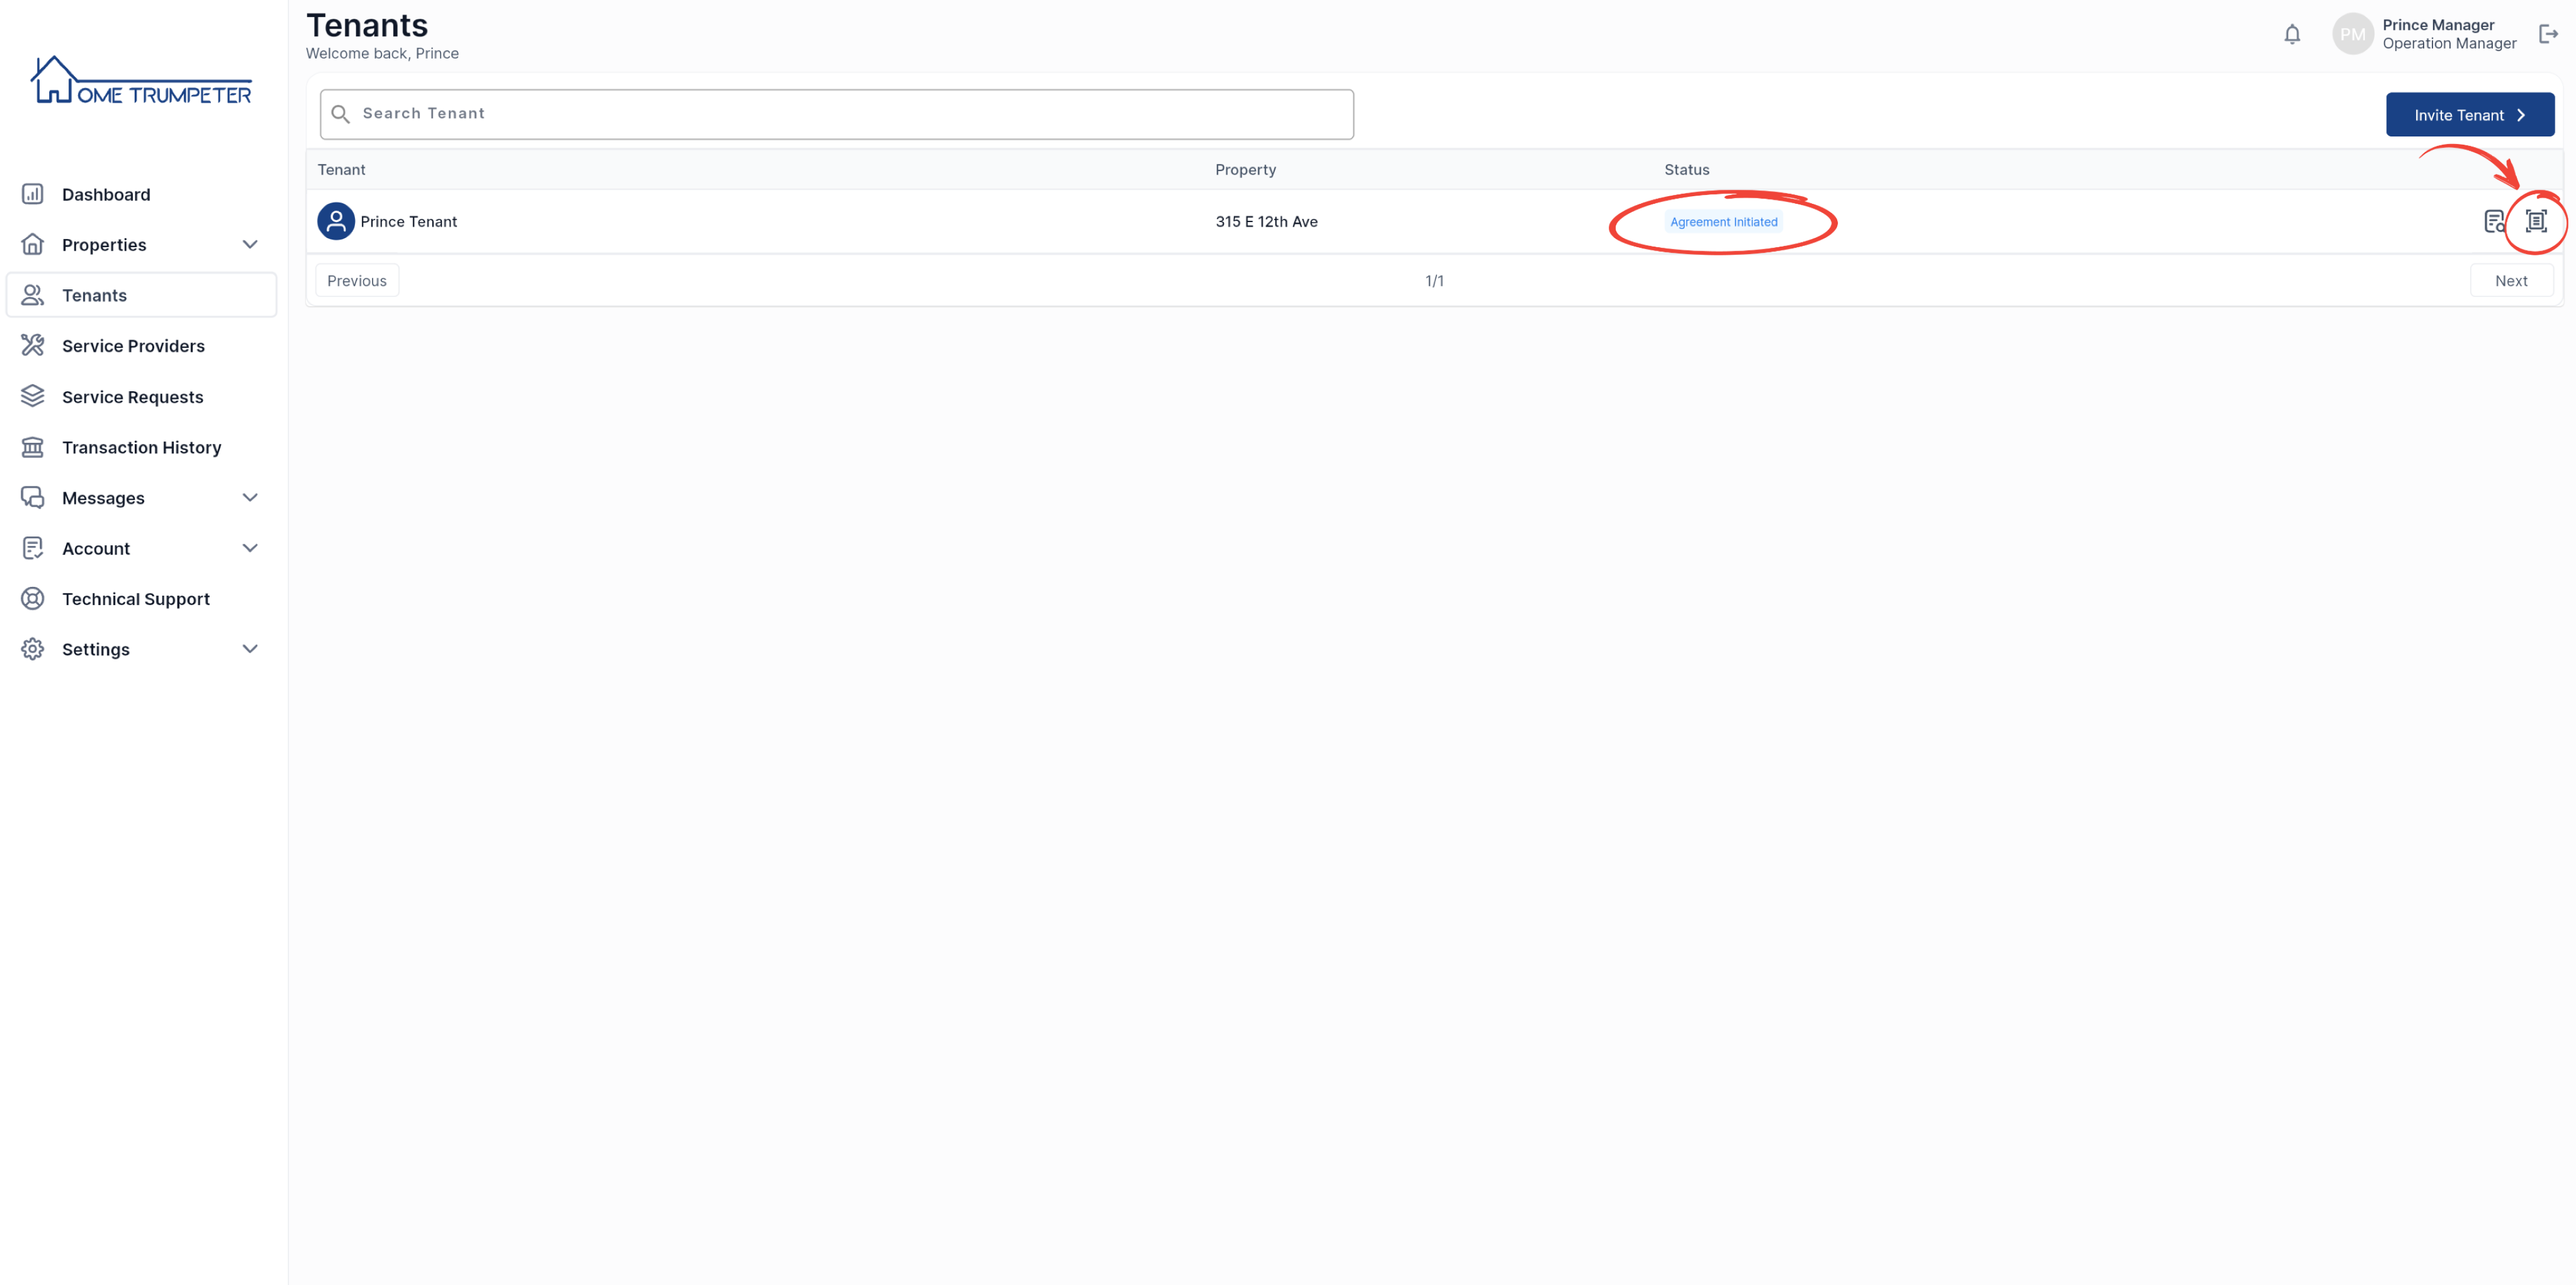
Next, you will be prompted to review the agreements and agree to them.
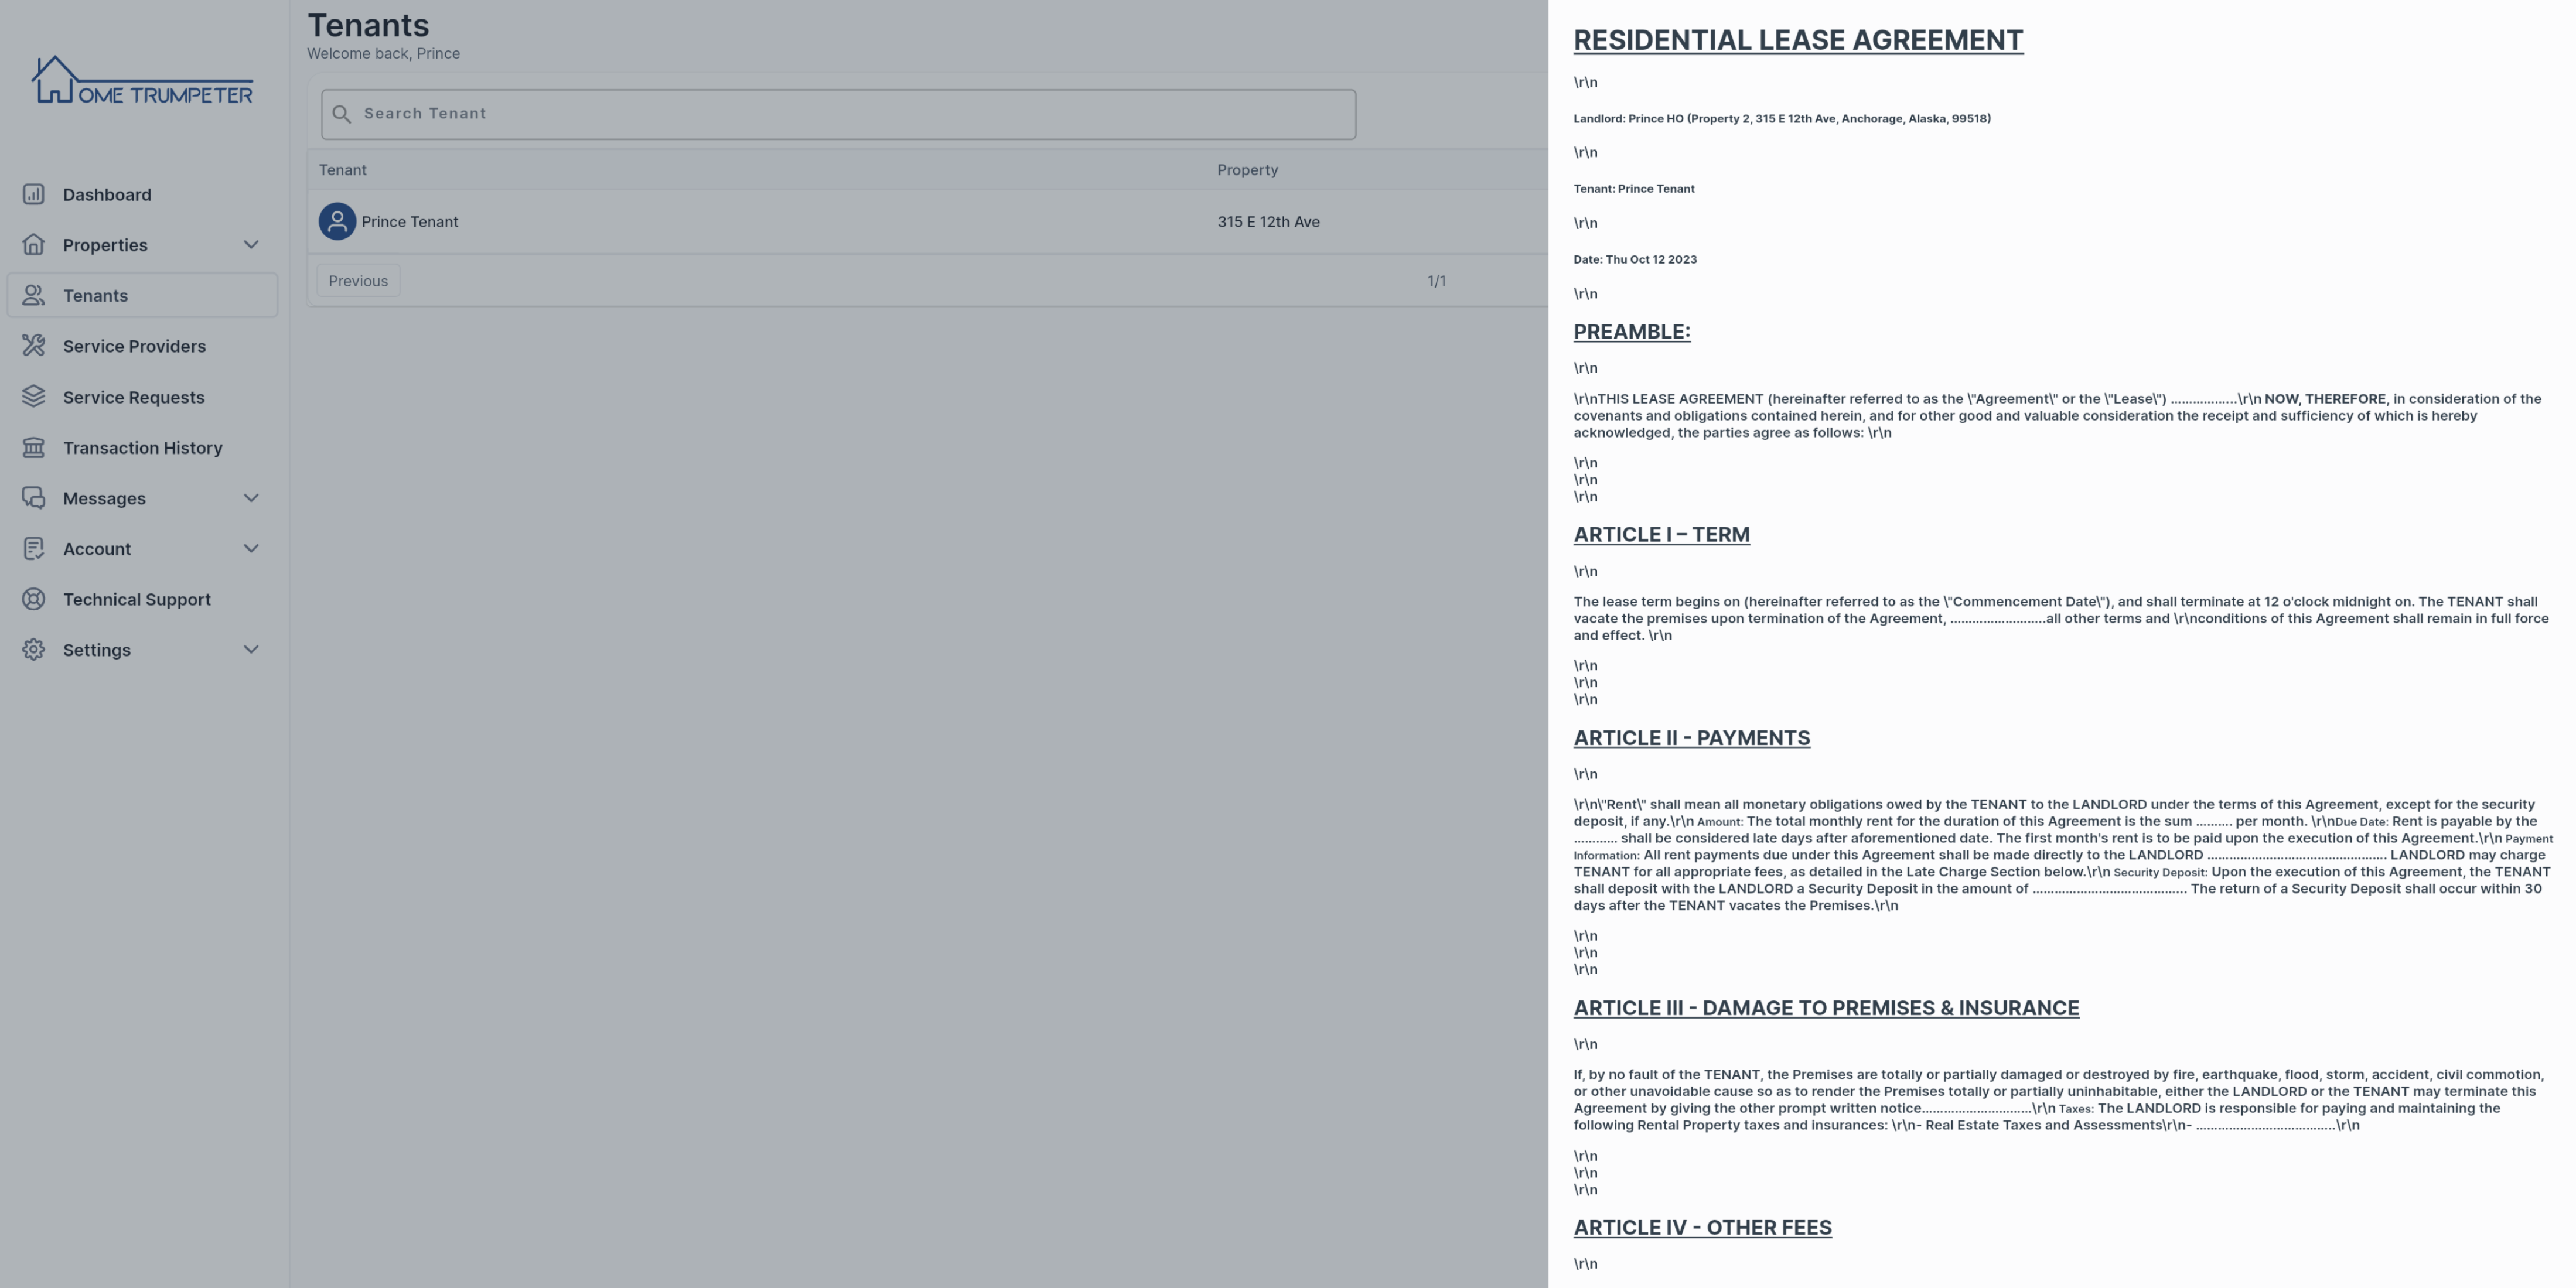

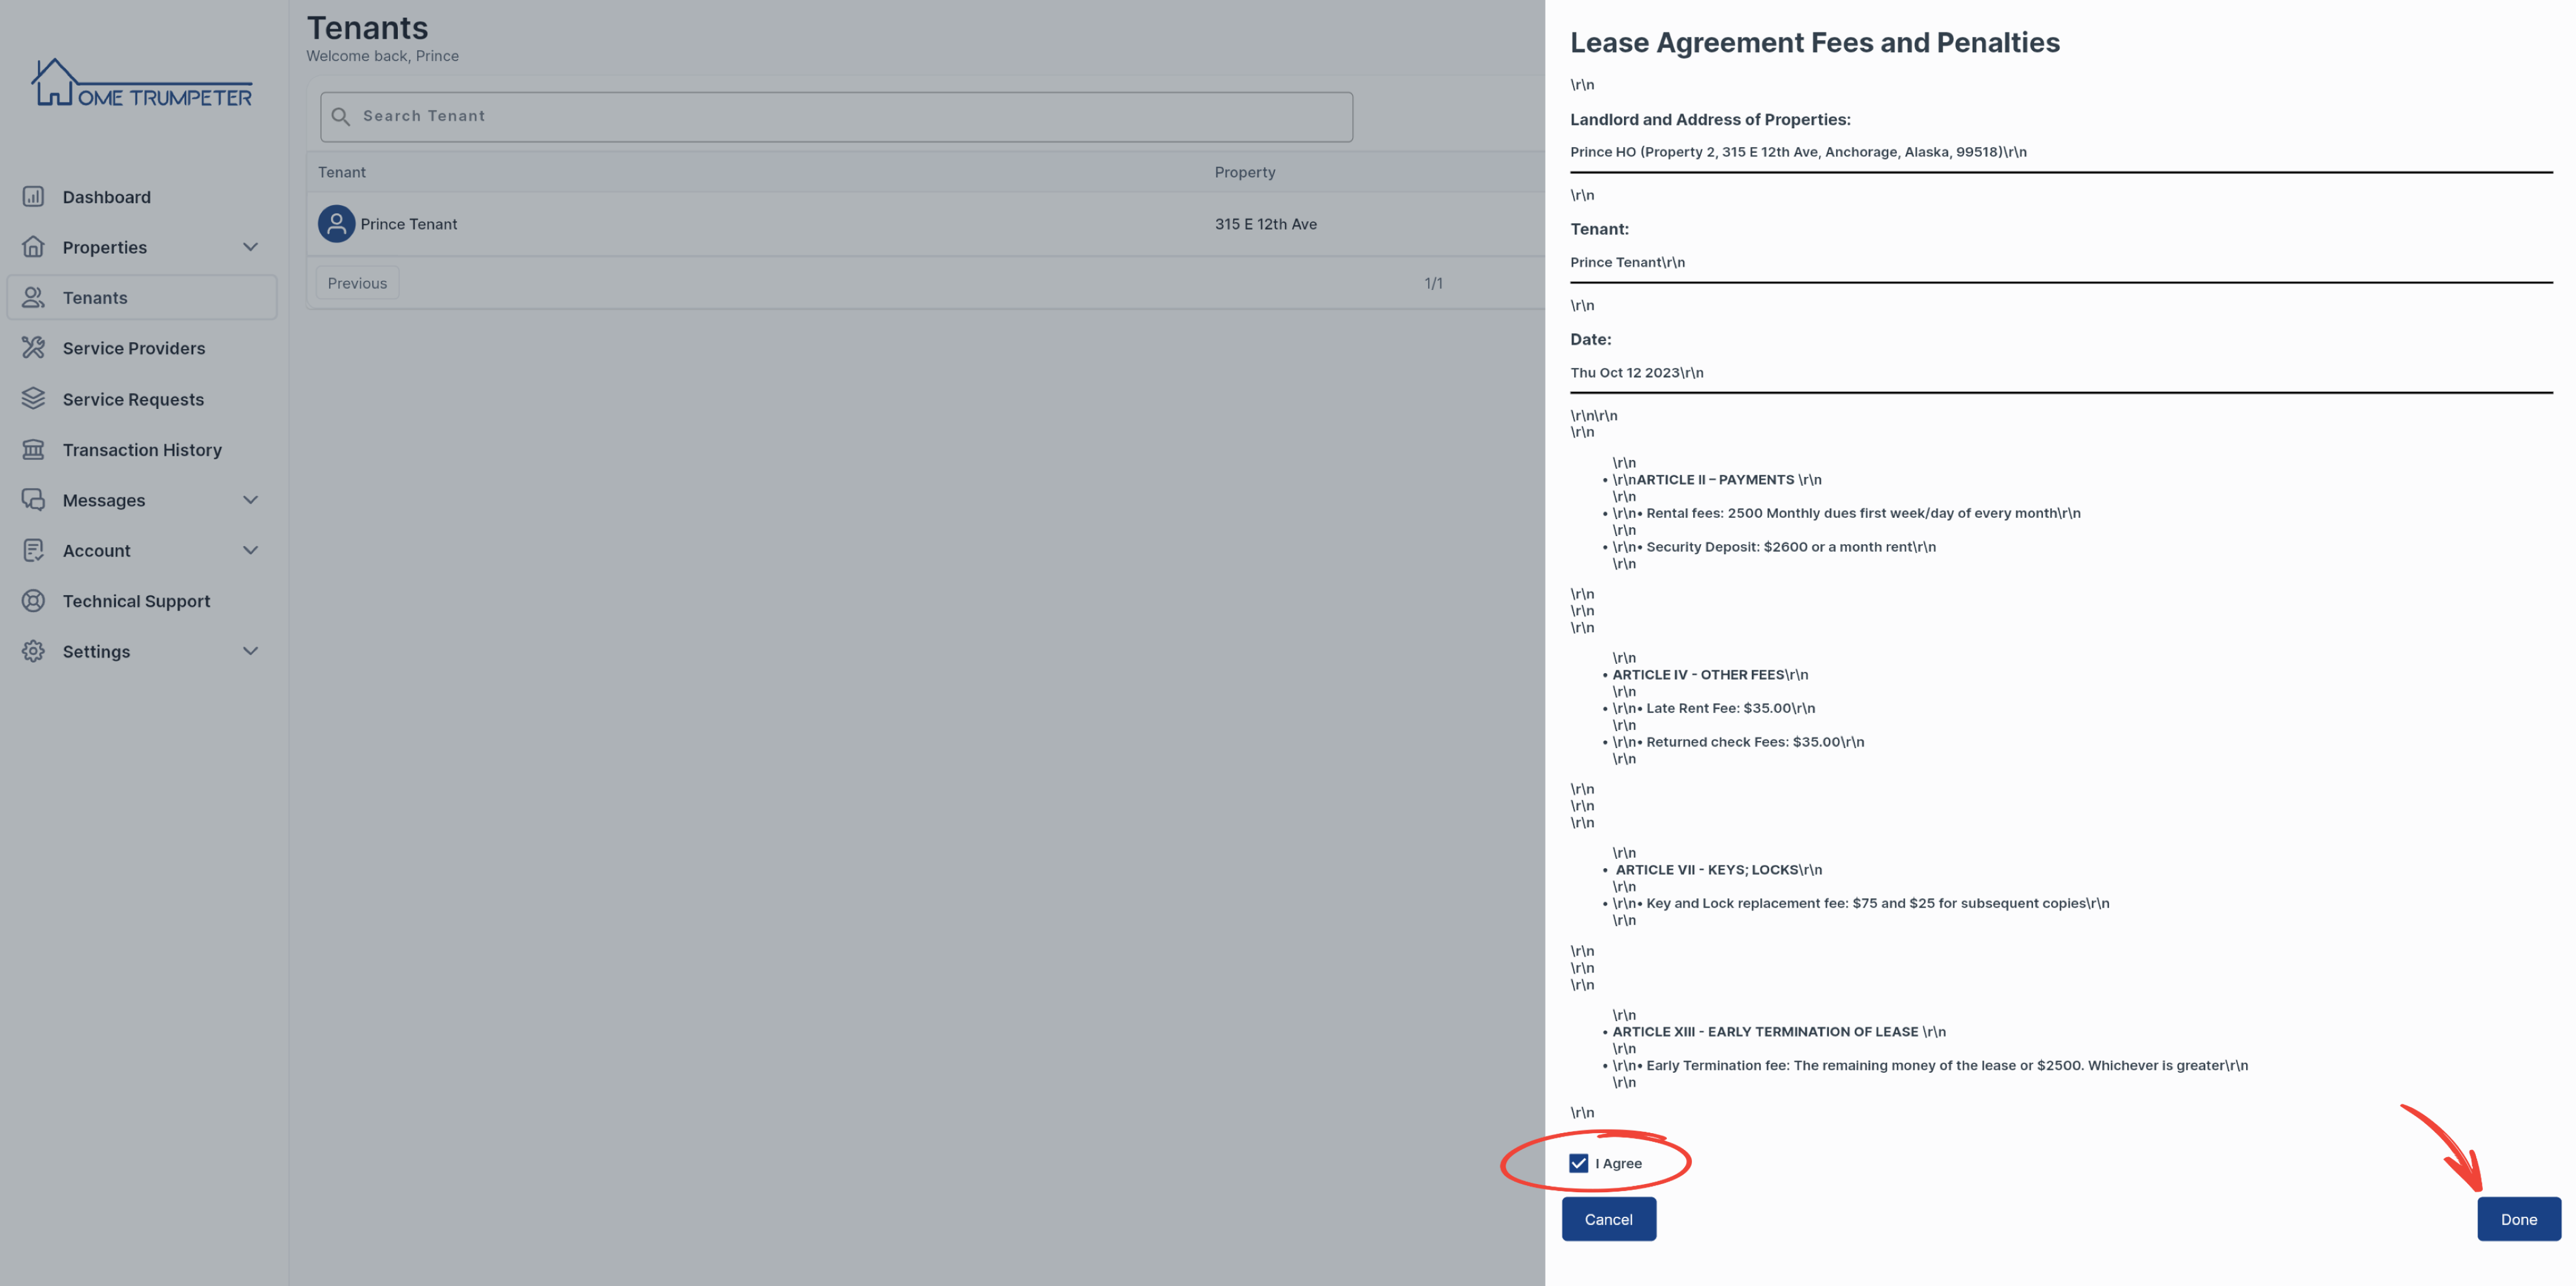
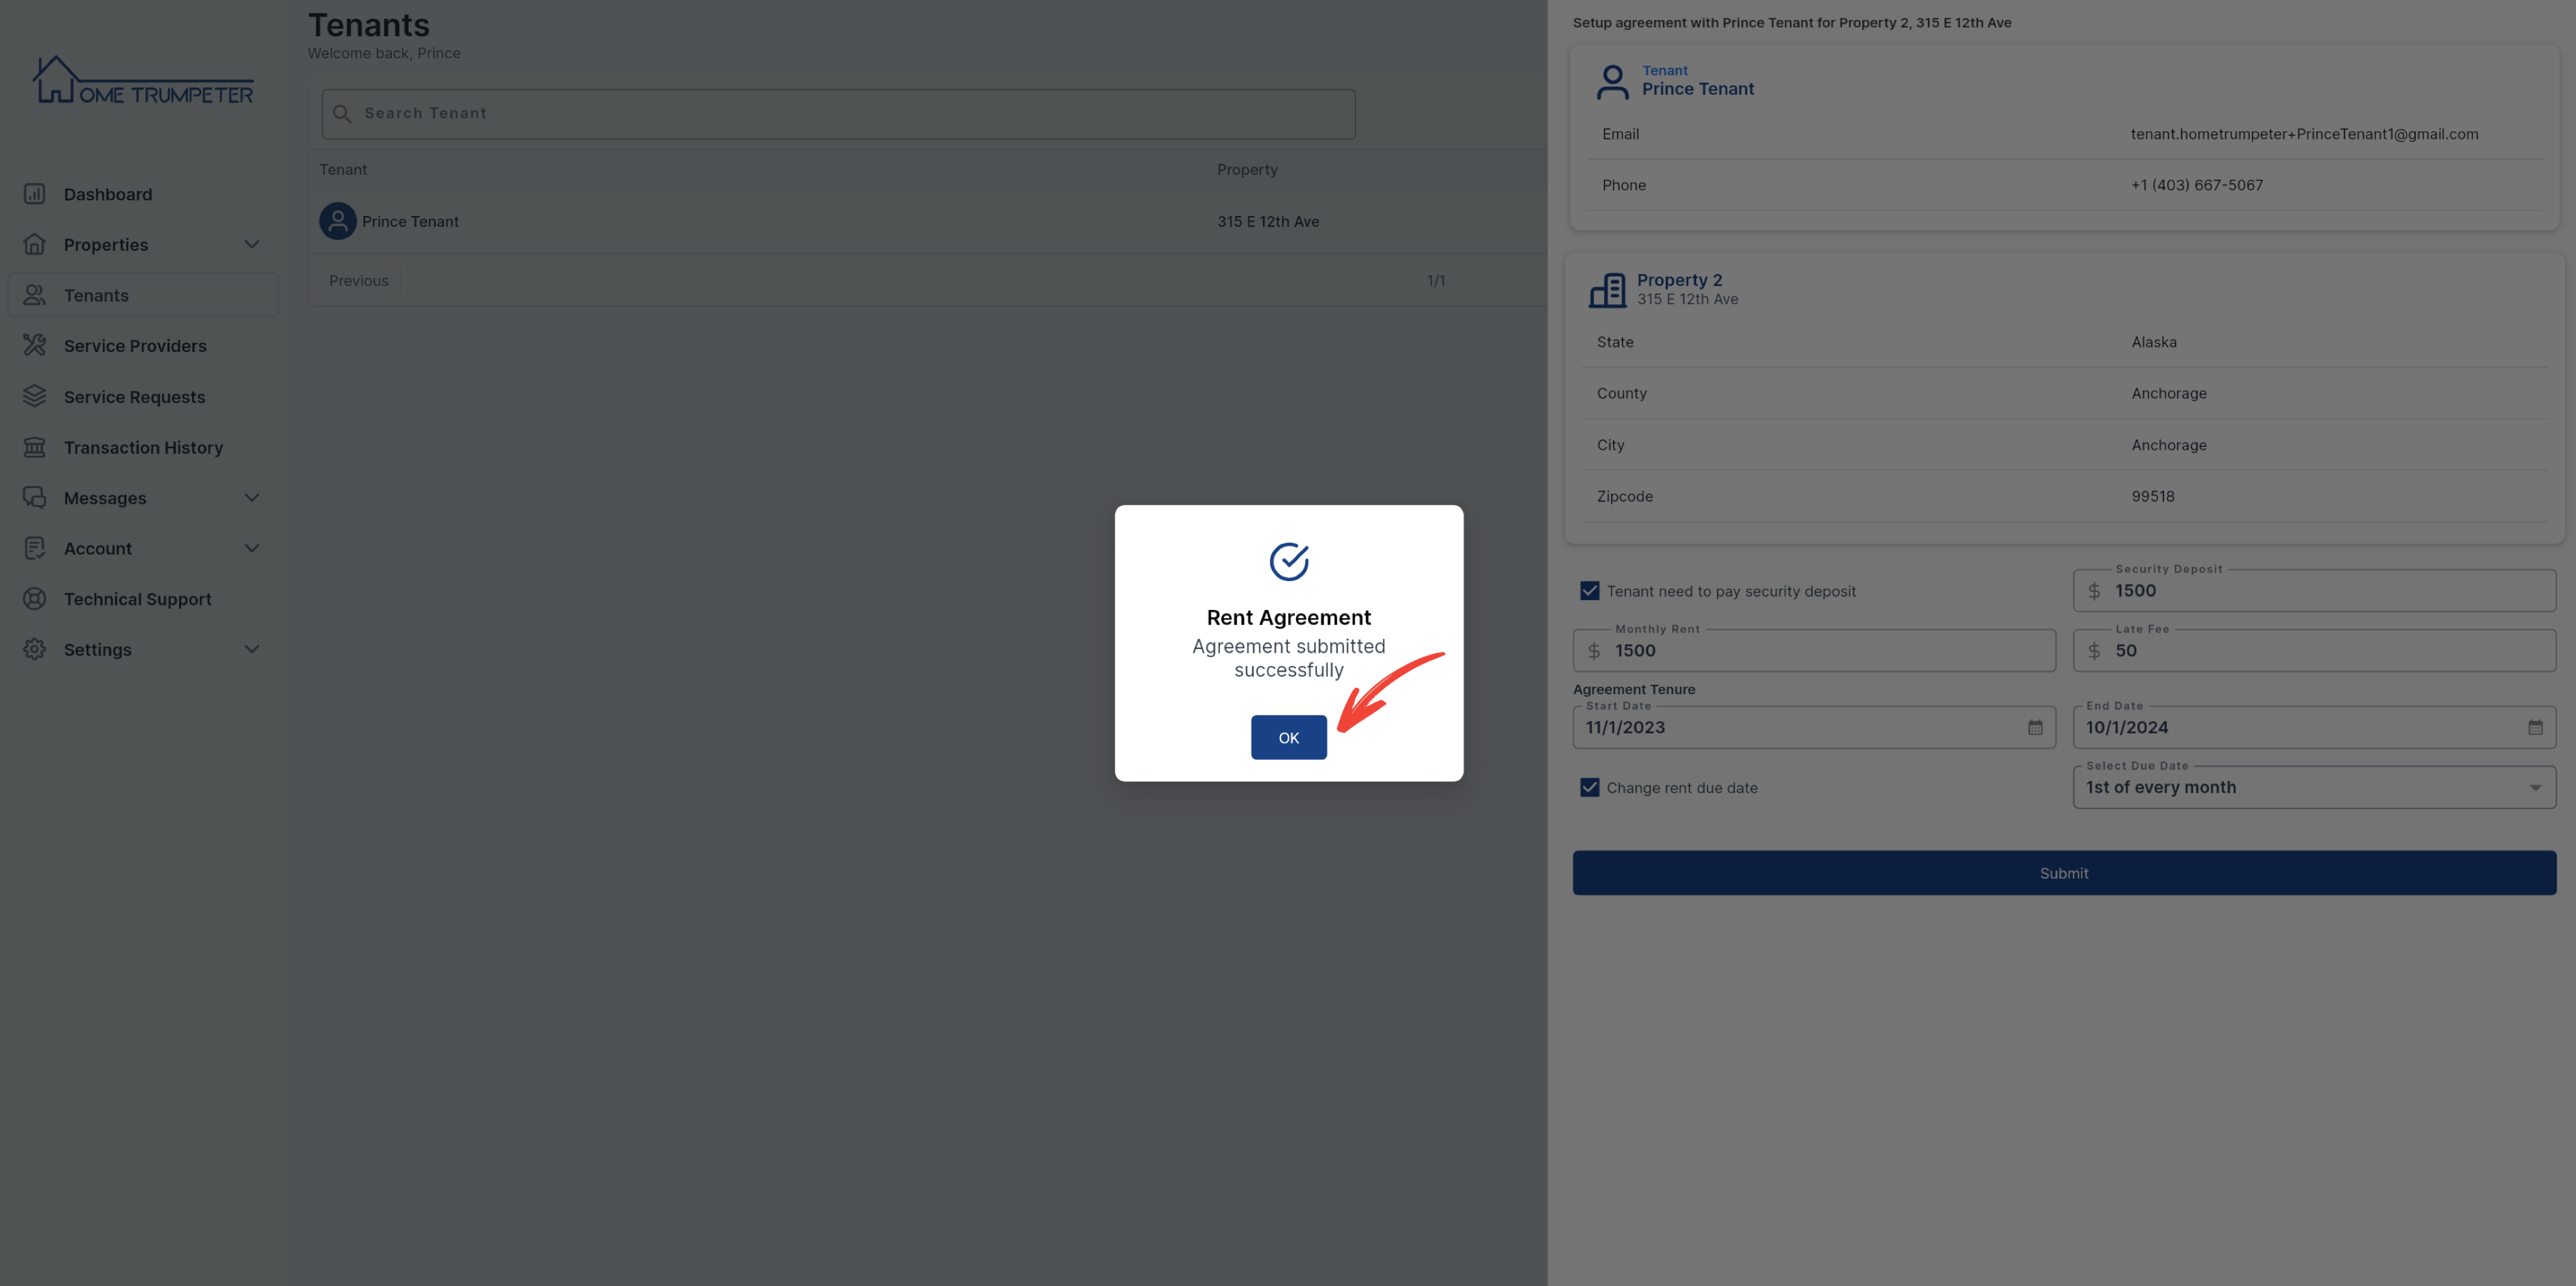
Clicking ‘Done’ on the last agreement document will bring you to the slide-out options where you will have to indicate some rental details such as monthly rent, security deposit, and agreement tenure.
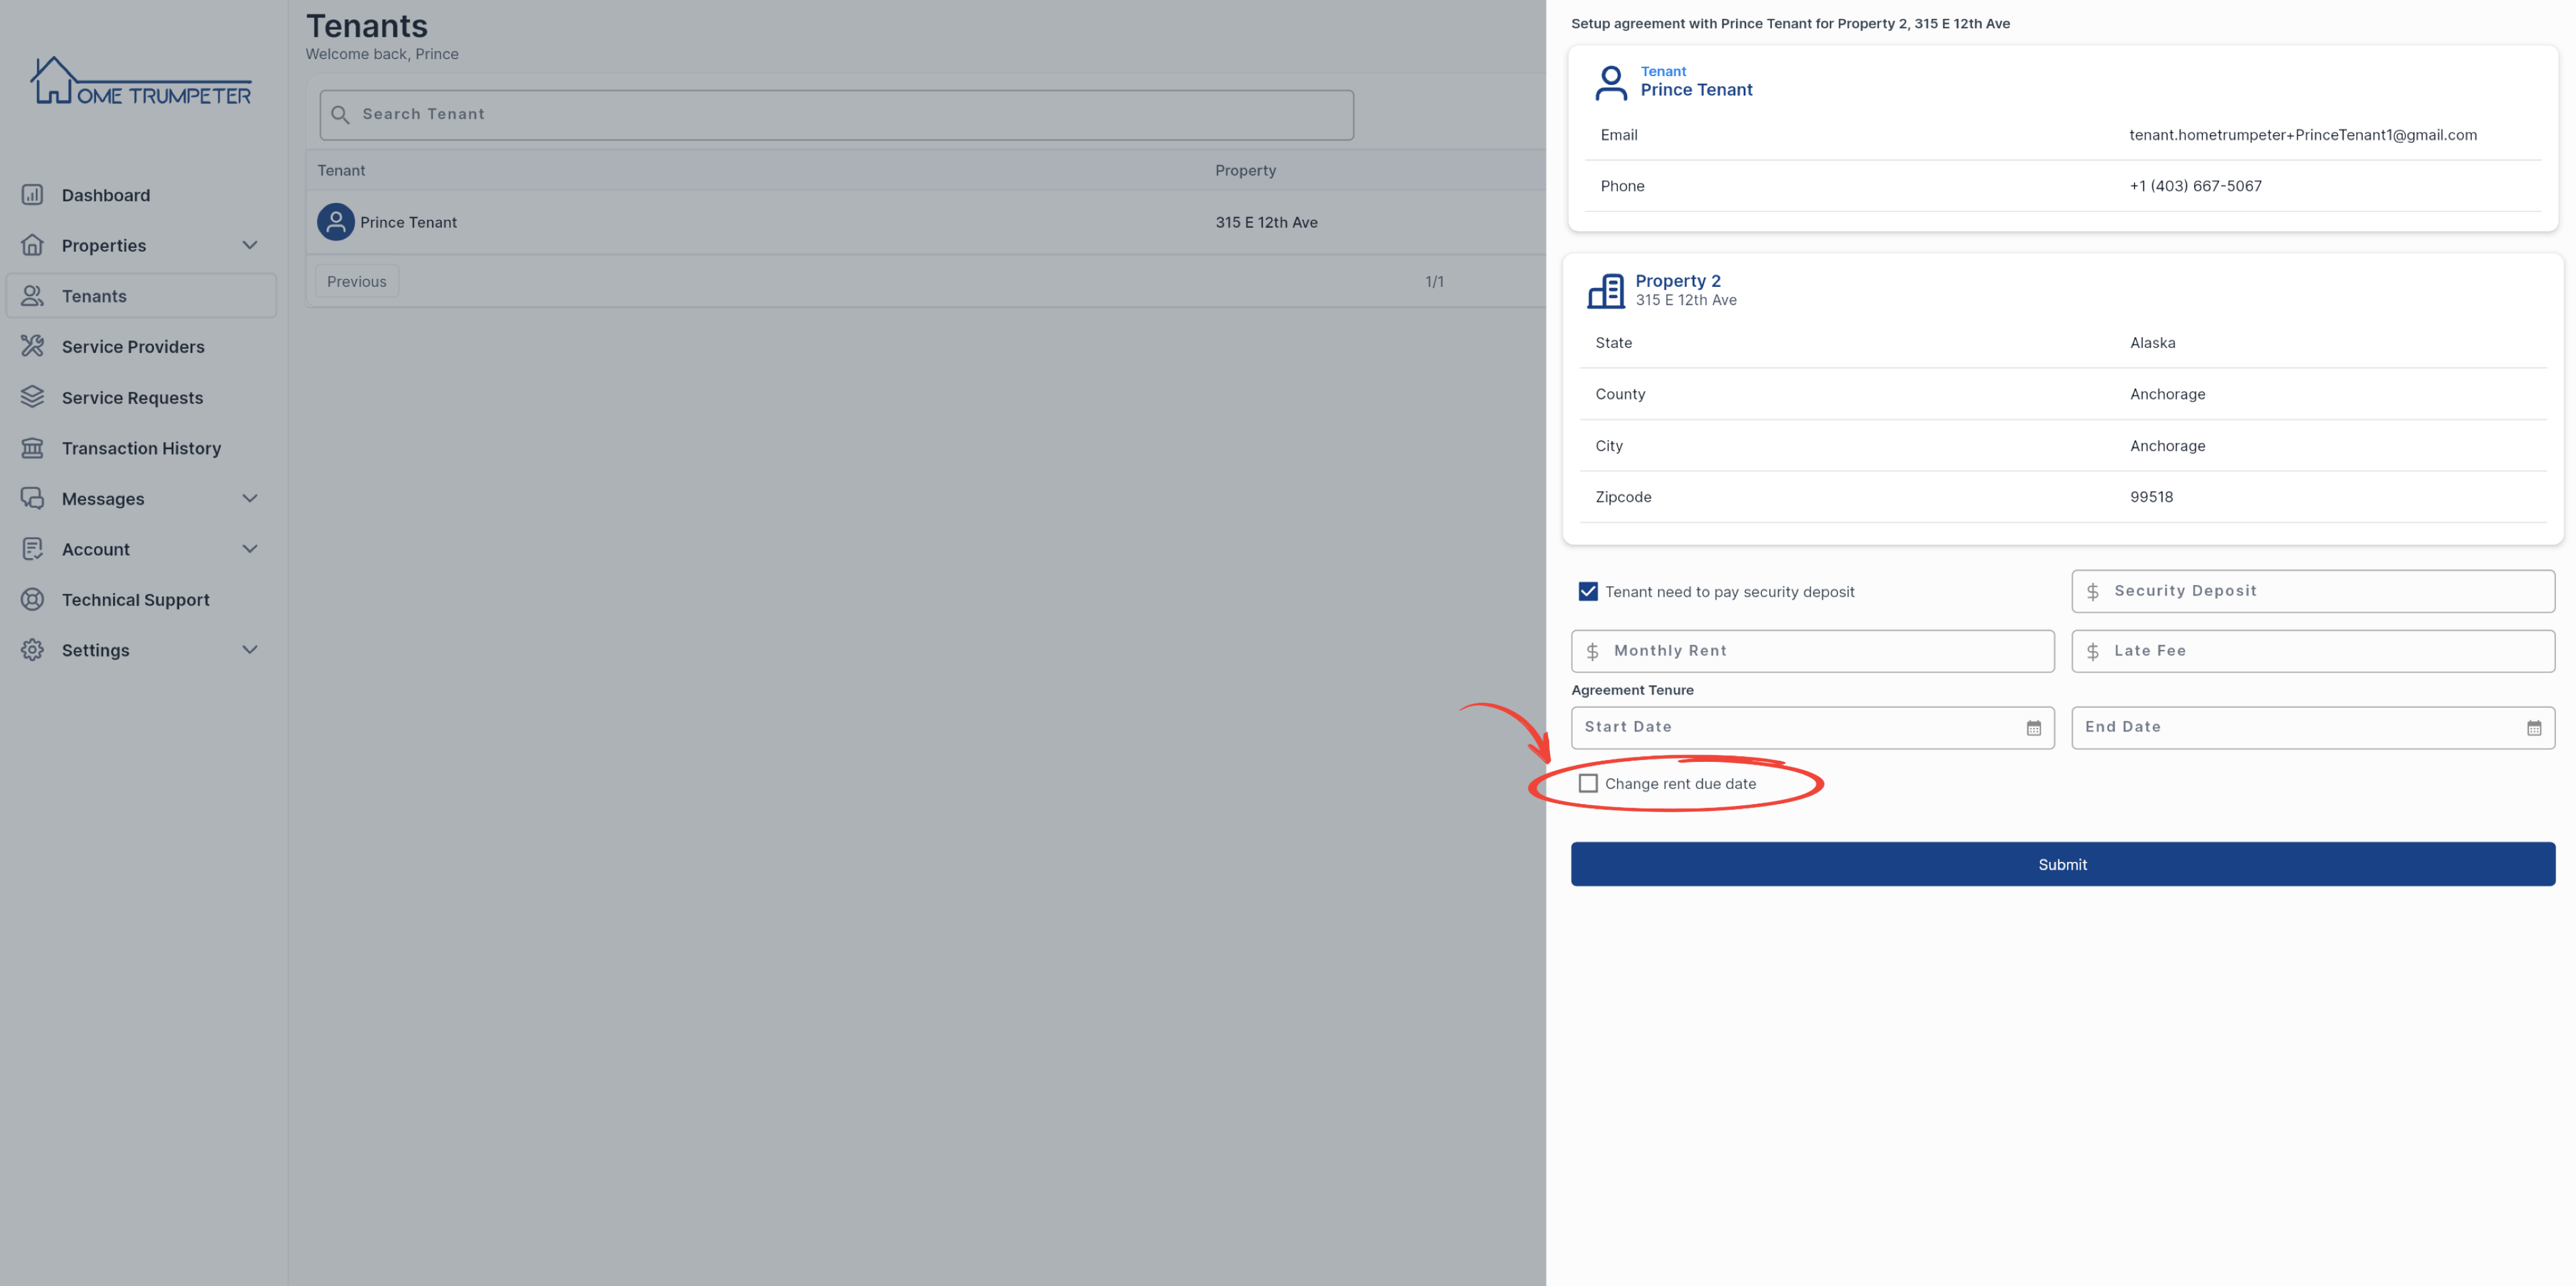
Once you are done, click on ‘Submit’. This will bring up a pop-up message confirming the completion of your rent agreement.
The status of your tenant should now indicate as ‘Agreement Submitted’.


